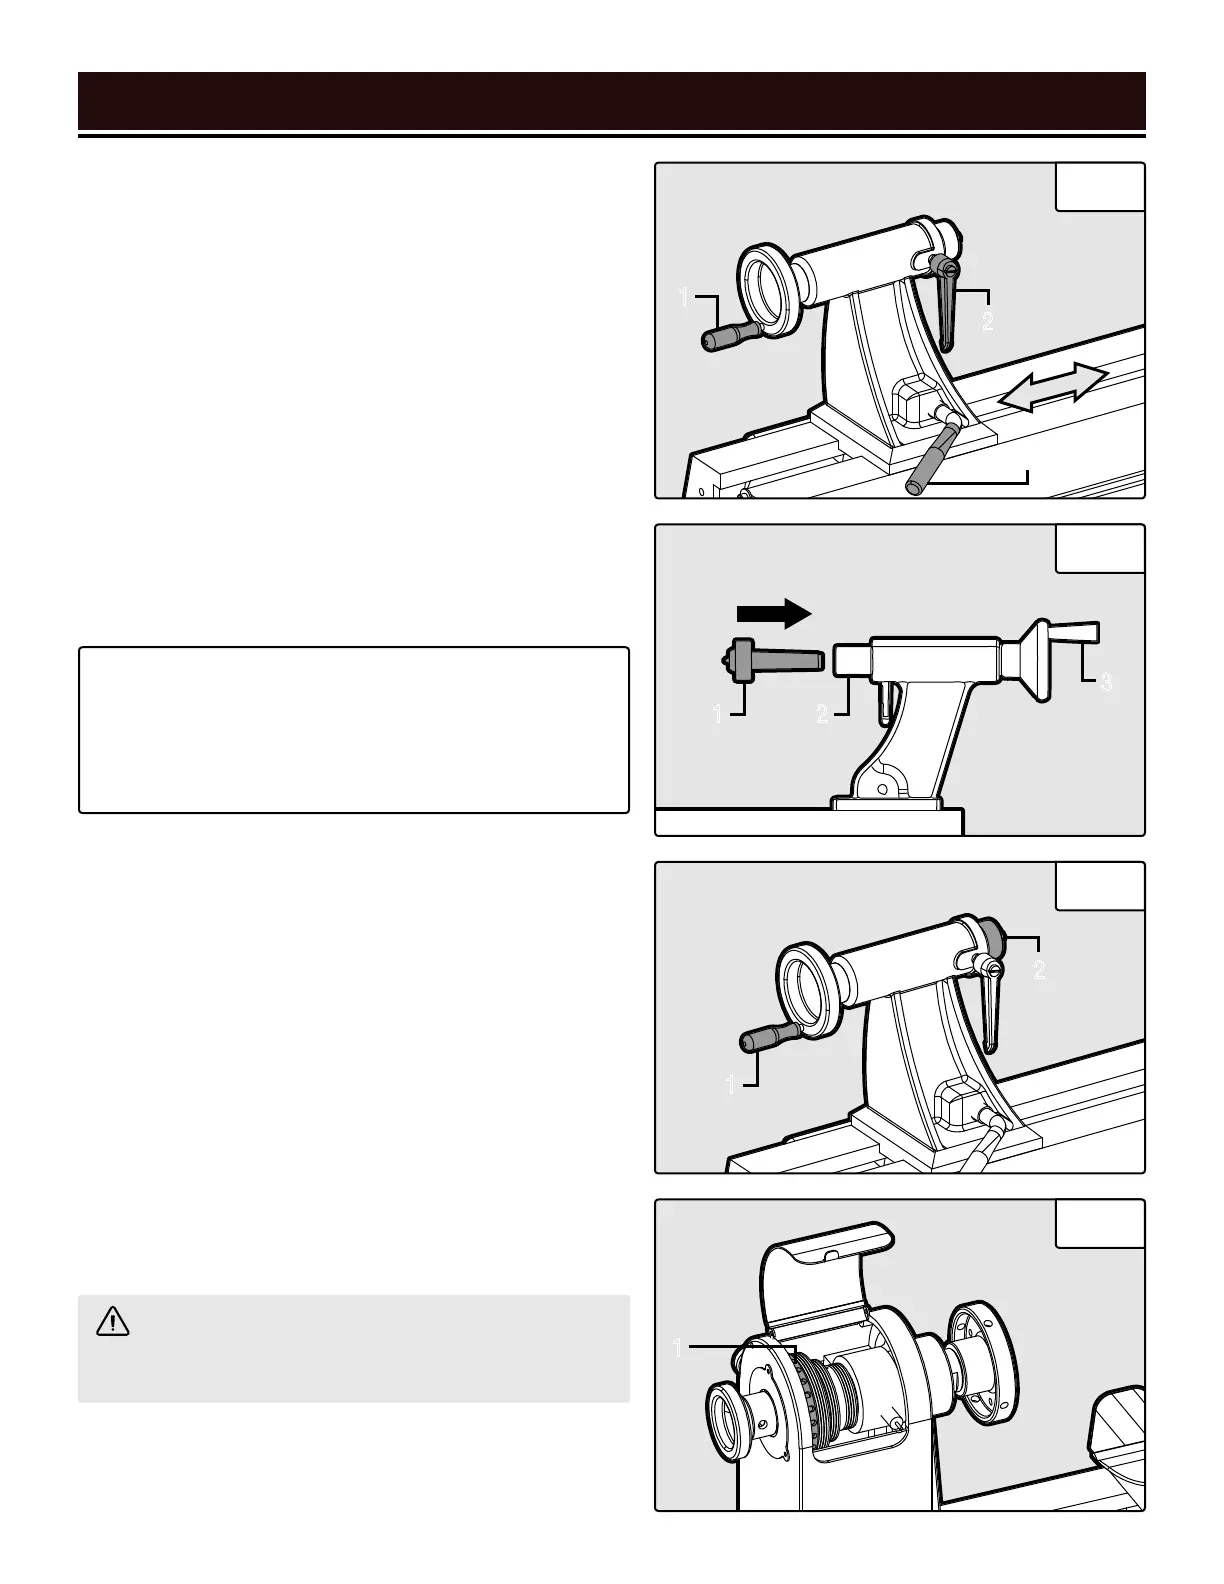
ADJUST THE TAILSTOCK
1. Loosen the tailstock locking lever (Fig. 9 - 3) and slide
the tailstock along the lathe bed into the desired position.
Retighten the locking lever.
2. Loosen the quill locking handle (Fig. 9 - 2) just enough
to unlock the tailstock quill. Turn the handwheel (Fig. 9 - 1)
clockwise to advance the quill and counterclockwise to re-
tract the quill. Retighten the quill locking handle.
INSTALL THE TAILSTOCK LIVE CENTER
To install the live center:
1. Rotate the tailstock handwheel (Fig. 10 - 3) clockwise a
few times to advance the quill (Fig. 10 - 2) forward.
2. Make sure the mating surfaces are clean. Push the live
center (Fig. 10 - 3) into the quill.
ASSEMBLY & ADJUSTMENTS
13
CAUTION! Make sure to DISENGAGE the spindle
lock before starting the lathe again. Never start the lathe
with the index pin engaged in the spindle pulley.
Fig. 9
Fig. 10
Fig. 11
Fig. 12
1
2
1
1
2
2
3
3
NOTE: If the tailstock quill gets fully retracted when the
live center is mounted, it will dismount the live center.
This is normal. Remount the live center by extending
the tailstock quill approximately 0.5 inch and pushing
the live center in place.
To remove the live center:
1. Hold the live center (Fig. 11 - 2) to prevent it from falling.
Use a rag to protect your hand from the sharp edges.
2. Rotate the handwheel (Fig. 11 - 1) counterclockwise to
retract the quill until the live center is released from the
quill.
INDEXING/SPINDLE LOCK
Indexing is used to create evenly spaced features around
the circumference of the workpiece while keeping the spin-
dle locked. There are 24 index positions (Fig. 11 - 1) in
the spindle pulley, each 15° apart, to help you rotate the
workpiece evenly for accurately spaced features. Place the
spindle lock in the locked position (Fig. 6 on page 12) to
help maintain the certain index point.
1
 Loading...