To unpack the generator, first place the shipping carton on a solid, flat ground. Cut open the box from the four
edges and take out all the contents from the carton except for the generator itself. Follow the instructions below to
assemble your generator with the help of a friend or a trustworthy foe.
UNPACKING & ASSEMBLY
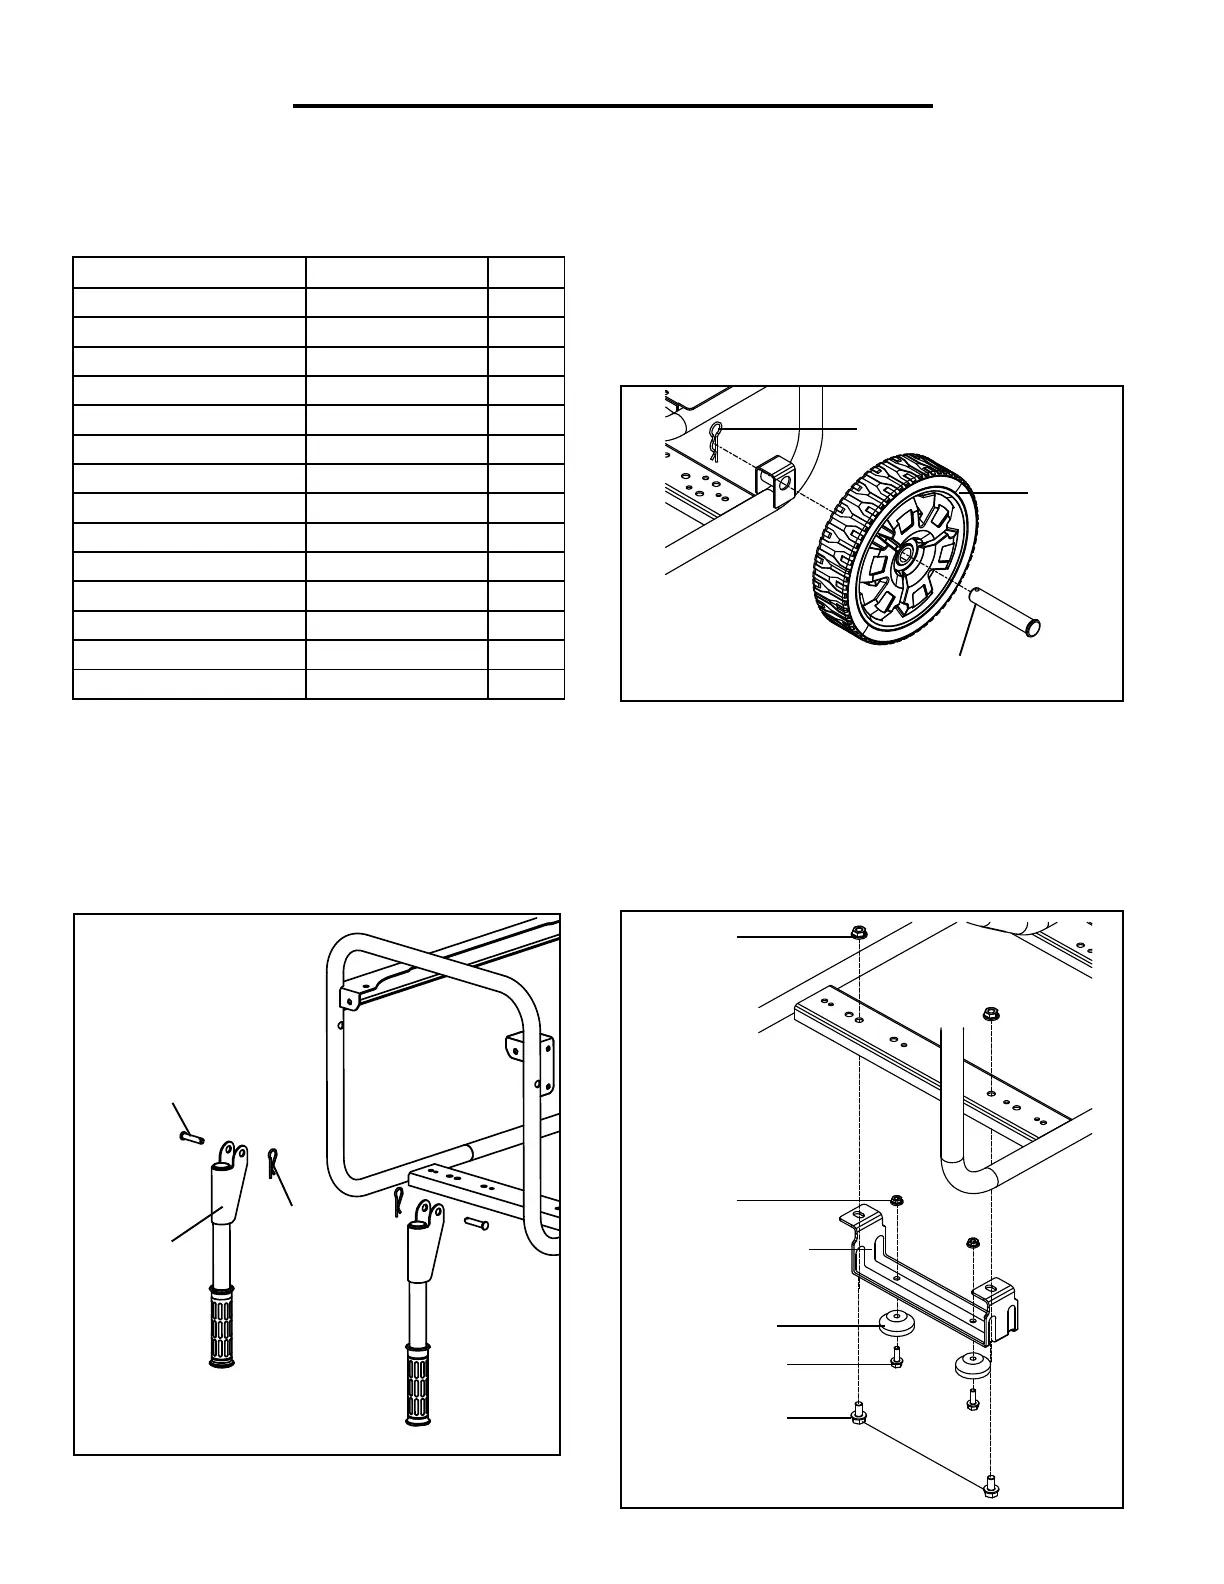
INSTALLING THE WHEELS
Slide the M16 x 85 wheel axle through the wheel and
wheel mounting bracket on the bottom of the generator
frame. Insert the wheel cotter pin through the wheel axle
to secure the wheel in place. Repeat with the other wheel.
INSTALLING THE HANDLE ASSEMBLIES
Insert the M10×40 handle axle through the handle
assembly and handle mounting bracket on the gen-
erator frame. Insert the handle cotter pin through
the handle axle to secure the handle in place.
Repeat with the other handle assembly.
INSTALLING THE SUPPORT BRACKET
1. Attach the two rubber feet onto the support bracket
using two M6x16 screws and M6 nuts.
2. Attach the support bracket onto the bottom of the
generator frame using two M8x16 screws and M8 nuts.
Wheel Cotter Pin
Wheel
Wheel Axle
Handle Pin
Handle
Handle
Cotter Pin
Rubber Foot
M8x16 Screw
M6x16 Screw
Support Bracket
M6 Nut
M8 Nut
PACKING LIST
Accessory Part No. Qty.
Wheel 56500-008 2
Wheel Axle M16x85 56500-009 2
Wheel Cotter Pin 56500-007 2
Handle Assembly 56500-001 2
Handle Axle M10x30 56500-005 2
Handle Cotter Pin 56500-003 2
Support Bracket 56500-058 2
Support Foot 56500-059 2
Screw M6x16 56500-054 2
Nut M6 56500-057 2
Screw M8x16 56500-060 2
Nut M8 56500-055 2
Wrench M10/M12 N/A 1
Spark Plug Socket N/A 1
8