13
ASSEMBLY & ADJUSTMENTS
WARNING: Do not plug in or turn on the tool until it is fully assembled according to the instruc-
tions. Failure to follow the safety instructions may result in serious personal injury.
UPPER GUARD
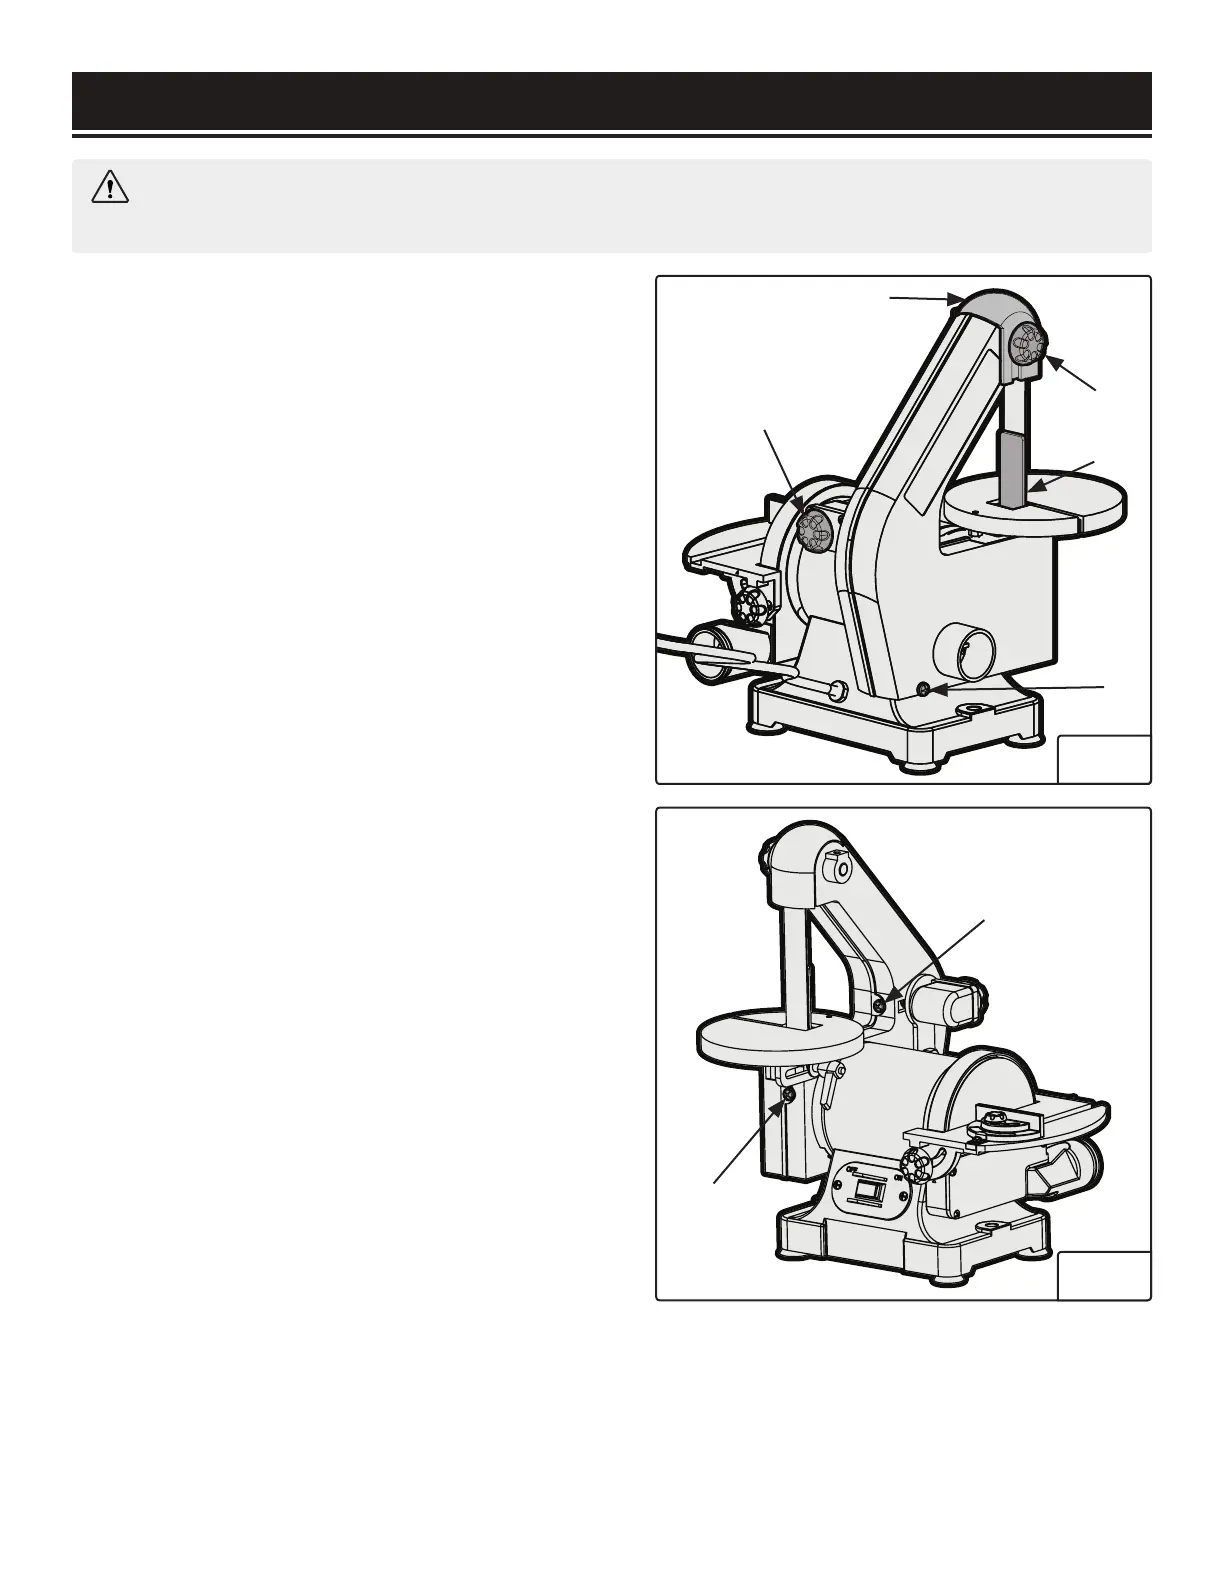
Install the upper guard (Fig. 8 - 2) onto the belt sanding arm
using the upper guard locking knob (Fig. 8 - 3) to secure it
in place.
BELT TRACKING
Belt tracking means adjusting the belt to ride in the center
of the rollers so that it runs true (does not wander left or
right during operation). The sander is equipped with a belt
tracking adjustment knob (Fig. 8 - 1).
To adjust the belt tracking:
1. Remove the upper guard locking knob (Fig. 8 - 3) and the
upper guard (Fig. 8 - 2).
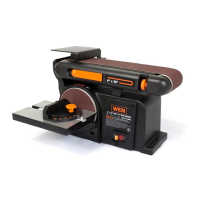
2. While holding the side cover in place, remove the three
screws and washers holding the cover in place (Fig. 8 - 5.
Fig. 9 - 1 & 2). Remove the side cover.
3. Rotate the sanding disc with your hand. This causes the
belt to slowly rotate. Watch to see if it starts to move left or
right (toward or away from the body of the sander). If the
belt wanders from the belt rollers, use the belt tracking ad-
justment knob (Fig. 8 - 1) to adjust the angle of the rollers.
Keep rotating the disc with one hand while turning the belt
tracking knob until the belt rides in the center of the rollers.
3. Re-install the side cover, upper guard, and upper guard
locking knob. Connect the cord to the power source. Turn
the sander ON and then quickly OFF to verify that the belt is
riding true in the center of the rollers. If it does not, repeat
the above steps to adjust the belt tracking.
SQUARING THE TABLE
The best results are obtained when the tables are square
(exactly 90°) with the belt and the disc sanding surfaces.
Fig. 8
1
2
Fig. 9
1
3
5
4
2
1. Make sure the switch is in the OFF position and the cord is disconnected from the power source.
2. Loosen the locking knobs for the disc table or the locking lever for the belt table. Place a square (not included) on
the table and adjust the table until it is square with the belt and the disc. Retighten the locking knobs/lever.