17
MAINTENANCE
SANDING BELT REPLACEMENT
1. Make sure the switch is in the OFF position and the
cord is disconnected from the power source.
2.
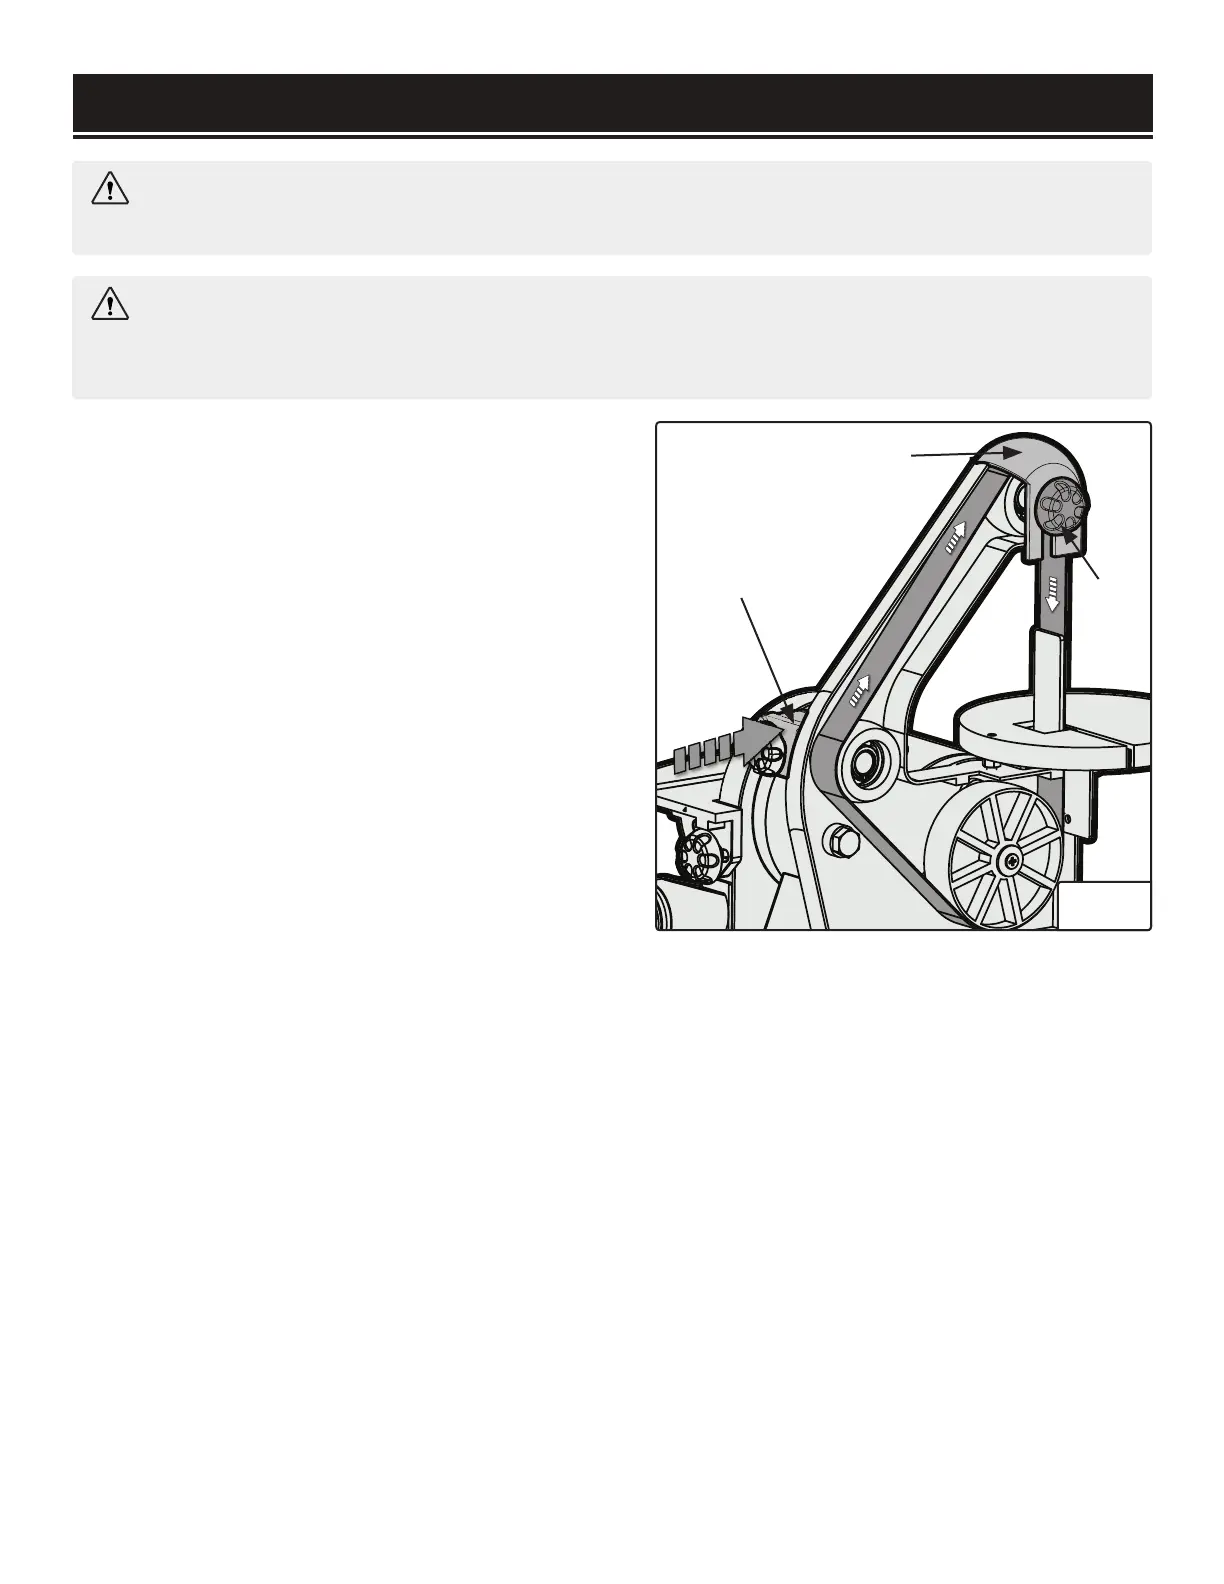
Remove the upper guard locking knob (Fig. 11 - 3)
and the upper guard (Fig. 11 - 2).
3. While holding the side cover in place, remove the
three screws and washers holding the cover in place
(p. 13, Fig. 8 - 5. Fig. 9 - 1 & 2). Remove the side
cover.
4. Push the shaft guard (Fig. 11 - 1) forward towards
the work table. (This will shift the middle roller for-
wards and create slack in the belt.) While pushing the
shaft guard forwards, slide the belt off of the rollers
with your other hand.
5. Place a new belt on the rollers. Check that the arrow
WARNING:
Any attempt to repair or replace electrical parts on this tool may be hazardous.
Servicing of the tool must be performed by a qualified technician. When servicing, use only iden-
tical WEN replacement parts. Use of other parts may be hazardous or induce product failure.
WARNING:
To avoid accidents, turn OFF and unplug the tool from the electrical outlet before
cleaning, adjusting, or performing any maintenance work.
1
2
3
Fig. 11
on the back of the new belt is pointed in the direction of travel.
7. Adjust tracking (instructions on p. 13) accordingly and reinstall the side cover, upper guard, and upper
guard locking knob.
SANDING DISC REPLACEMENT
1.Make sure the switch is in the OFF position and the cord is disconnected from the power source.
2. Remove the sanding disc table by removing the two locking knobs on either side of the sanding disc.
Remove the disc dust port by removing the three screws and washers. See figures on p. 12.
3. Remove the used sanding disc. A WEN Heat Gun (model number 2020 or HG1022) can help to soften
up the adhesive to make for an easier, cleaner removal. Wipe the sanding disc plate clean.
4. Peel the backing from the new sanding disc, align the disc with the plate and press the sanding disc
firmly on to the plate.
5. Reinstall the disc dust port, work table, and locking knobs.

 Loading...