■ TTL-ALL - Wireless connection protocols when using the FJ-X2m to communicate
with compatible camera models. See westcott.com/4705 for a full list.)
■ OFF - Disable wireless communication
Menu Screen #2
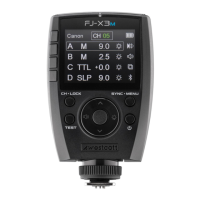
● MENU 2 ► Button 1
● CH Icon ► Button 2
○ CH - Wireless Channel selection between the values of [AU] and [01-31]. (AU locates the
most reliable 2.4GHz channel.)
■ Enable the [AU] “automatic channel” mode:
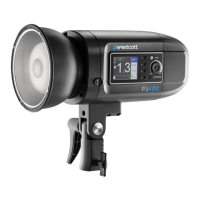
● Set the FJ400 and FJ-X2m to channel [AU]
● Long press the 2nd Menu Selection button on the FJ-X2m labeled CH until
the channel on the FJ400 displays [AU].
● NOTE: The FJ-X2m trigger will continue to display [AU] in the channel
window.
● NOTE: Only one FJ-X2m in AU mode can operate an FJ Wireless Flash
System.
● GR Icon ► Button 3
○ GR - Wireless Group selection between the letters A-J.
● ID/RT Icon ► Button 4
○ CanonRT ID values between 00-99.
○ Canon Radio Triggers and speedlites can be synchronized with the FJ400 by selecting
the same Channel, Group, and ID#.
Menu Screen #3
● MENU 3 ► Button 1
● “Audible Beep” Icon ► Button 2
○ Enables/Disables audible notifications for strobe recycling completion and menu
selections.
● “Optical Sensor” Icon ► Button 3
○ Enables/Disables the optical sensor when wanting to trigger the FJ400 with another
flash-based light source (ie. 2nd strobe, speedlite, etc.) without utilizing a wireless radio
trigger or PC cord.
● “Modeling Lamp” Icon ► Button 4
○ “Modeling Lamp” Icon + Off: Disables the modeling lamp.
○ “Modeling Lamp” Icon + Auto: Variable modeling lamp power output based upon the
FJ400’s power output.
○ “Modeling Lamp” Icon + “#”: Enables the modeling lamp.
Menu Screen #4
● MENU 4 ► Button 1
● MASK Icon ► Button 2