Disassembly / Reassembly
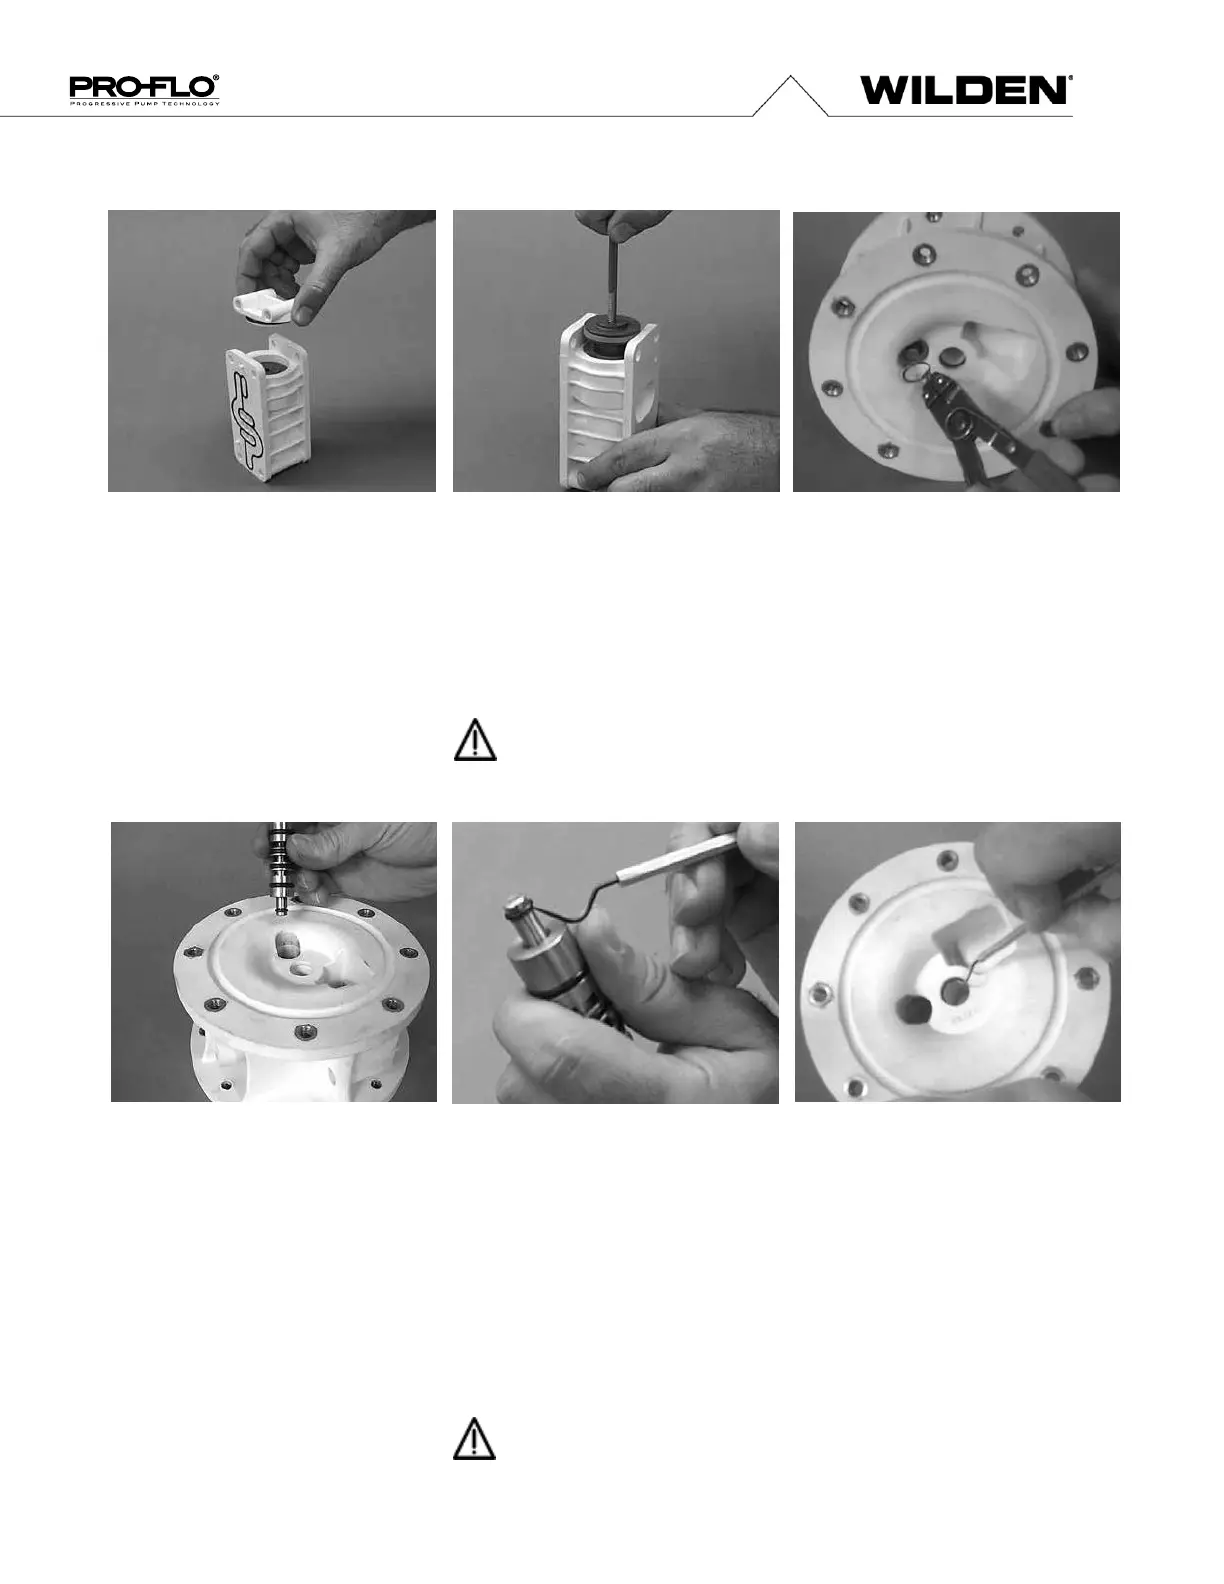
Step 4
Remove air valve end cap to expose air
valve spool by simply lifting up on end cap
once air valve bolts are removed.
Step 5
Remove air valve spool from air valve body
by threading one air valve bolt into the end
of the spool and gently sliding the spool out
of the air valve body. Inspect seals for signs
of wear and replace entire assembly if
necessary. Use caution when handling air
valve spool to prevent damaging seals.
NOTE: Seals should not be
removed from assembly.
Seals are not sold separately.
Step 6
Remove pilot spool sleeve retaining snap
ring on both sides of center section with
snap ring pliers.
Step 7
Remove pilot spool sleeve from
center section.
Step 8
With o-ring pick, gently remove the o- ring
from the opposite side of the “center hole”
cut on the spool. Gently remove the pilot
spool from sleeve and inspect for nicks or
gouges and other signs of wear. Replace
pilot sleeve assembly or outer sleeve o-rings
if necessary. During re-assembly never
insert the pilot spool into the sleeve with the
“center cut” side first, this end incorporates
the urethane o-ring and will be damaged as
it slides over the ports cut in the sleeve.
NOTE: Seals should not be
removed from pilot spool.
Seals are not sold separately.
Step 9
Check center section Glyd™ rings for
signs of wear. If necessary, remove
Glyd™ rings with o-ring pick and
replace.
.
 Loading...