WIL-10183-E-04 16
P4 Clamped Metal
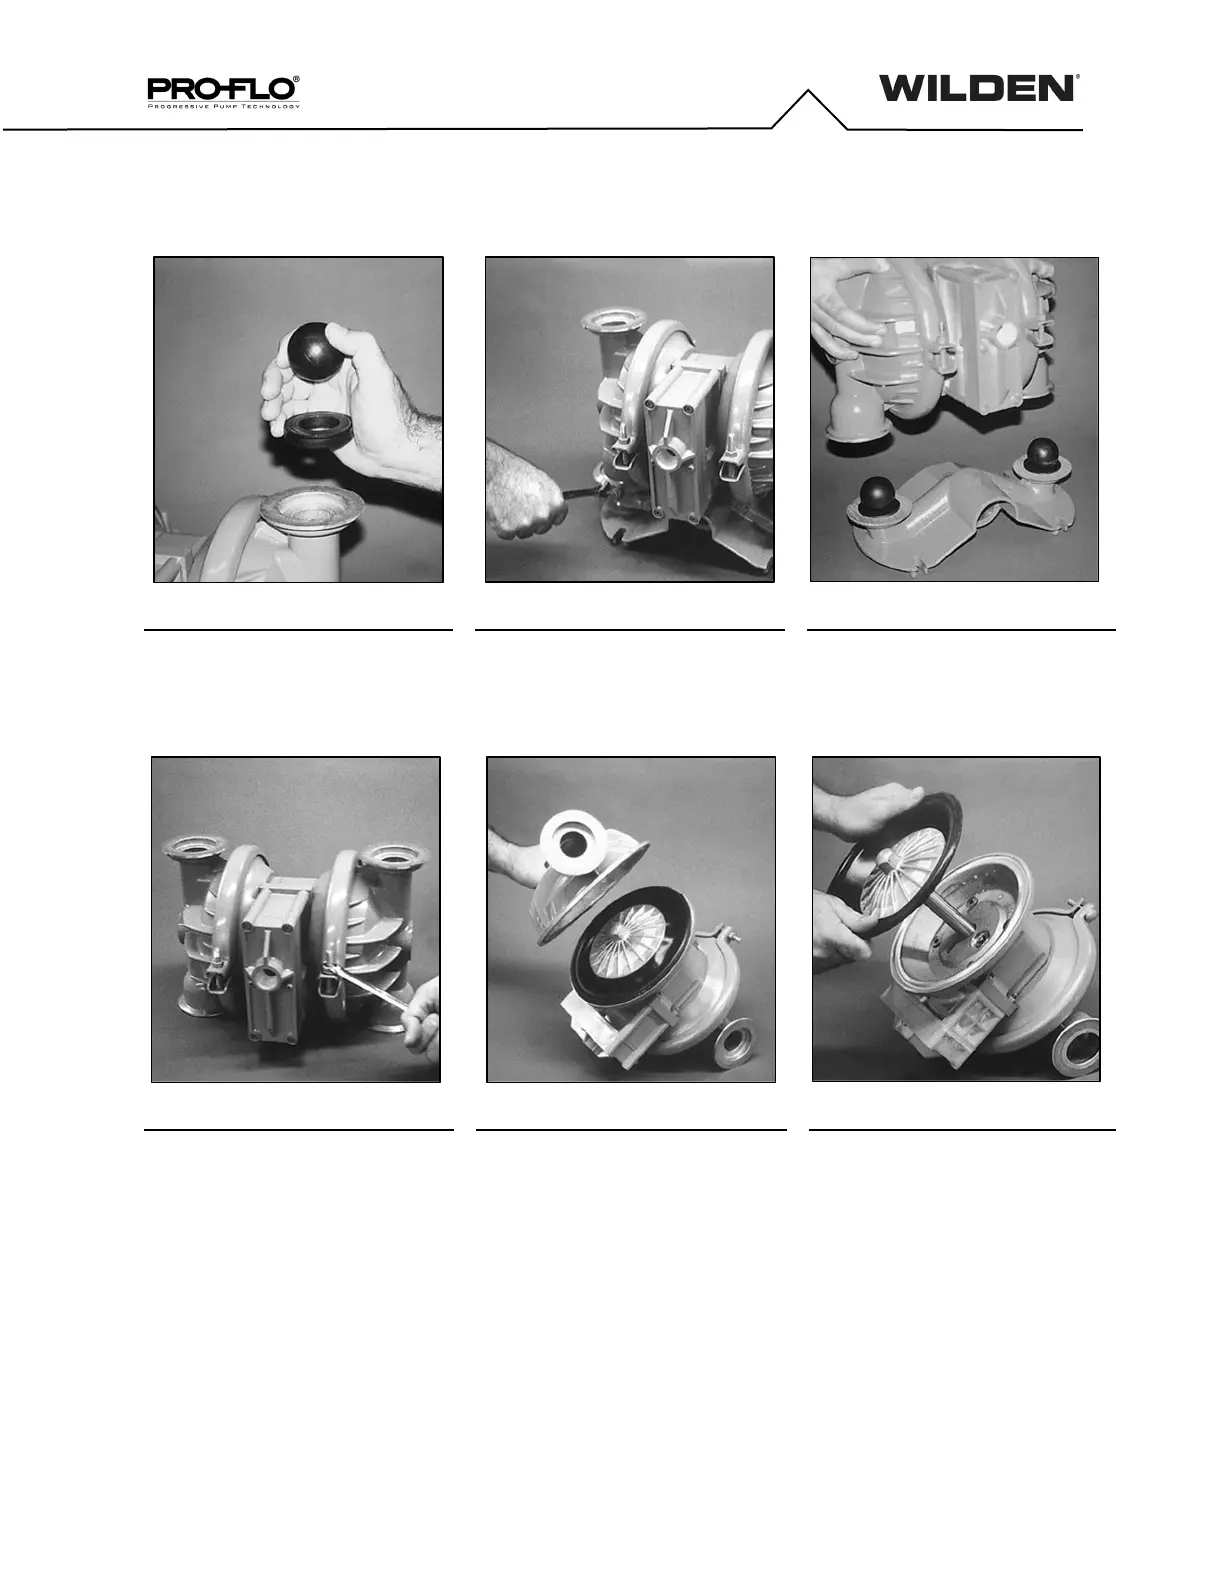
Step 4 Step 5 Step 6
Remove the discharge valve ball, valve
seat and valve seat O-ring and inspect for
signs of wear and replace, if necessary.
Now the center section assembly can be
removed from the inlet manifold.
NOTE: Inverting the pump will facilitate
removal of inlet manifold.
Remove the inlet valve balls, seats and
valve seat O-rings from the liquid chamber
and inlet manifold, inspect for nicks,
gouges, chemical attack or abrasive wear.
Step 7 Step 8 Step 9
Remove one (1) set of large clamp bands
which secure one (1) liquid chamber to the
center section.
Lift liquid chamber away from center section
to expose diaphragm and outer piston.
Using an adjustable wrench, or by rotating
the diaphragm by hand, remove the
diaphragm assembly.
NOTE: Due to varying torque values, one
of the following two situations may occur: 1)
The outer piston, diaphragm and inner
piston remain attached to the shaft and the
entire assembly can be removed from the
center section.
DISASSEMBLY / REASSEMBLY