Installing Your Furnace
14
Vent Installation
WARNING: DANGER OF PROPERY DAMAGE,
BODILY INJURY OR DEATH.
Proper vent installation is critical to the safe
operation of the furnace. Therefore, carefully read
and follow all the instructions given in this section.
The following instructions are for either surface or recess mounted
wall furnace.
USE ONLY THE VENT ASSEMBLY SUPPLIED.
IMPORTANT: All joints in the inlet and vent tubes
and all gaskets must be tight. Installation in any
other manner voids the C.S.A. design certification
and will affect the warranty.
Refer to Page 15, Fig. 19 for the name and location of the vent
parts.
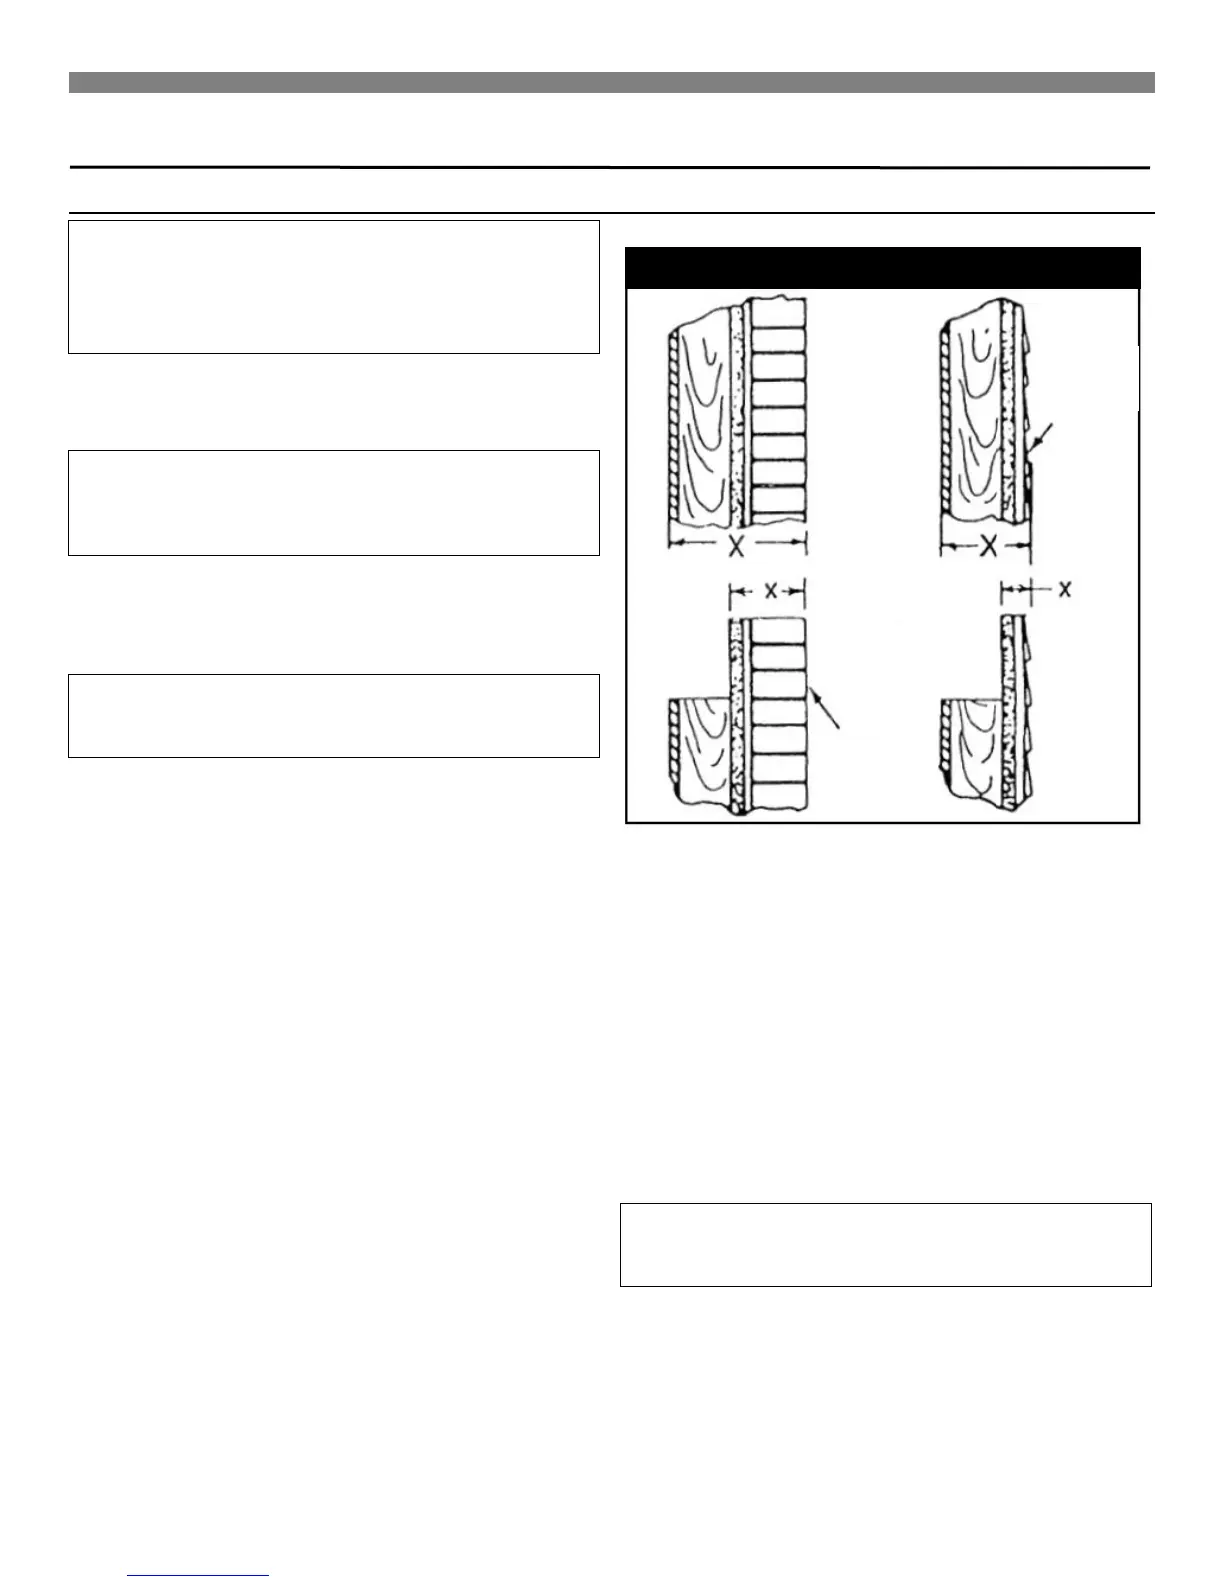
DETERMINE PROPER LENGTHS
IMPORTANT: To prevent harmful flue gases from
entering the house, make sure NOT to trim air or
vent tubes shorter than specified below.
Air inlet air tube 'A' and vent tube 'B' are supplied in lengths to
handle wall thickness up to 8½-inches.
To find the correct vent and air tube length, measure exact
distance 'X' between surface on which back of cabinet will rest
(inside of recessed cavity or face of wall when freestanding) and
the outside wall surface. See Page 14, Fig. 18 & Page 15, Fig. 19.
Inlet air tube 'A' Add ⅞-inch to dimension 'X'. Mark on tube
starting from end with collar and holes. Cut off evenly. File off any
burrs resulting.
Vent tube 'B' Add 2⅛-inches to dimension 'X'. Mark on tube
starting from end with collar and holes. Cut off evenly. File off any
burrs resulting.
CUT ONLY THE PLAIN END (WITHOUT THE FLANGE) OF THE
TUBES. MAKE A SQUARE CUT TO THE EXACT LENGTH.
HELPFUL CUTTING HINT
To make a straight cut, measure from the end and mark tube in
several places. Align a piece of tape with the marks and wrap it
around the tube. Use the edge of the tape as a guide to help keep
the cut straight.
ATTACHING TUBE TO FURNACE
The smaller diameter vent tube (Page 15, Fig. 19-"B") must be
installed first.
The easiest way to install the vent tubes and get the gaskets
positioned properly is to have the furnace lying front down on a
flat surface.
IMPORTANT: To prevent harmful flue gases from
entering the house, make sure NOT to trim air or
vent tubes shorter than specified below.
1. Attach vent tube (Page 15, Fig. 19-"B") and gasket to the back
of the furnace heat exchanger with (8) #8 x ⅜-inch sheet
metal screws provided.
2. Attach air tube (Page 15, Fig. 19-"A") and gasket to the back
of the furnace casting with (8) #8 x ⅜-inch sheet metal screws
provided.