A l e x i A O w n e r ’ s M A n u A l
fourth table: “Tweeter Module Detent Position” specifies the position of the
bridge spike into the detent on the top of the tweeter module (see Figure 7).
7. Make a mark on the chart Number 1 “Alexia Upper Array Spike Length”
indicating the proper rear spike for this module as determined by the ear
height and distance from listening position.
Note: The shortest spikes (labeled AA) are always used at the front of the Upper Array.
8. Make a mark on the second chart labeled “Alexia Upper Array Alignment
Block Step Position” indicating the block location for that module. Set this
information aside as you will refer to it in the next section. (See Figure 7.)
9. Make a mark on the third chart labeled “Alexia Upper Array Alignment
Block Step” indicating Upper Array spike’s resting position on the align-
ment block. Set this information aside as you will refer to it in the next sec-
tion. (See Figure 7.)
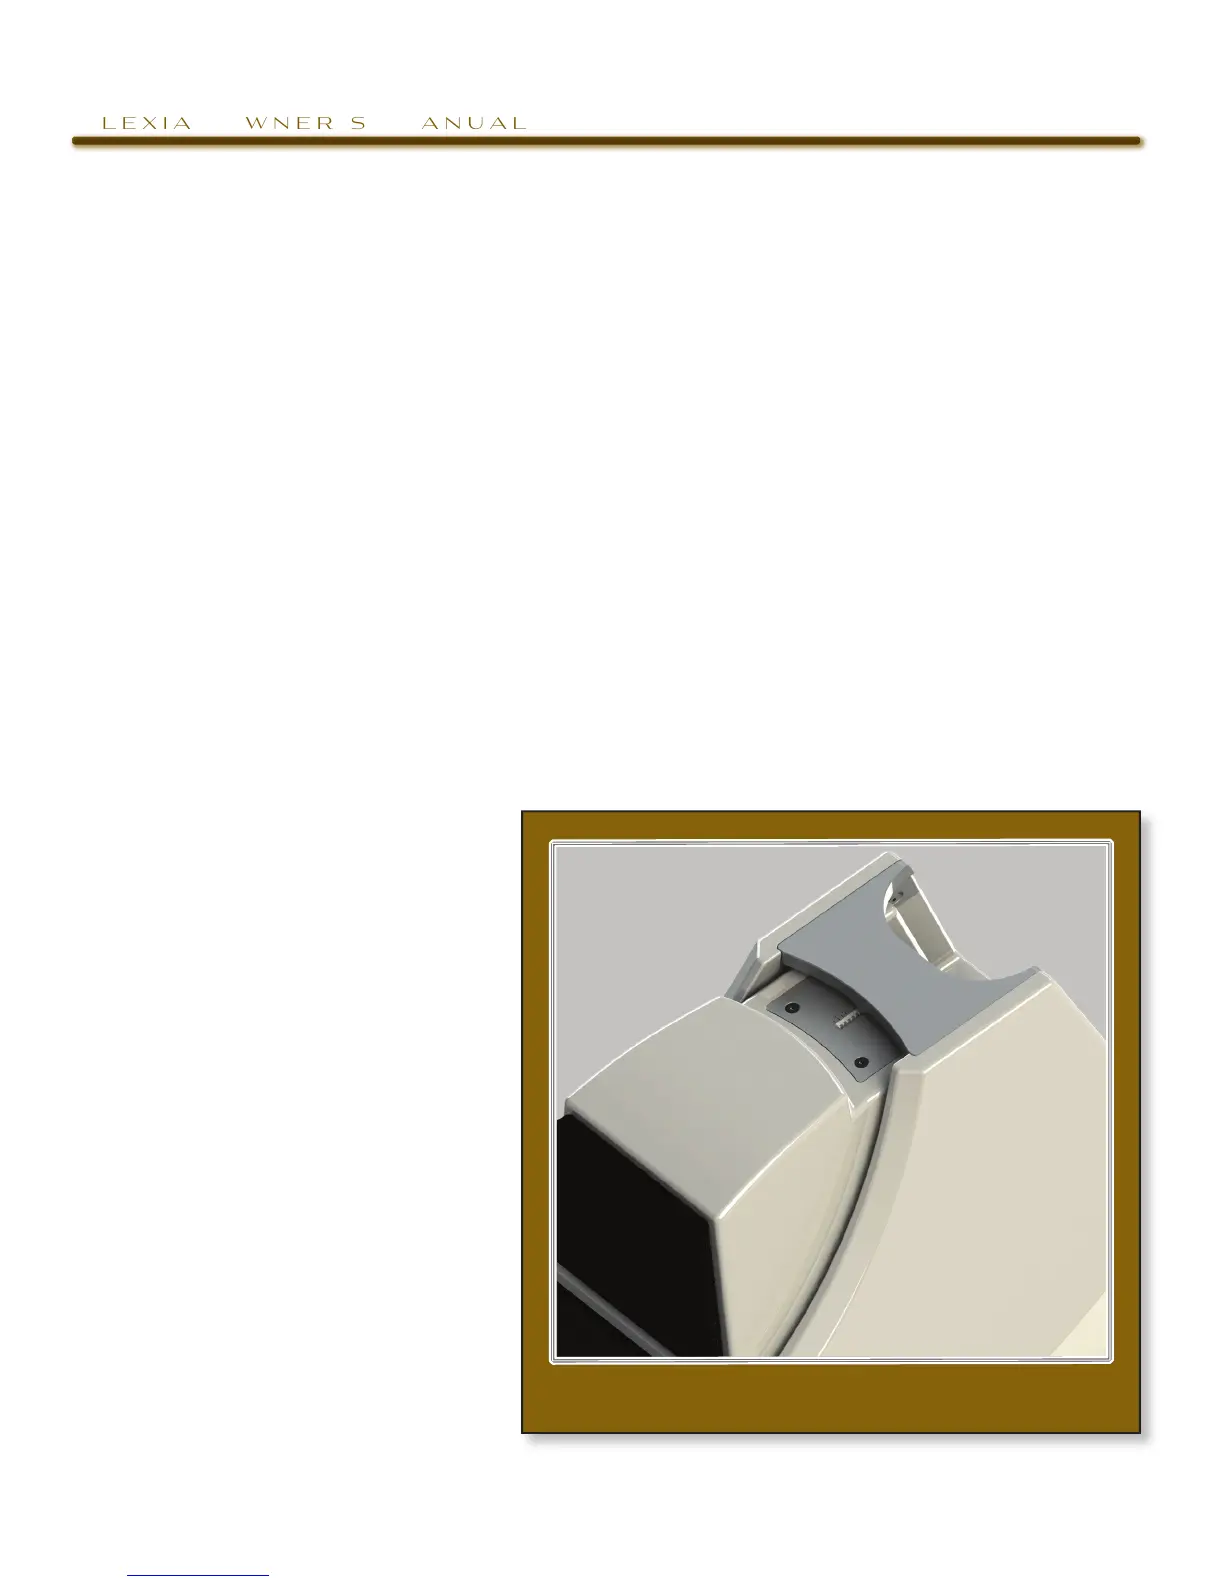
10. Refer to Table Num-
ber 4 labeled “Alexia
Tweeter Detent Loca-
tion.” This table indi-
cates the detent loca-
tion in which the cross
member spike rests
(see Figure 9).
Section 3.3—Mounting the
Upper Array
Materials Required:
• Correct spikes for the
modules.
36
Wilson Audio Specialties
figure 9—tweeter bridge spike pOsitiOn in the
prOpAgAtiOn delAY detent