A l e x i A O w n e r ’ s M A n u A l
46
Wilson Audio Specialties
process as above, lengthen the appropriate spikes on the front or rear of the
Woofer Module until the Alexia is level.
6. To find out which spike to lower, grasp the Alexia channel and gently rock
it back and forth. This will identify the spike that is out of level from the
other three. If there is movement, lengthen the appropriate spike until the
Alexia sits solidly on the floor. Make sure the spike is penetrating the car-
pet surface and is resting on the solid floor beneath. Alternatively, if is
desirable to protect the surface beneath the spike, the aluminum spike disks
can be installed. There is a conical detent in the disk in which the spike
rests.
7. Once all adjustments have been made, with the 9/16” wrench provided,
tighten the nut on the spike to the diode. DO NOT OVERTIGHTEN! “Snug”
is tight enough.
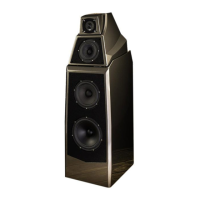
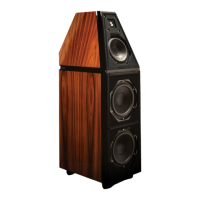
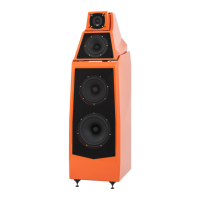
Section 4.3—Removing the Protective Film
To protect the finish of the Alexia during final manufacture, shipment, and setup
in your listening room, we have applied a removable layer of protective film over the
finish. We recommend that this film be left in place until the speakers are in their final
location in your listening room. Once you have determined their final position, remove
the film by following this procedure:
1. Ensure the speaker surface is room temperature before removing the protec-
tive film.
Note: Removing the protective film when the speaker surface is cold can damage the
paint surface.
2. Slowly remove the film from the top down, large sections at a time, gently
pulling the film downward and outward.
Note: Tearing the film aggressively can damage the paint.