45
Wilson Audio Specialties
s e C T i O n 4 . 2 — l e v e l i n g T h e A l e x i A
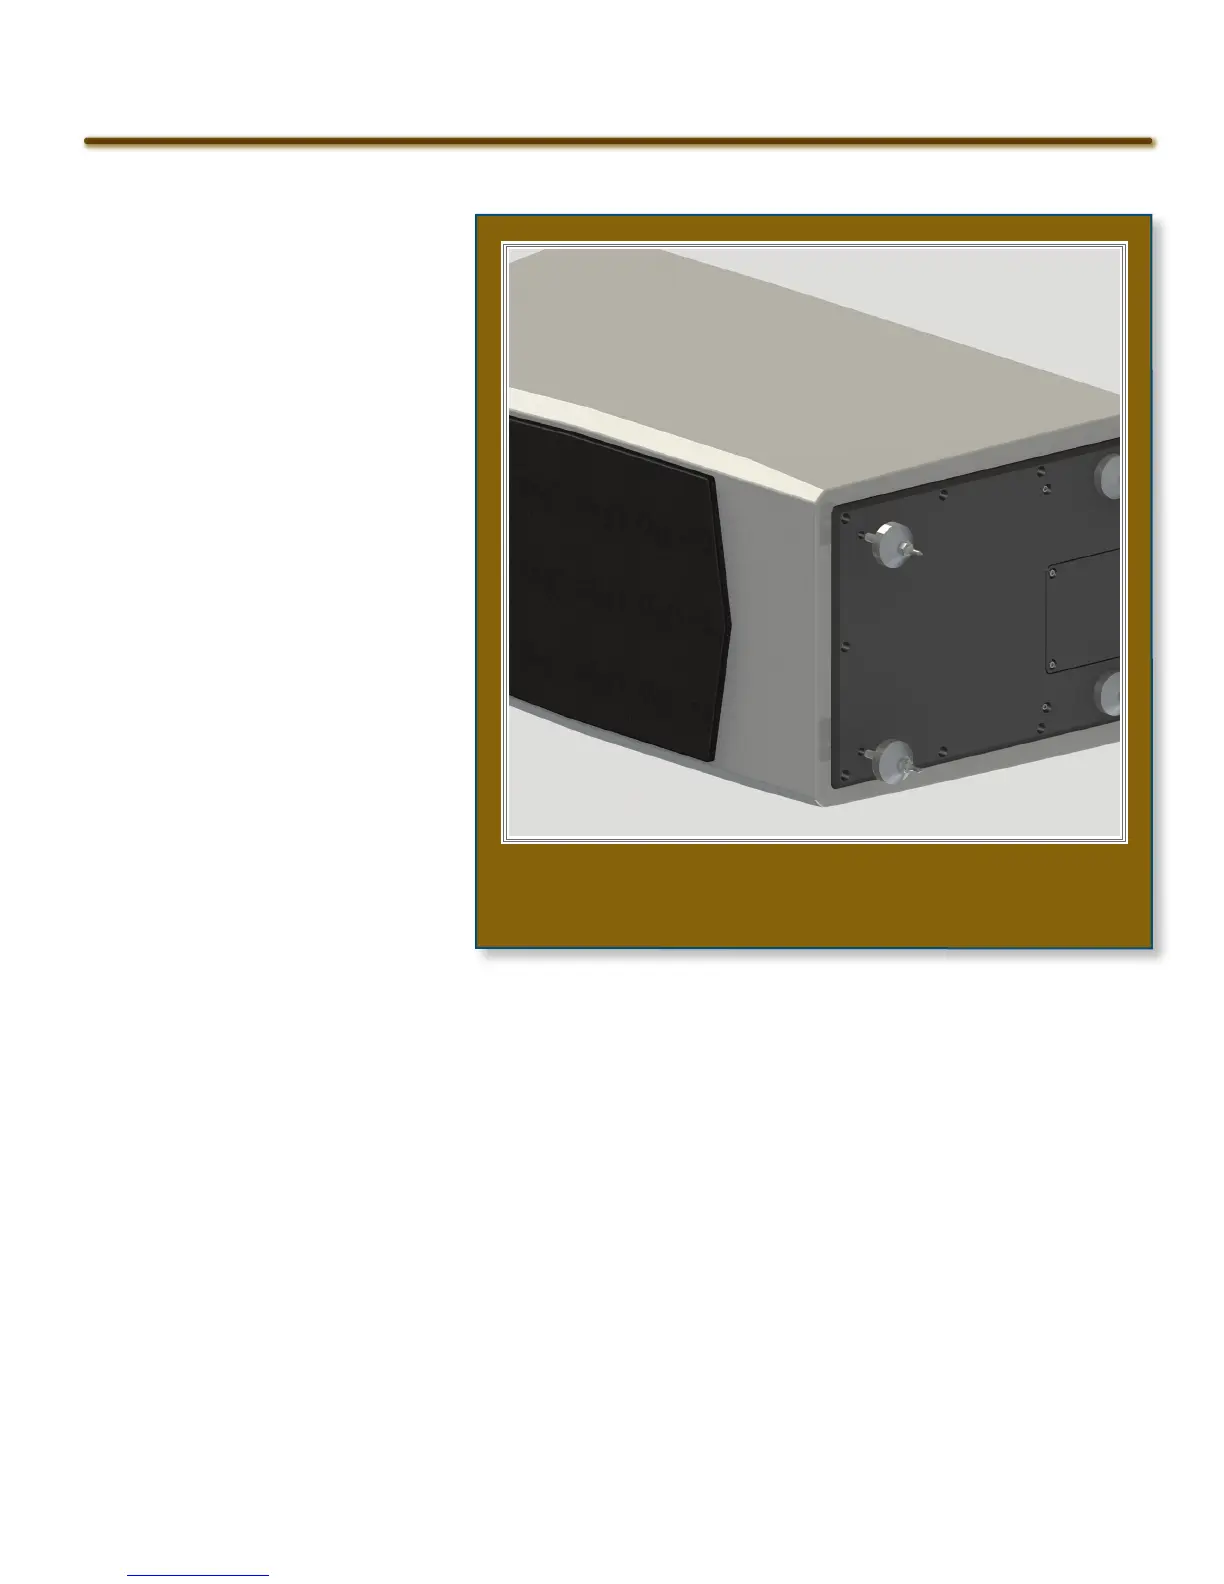
Note: The spike receptacles
are tapped directly into the
“X” material plate on the bot-
tom of the Woofer Module. Be
very careful NOT TO CROSS
THREAD the spikes (see Figure
14).
Section 4.2—Leveling the
Alexia
1. Place a level on
the left to right
oriented axis in
the flat area atop
the woofer behind
the Upper Array. If
it is level, move to
the next step.
2. You may rotate the
spike tips in place
by using a vice-grip or toothed pliers.
3. Lengthen the appropriate spike or spikes (not the Woofer Module Spike di-
ode on the set screw) on the lower side until the Alexia is level.
4. If the speaker is leaning to the left, lengthen both Woofer Module spikes on
the right hand side of the speaker. If the speaker is leaning right, lengthen
the left hand spikes. Lengthen the spikes incrementally, checking and re-
checking the level until the Alexia is level left to right.
5. Place a level on the front to back oriented axis. If it is level, then Alexia
is level. If the Alexia is leaning one way or the other, following the same
figure 14—instAll the AsseMbled wOOfer MOdule spikes
bY reMOving the upper ArrAY And turning the wOOfer
MOdule On its side�