J
Jackie ThomasAug 1, 2025
How to fix Wisenet Security Camera DAY/NIGHT menu?
- KkwalkerAug 1, 2025
If the DAY/NIGHT menu on your Wisenet Security Camera does not work, check that the AGC of the EXPOSURE SETUP menu is set to ‘OFF’.
How to fix Wisenet Security Camera DAY/NIGHT menu?
If the DAY/NIGHT menu on your Wisenet Security Camera does not work, check that the AGC of the EXPOSURE SETUP menu is set to ‘OFF’.
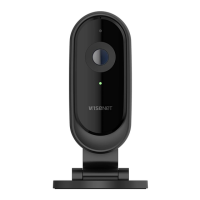
Why is the image on my Wisenet HCD-6010 screen dim?
If the image on your Wisenet Security Camera screen is dim, there might be a few reasons. First, the lens could be stained with dirt. Try cleaning it with a soft, clean cloth. Also, make sure that the monitor or DVR is set to the proper condition. Finally, check if the camera is exposed to very strong light, and if so, change the camera's position.
What to do if nothing appears on the Wisenet HCD-6010 screen?
If nothing appears on the screen from your Wisenet Security Camera, check that the power cord and the line connection between the camera and the monitor are properly connected. Also, verify that you have correctly connected the BNC cable to the camera.
Why is the image on my Wisenet HCD-6010 screen dark?
If the image on the Wisenet Security Camera screen is dark, try adjusting the contrast feature of the monitor or DVR. Also, if you have an intermediate device, ensure that the 75 ? / Hi-z is set properly.
How to fix incorrect color on Wisenet HCD-6010 Security Camera?
If the color on your Wisenet Security Camera is not correct, check the setting of the WHITE BAL SETUP menu.
What to do if Wisenet Security Camera is hot and not working?
If your Wisenet Security Camera is not working properly and the surface is hot, check that you have properly connected the camera to an appropriate power source.
Why does the Wisenet HCD-6010 screen flicker?
If the screen of your Wisenet Security Camera flickers continually, ensure the camera is not pointing towards the sun.
Lists the key capabilities and technical highlights of the camera.
Details the items included in the product package for setup and use.
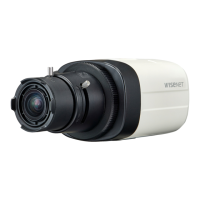
Identifies and explains the purpose of each physical part of the camera.
Crucial preliminary checks and safety guidelines before physically installing the camera.
Instructions on how to safely separate the camera's dome cover from its base.
Guides on how to set the pan, tilt, and rotation angles for optimal camera view.
Steps for linking the camera's video output to a monitor or DVR for viewing.
Instructions on how to properly supply electrical power to the camera unit.
Explains how to utilize coaxial cables for data transmission and control signals.
Specifies the type of video cable and recommendations for optimal signal transmission.
Overview of the camera's main setup menu and available configuration options.
Setting pre-defined camera modes based on environmental conditions like day/night or lighting.
Adjusts the color temperature of the image for accurate color reproduction in different lighting.
Controls image brightness by adjusting settings like shutter speed, gain, and aperture.
Enhances image clarity in scenes with strong backlighting or high contrast.
Wide Dynamic Range feature to balance bright and dark areas for detailed images.
Accesses advanced settings such as display titles, image adjustments, and privacy masking.
Options for saving settings, discarding changes, or resetting the camera to factory defaults.
Provides the physical size and mounting hole specifications of the camera.
| Brand | Wisenet |
|---|---|
| Model | HCD-6010 |
| Category | Security Camera |
| Language | English |