Outdoor Grill (OG) Series
Component Access / Removal
4-12
#814144 - Revision A - July, 2009
Rotisserie Burner Igniter
The rotisserie burner igniter is attached to the side of
the igniter bracket with a bolt and nut. The bracket is
attached to the rear hood assembly with two screws.
The igniter wire leads run out the back of the rear hood
assembly and down through a hole in the rear deck of
the burner box. Cable ties hold the wires in place
where they are routed along the side flange to the
micro-switch on the valve assembly.
NOTES:
• If the grill is sitting on a cart, the rear panel of the
cart will need to be removed at this time.
• If the unit is built in and there is no rear access to
the grill below the rear hood shell, then the grill will
need to be pulled forward 3” - 6” (76 - 152 mm). If
pulling the grill forward, take care to not damage the
gas supply line.
To remove the rotisserie burner igniter, first remove rear
hood shell and detach the front panel from the landing
ledge as described in steps 1 and 2 of Front Panel
Assembly removal instructions, then:
1. At front of unit, disconnect igniter electrical leads
from micro-switch and wire harness.
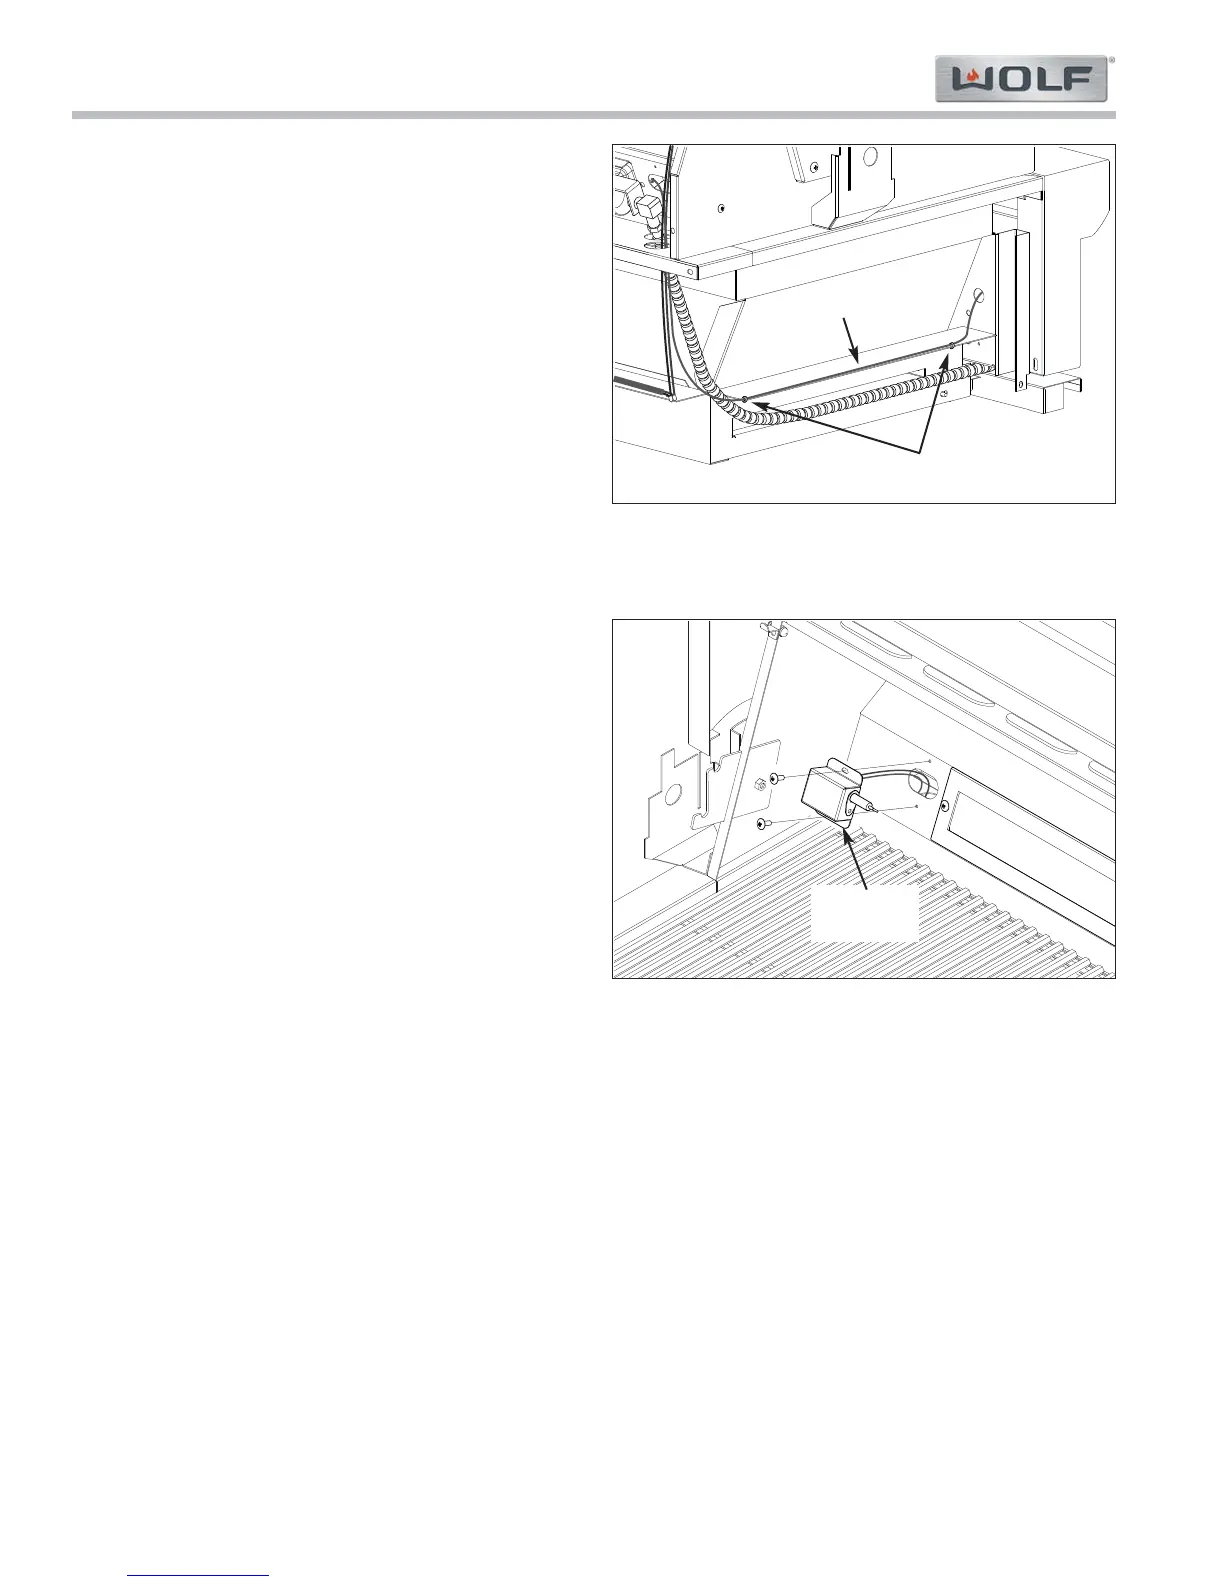
2. Cut all cable ties holding igniter wire leads (See
Figure 4-24).
3. Pull igniter wires from front to back of unit.
4. Open hood, then extract rotisserie igniter bracket
mounting screws and pull assembly away from rear
hood assembly, pulling wire leads up and out (See
Figure 4-25).
5. Extract igniter mounting bolt from nut at inside of
igniter bracket.
6. Pull igniter out through hole in igniter bracket.
Figure 4-24. Cable Ties on Igniter Wire
Figure 4-25. Rotisseries Burner Igniter Removal
Cable Ties
Igniter Wires
Igniter
Assembly