SERVICING AND SPARES
6 720 812 175 (2014/07) 45
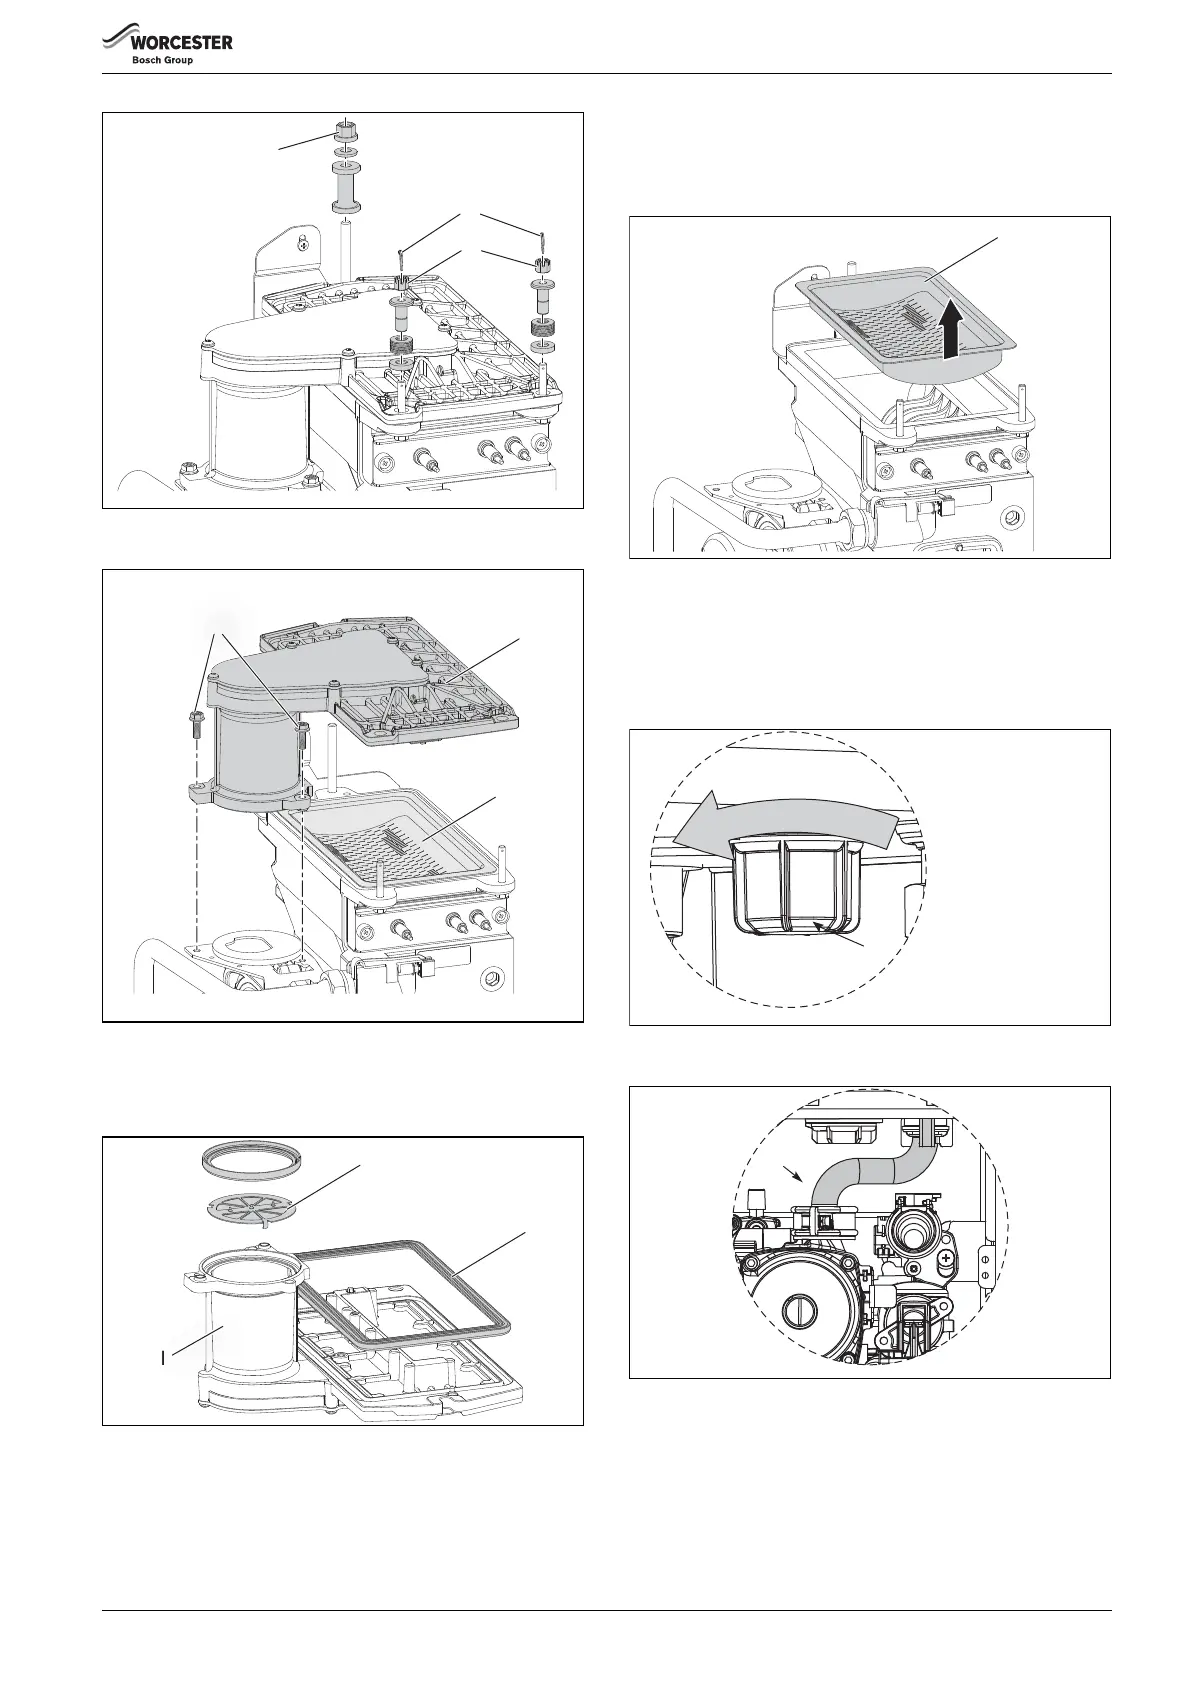
Fig. 80 Release air/gas manifold
3. Remove air/gas manifold (I)
Fig. 81 Air/gas manifold
4. Open air/gas manifold (I).
▶ Carefully withdraw diaphragm (J) from fan intake tube and check for
soiling and splits.
Fig. 82 Diaphragm
15. BURNER
▶ Remove the burner (H).
▶ Replace new burner in correct position.
▶ Ensure that a new seal (K) is used, refer to fig. 82.
Fig. 83 Burner removal
16. HEAT EXCHANGER
▶ Isolate flow and return valves and drain the boiler.
▶ Remove condensate trap (see page 43).
▶ Remove fan assembly (see page 44).
1. Remove plastic nut (A) from the base of the inner casing
Fig. 84 Heat exchanger removal 1
2. Remove return pipe at the bottom of heat exchanger.
Fig. 85 Heat exchanger removal 2
3. Remove screw at the top of the heat exchanger (C).
▶ Unscrew the flow pipe (D).
F
C
D
2.
6 720 812 175-16.1O
H
G
EE
3.
6 720 812 175-17.1O
J
I
K
4.
6720647361-66.1Wo
H
6 720 812 175-29.1O
1.
6720647361-67.1Wo
B
2.
6 720 812 175-33.1O



 To Next Page