[g) Ensure a 'J' bolt is located in
the
b
r
acke~
on each side
of
the
combustion chamber
with
the
M4
washer and
M4
w
ing
nut
at
~
he
start
of
the thread.
{h)
Reassemble in
the
reverse order.
Push
each '
J'
bo11
in
an
upwards direction until
they
are located in
1he
brackets on
the
inside
of
the boiler cas
ing
.
(il .Test for gas soundness at thejoin
tbetwee
nth
ep
ilo
tsupply
pi
pe
tubing
nut
and
pilot
bracket
as described in Section
15
Routine Cleaning and Inspection, I
nst
ruction B.
For
replac
ement
of
the
following
parts
the
electrical
tray
must
be
hinged
dow
nwards:
Unscrew
the
hexagon headed
screw
at
the
front
insid9 edge
of
each
side
panel
and
ease
the
electri
c
al
tray
forwards
off
t
he
fovrbalf
studs
locating
it
to
the
rear
of
the applil:mce.
Allow
the
electrical
tray
to
pivot
vertically
downwards
supported
by
the
two
plast
ic stops.
7.
TO
REPLACE
THE
BOILER
HEAT EXCHANGER
!See Fig.
37
)
(a)
Drain
down
the h
ea
ti
ng
sys
tem
and the appliance.
NOTE:
A
dra4n
cock is fitted
to
the
re
ar
rig
ht
hand side
of
the
hot
water
heat
exchenger. See Fig.
40
.
!bt
Remove
t1'1e
fan
, fl
ue
ho
od
assemb
ly
and
b
urn
er
as
desc
ri
bed
in
Section '•5 Routine Cleaning and Inspectio
n.
parts
3b
, c. d. e, f, g. h, i, j, k, t, m and
n.
!cl Removethecombusti
on
chamber as described in parts
8b
a
nd
c.
~d)
Unscrew the
two
fiat face union conf"'ections securi"\g
the
heat exchanger to
th
e
water
fl
ow
manifold and return
pipework.
(e)
Ease
th
e heat exchanger
off
t he pipework and
lowe
r
out
of
the boiler casing. Rernove
the
fibre sealing washers
if
attached
to
the appliance pip
ewo
rl<.
(f) Refit a
new
heat exchanger in the reverse order using
new
f
ib
re sealing
was
hers.
NOTE:
The
heat exchanger will only
fi
t in one direction.
The
h
ea
't
exchanger pipes
ar
e
offset
and
th
e heat exchanger is
installed w
it
h
the
smaller
offset
:awards
the base
ot
!he
boiler.
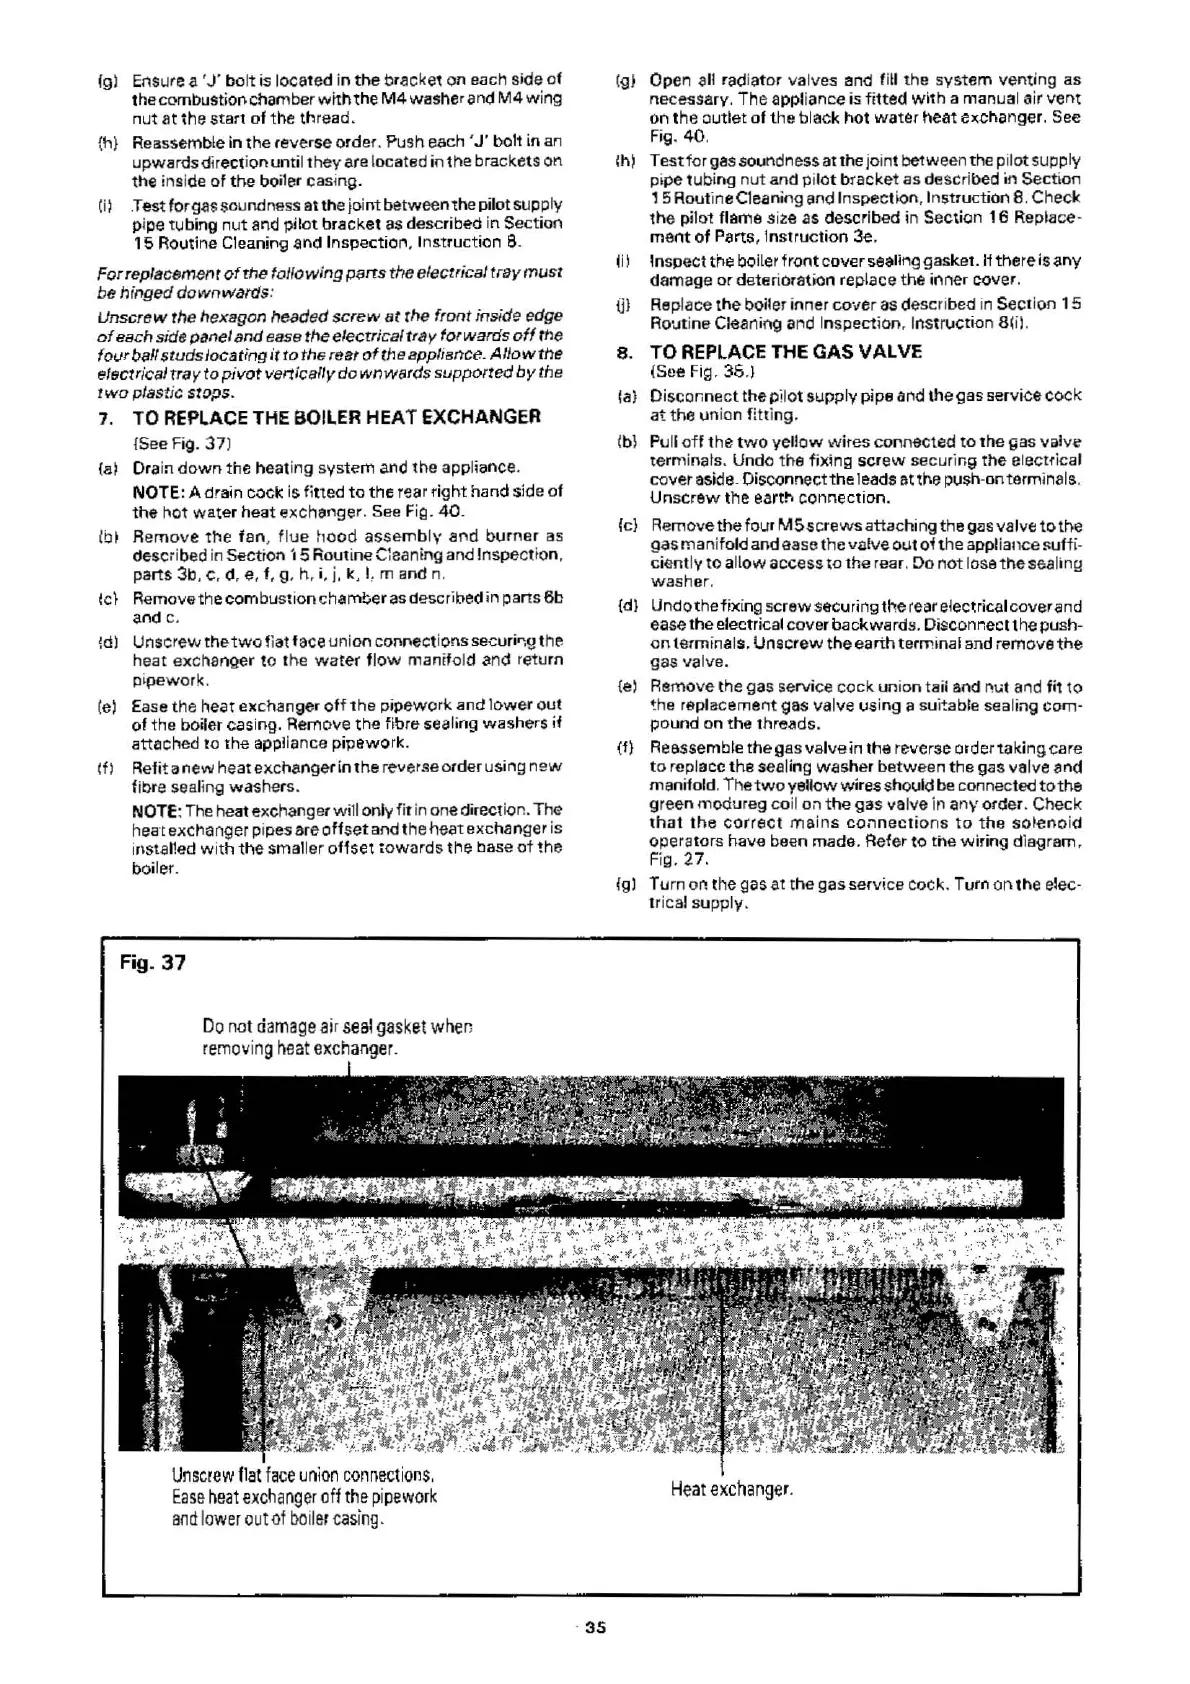
Fig_
37
Do
not
damage
ai
r
seal
gas
k
et
when
remov
i
ng
heat
exchanger
.
Unscrew
f
lat
face
union
connections.
Ease
heat
exchanger
oft
the
pi
pe
wo
rk
and
lo
we
r
out
of
boi
l
er
casi
ng
.
.
35
(g) Open all radi
at
or valves and fill the system
ven
ti
ng
as
ne
cessary. The appliance is
fitted
wit
h a manual air
vent
on
th
e outlet
of
the black
hot
wa
ter
heat exchanger.
See
Fig.
40
.
!h) Test for gas soundness
atthe
joint be1ween the pilot supply
pipe
tub
i
ng
nut
and pi
lot
bracket as
de
scribed in Section
, 5 Routine Cleaning and Inspection, Instruction 8. Check
the
pi
lo
t fl&me size as described in Se
ction
16
Repla
ce-
ment
of Parts, Instruction 3e.
li 1 Inspect the boiler fr
ont
cover
sea
ling
gasket.lfthere
is
any
damage
or
deterioration replace the inner cover.
til Replace the
bo
iler inner
cover
as
desc
ri
bed in Section
15
Routi
ne
Cleaning and Inspection. I
nst
ru
ction
8'
i
).
8.
TO
REPLACE
THE
GAS
VALVE
(See
Fig
.
35
.)
(a) Di
sconnect
the pilot supply pipe and the gas service cock
at
the
onion fi
tting.
(bl Pull
off
the
t
wo
yellow
wires connected
to
the
gas
valve
terminals. Undo
th
e fixing
screw
securir.9 the electrical
cover aside. Disconnect
th
e leads at the push-on terminals.
Unscrew
the
earth
connection
.
(c)
Rem
o
ve
the
four
MS
sc
r
ews
attaching the gas valve
to
the
gas manifold and
aaso t
he
valve out
of
the applia
nce
!:uft
i-
ci
e
nt
ly
to
all
ow
access to the rear. Do
not
lose
the
sealing
washer
.
(dl
Undothefix
ing screw securing
the
rear
elec
~
r
ical
cover and
ease
the
electrical cover backwards. Discon
r.eclt
he push-
on term
in
als.
Unscrew
the earth terminal and
re
move
the
gas valve.
{e) Remove the gas
se
rvice cock
un
ion tail and
l"!ut
and
fi1
to
!he
replacemMt gas valve usi
ng
a suitable sealing com-
pound on
the
threads.
(f)
Reassemble the
gas
valve in the reverse order
taking
care
to
replace the sealing washer between the gas valve a
nd
manifold. The
two
yellow
wi
res should
be
connected
to
the
green modureg
co
il
on
the
gas valve in
anv
order. Check
that
the
correct
ma
i
ns
connections
to
t
he
solen
oid
operators have
be
en made. Refer to t
he
wir
ing d
iagr
am,
Fig. 27.
fgl Turn 011
the
gas
at
t
he
gas service cock. Turn
or~
th
e elec·
trica! suppl
y.
Heat
exc
han
ger
.
 Loading...


