6
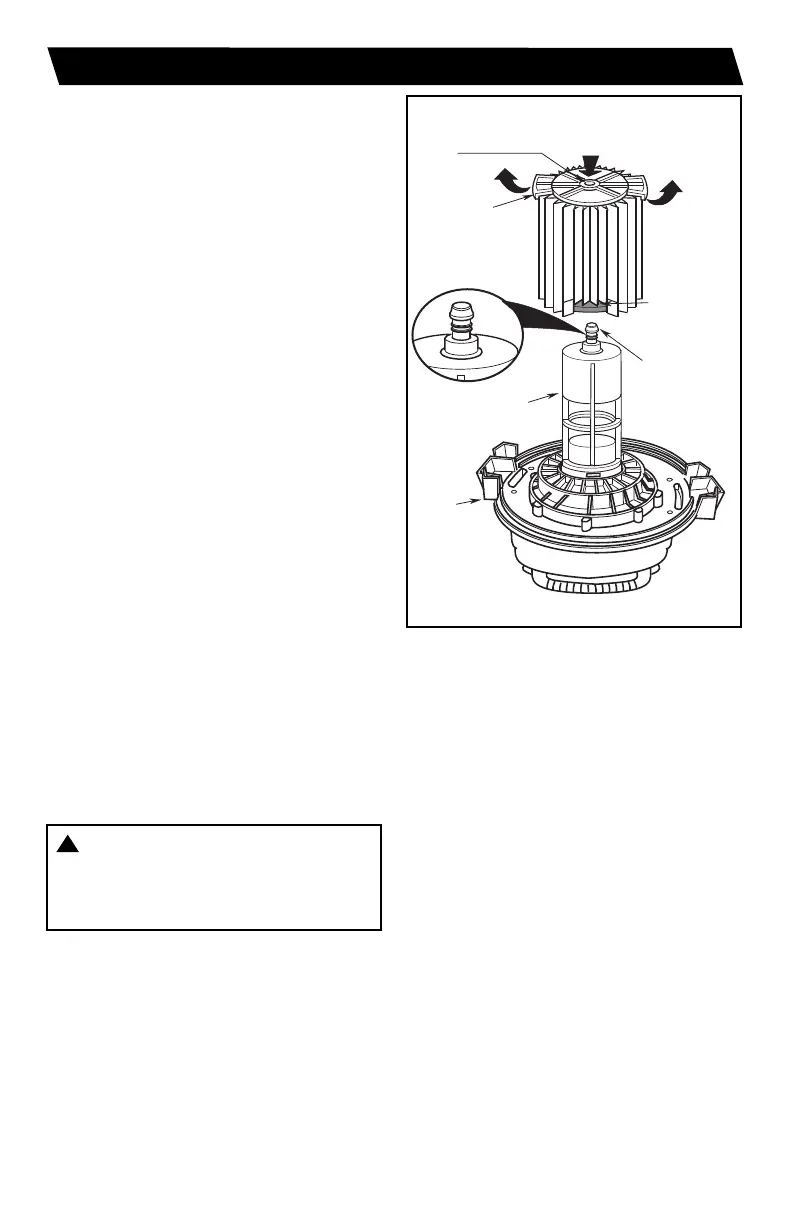
Removal and Installation
of the Qwik Lock™ Filter
Filter Removal:
1. Hold the filter tabs of the Qwik Lock™
filter in each hand.
2. With one thumb on the Qwik Lock™
stud, which protrudes through the
integrated filter plate, lift up on the
filter tabs while pushing down on the
stud.
3. This action will cause the filter to
release from the filter cage. Slide filter
off cage.
Filter Installation:
1. Carefully slide the Qwik Lock™ filter
over the filter cage and press down on
the outside edge of the filter until the
rubber gasket on the bottom of the
filter seats securely around the base
of the filter cage and against the lid.
2. Align the small center hole in the top
of the filter over the Qwik Lock™ stud
on the filter cage. Press firmly on top
of the filter near the stud to allow the
filter to snap over the ball on the end
of the stud. The filter is now attached.
Filter
Cage
Qwik
Lock™
Stud
Filter
Tabs (2)
Integrated Filter
Plate with Center
Hole
P
USH
D
OWN
P
ULL
U
P
Lid
Rubber
Gasket at
Bottom of
Filter
(
cutaway
v
iew)
NOTE: Failure to properly seat the
bottom gasket could result in debris
bypassing the filter.
WARNING: Do not operate
without filter cage and float, as they
prevent liquid from entering the
impeller and damaging the motor.
!
FILTER REMOVAL & INSTALLATION
SP6851-1 Workshop :SP6439-3_ES.qxd 9/20/13 11:58 AM Page 6