20 21
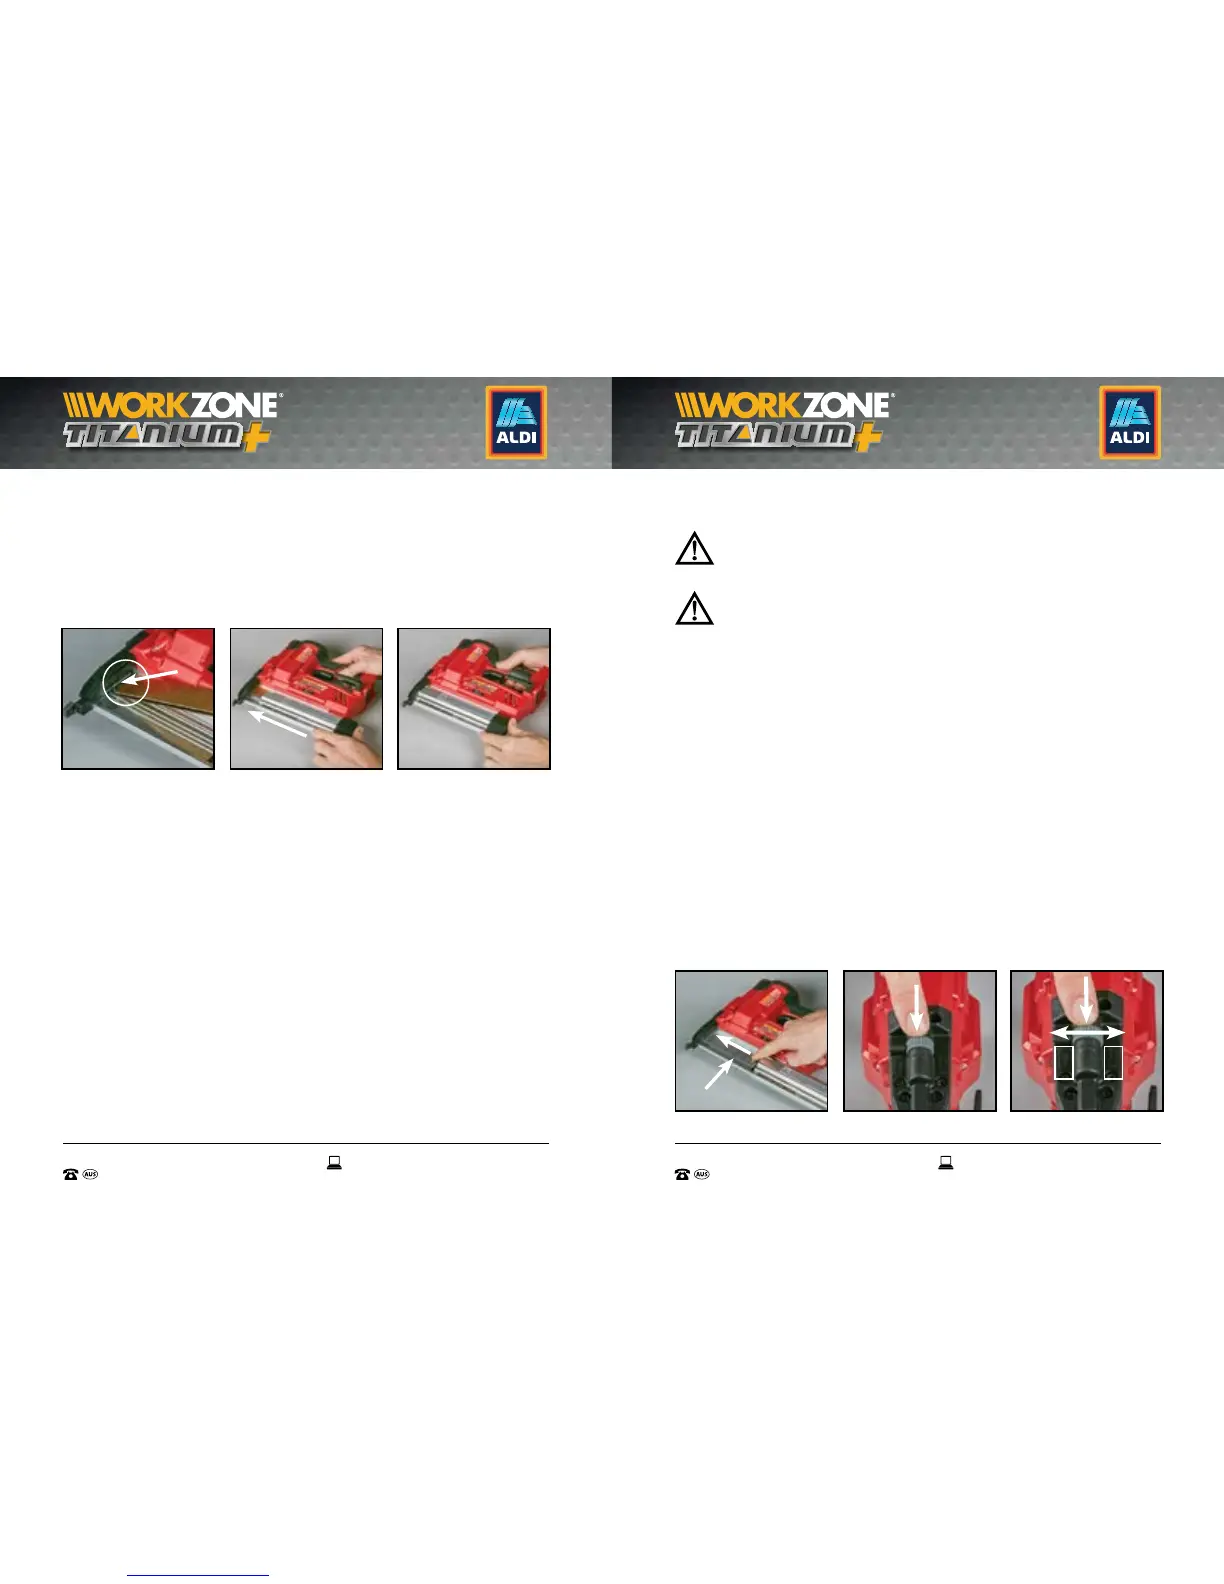
Ensure the end of the staple cartridge engages inside the guide rails at
the end of the magazine (Fig H).
3. Push the magazine (11) closed by pushing it up towards the safety
striker pin (1) end of the magazine until it closes securely (Fig I). The
magazine release latch (14) will engage and a “click” will be heard when
secure (Fig J).
B. Loading Nails
NOTE: Do not install nails of dierent sizes at the same time. Only 1 x
cartridge of the same size nail should be installed at each use. Loading
various nail sizes at one time will cause malfunction and void your warranty.
1. Press on the magazine release latch (14), to open the magazine (11)
(Fig E), ensuring you extend it out as far as it will release (Fig F).
2. To load nails, insert the cartridge of nails with the heads of the nails
facing to the top rear of the open magazine with the nail points facing
away (Fig K). Ensure the end of the nail cartridge engages inside the
guide rails at the end of the magazine (Fig H).
3. Push the magazine (11) closed by pushing it up towards the safety striker
pin (1) end of the magazine until it closes securely (Fig I). The magazine
release latch (14) will engage and a “click” will be heard when secure
(Fig J).
Depth Adjustment Wheel
WARNING: Keep the tool pointed away from yourself and others
when setting the depth adjustment. Failure to do so could result in
possible serious personal injury.
WARNING: Ensure to remove battery pack from the tool during
initial depth adjustment setting.
The depth adjustment wheel (3) (Fig L) is used for setting the depth of the
nail or the staple from the workpiece contact (nail/staple release) (2).
On each side of the depth adjustment wheel (3) is a symbol indicating
whether turning the wheel in that direction will increase or decrease the
nail / staple depth (Fig M). The range of the depth adjustment wheel (3)
is approx. 3mm.
1. When viewing the depth adjustment wheel (3) per Fig M, turning the
depth adjustment wheel (3) to the left will increase the depth of the nail
/ staple into the contact surface. If pushing all the way to the left, the nail
will be ush on the contact surface.
2. Turning the depth adjustment wheel (3) to the right will decrease the
depth of the nail / staple into the contact surface.
3. It is recommended to test the depth of adjustment doing a few test
shots, and then adjusting the wheel accordingly to reach the desired
depth required for the contact surface. Proceed to the next page for
Operation to start your product and check the adjustment.
H. I. J.
K. L. M.
“CLICK”