24 25
B. Contact Firing
1. Once the single/contact ring slider knob (9) is set to contact ring,
depress the trigger switch (6) (Fig U), and then depress the safety striker
pin ush on the contact surface to re a single nail / staple (Fig T).
2. Keeping your nger pressed on the trigger switch (6), lift the Brad
nailer / stapler away from the contact surface, hence also releasing the
safety striker pin (1), and place in the next position for the next nail or
staple to be red, again depressing the safety striker pin ush onto the
contact surface. The Brad nailer / stapler will automatically re another
staple or nail again (Fig V).
3. Repeat the process keeping your nger pressed on the trigger switch
(6), to continually re each nail/staple.
NOTE: The safety striker pin (1) MUST be depressed at the same time as
continually pressing the trigger switch (6), otherwise the Brad nailer /
stapler will not re / function.
WARNING: Do not keep the trigger switch (6) depressed when
the tool is not in use to prevent accidental ring.
Using the LED Worklight/s while using the
Brad Nailer / Stapler
CAUTION! LED is laser class 1! Do not look directly into the laser as this
may result in damage to the eyes.
1. To turn on the LED worklights while on the Brad nailer / stapler, press
on the LED worklight switch (7) before pressing on the trigger switch
(6) (Fig W/X).
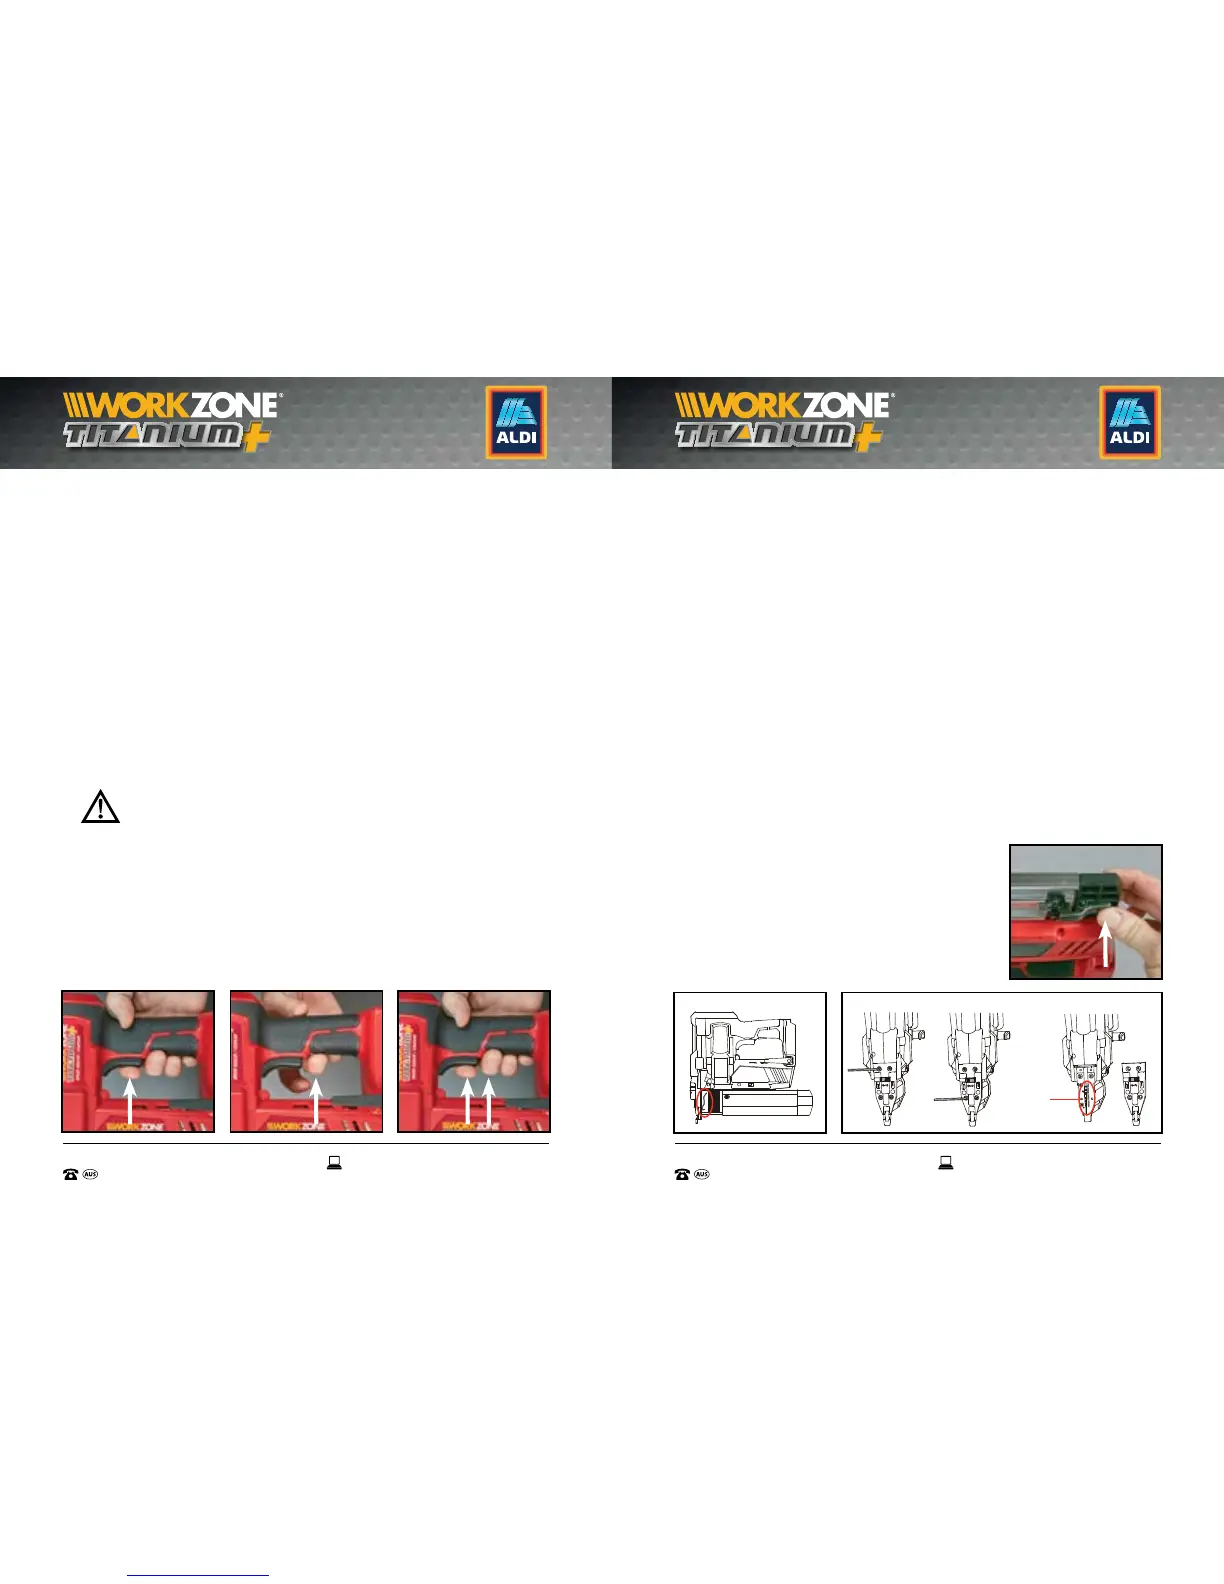
Removing jammed Nails / Staples
1. If the LED battery and function indicator (10) is ashing red (Fig N)
this indicates a jam in the magazine.
2. Remove the battery from the Brad nailer / stapler.
3. Open the magazine by pressing on the magazine release latch (14)
(Fig Y), and remove the nail or staple cartridge and the jammed nail or
staple (Fig Z).
4. Re-install nails or staples, re-install battery, and check the jam is
corrected. If corrected, the red light will be no longer ashing on the
LED battery and function indicator (10).
5. If the jam is still not corrected it means a nail or staple may be jammed
in the internal striking mechanism.
6. Remove the battery from the Brad nailer / stapler, then using the
supplied 3mm hex key (19), remove the 4 x hex screws located in front
of the depth adjustment wheel and remove the nosepiece. Remove the
jammed nail / staple; this may require using pliers (Fig AA).
7. When the jam is removed, reattach the nose
piece and resecure the 4 x hex screws using
the supplied 3mm hex key (19). Re-install nails
or staples, re-install battery, and check the jam
is corrected. If corrected, the red light will be
no longer ashing on the LED battery and
function indicator (10).
V. W. X.
Y.
Z. AA.
JAM