22 23
Operation
Checking the LED Battery and
function indicator
WARNING: Always keep the tool pointed
away from yourself and others when in
use. Failure to do so could result in possible
serious personal injury.
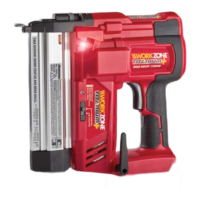
1. After installing the nail / staple cartridge into
the magazine, install your purchased fully
charged Xnity battery onto the brad nailer/
stapler per instructions on pages 19/20.
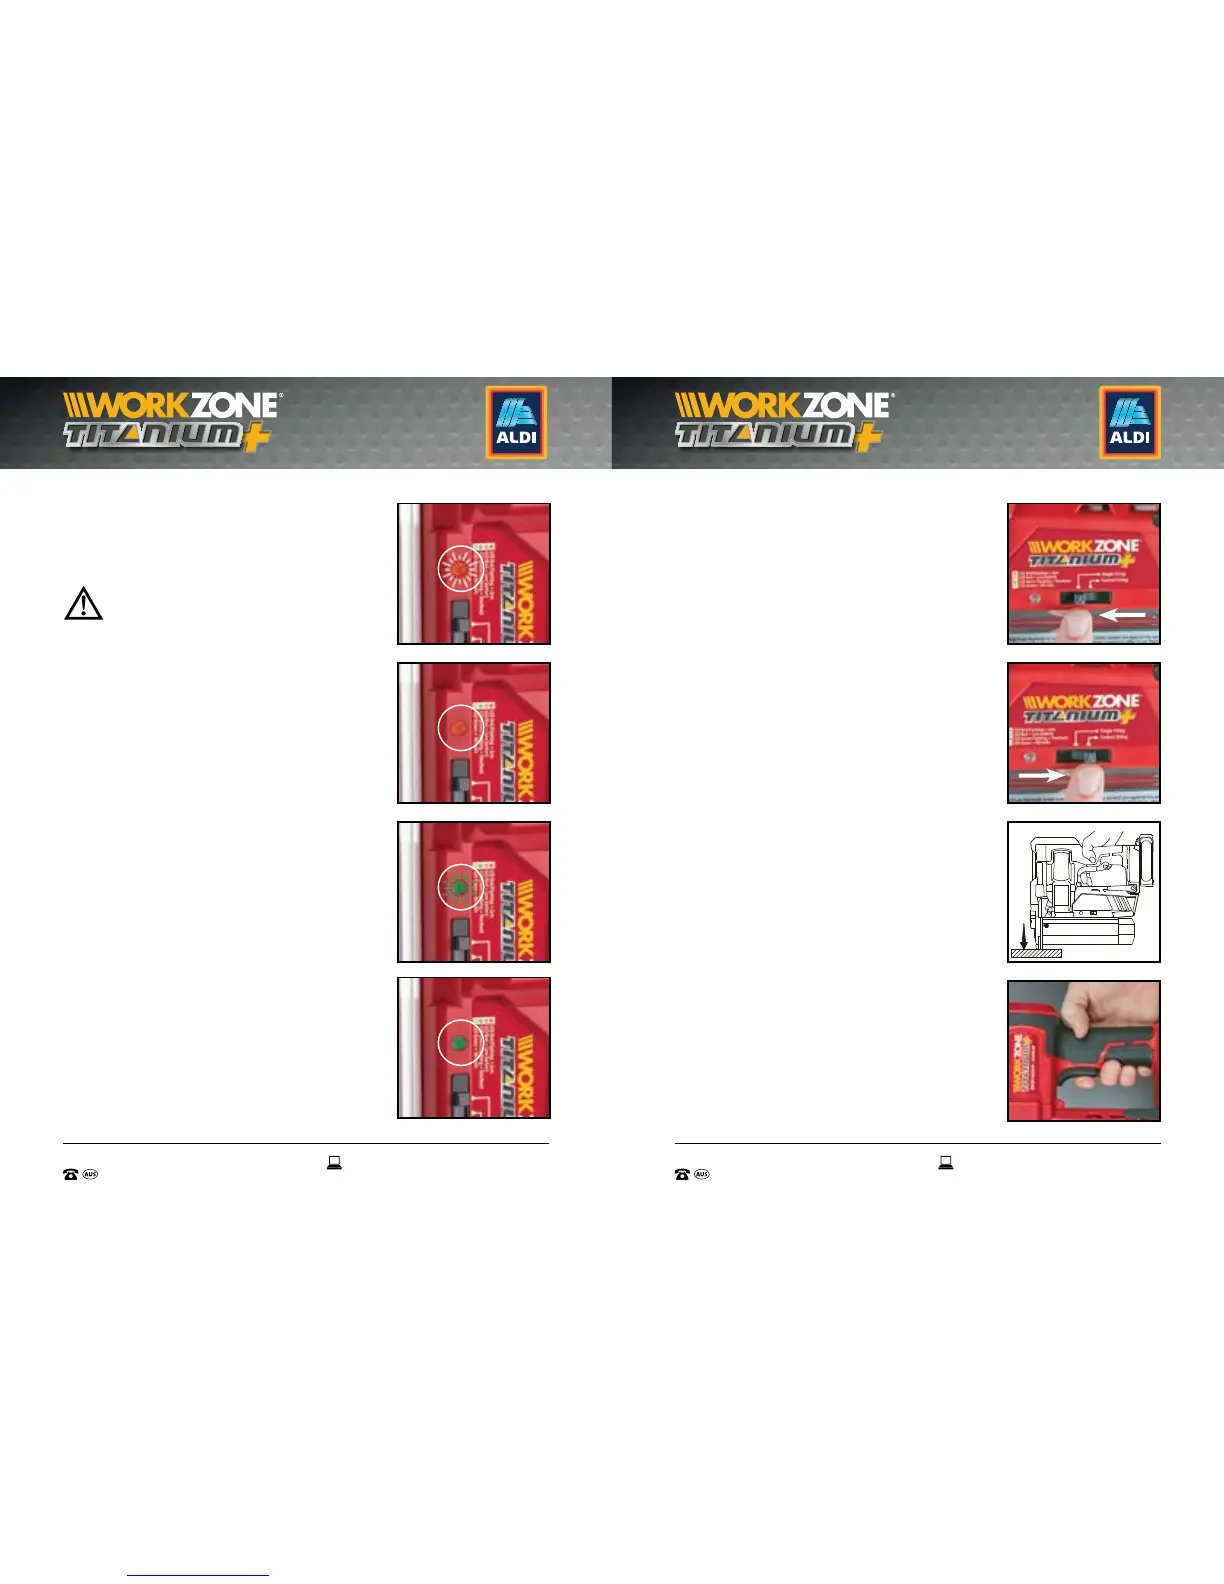
2. Check there are no lights lit up on the LED
battery and function indicator (10). If you have
loaded the nails or staples correctly, and the
battery is fully charged, no lights will be on.
3. If the LED battery and function indicator (10) is
ashing red this indicates there is a jam in the
magazine (Fig N). Refer to page 25 for xing
jams.
4. If the LED battery and function indicator (10) is
red, this indicates the battery is low on charge
(Fig O). Charge your purchased Xnity battery.
5. If the LED battery and function indicator (10)
is ashing green (Fig P), this indicates the brad
nailer / stapler has overheated. Refer to page
26 for further instruction.
6. If the LED Battery and function indicator (10)
is green (Fig Q), there are no nails/ staples
installed. Refer to pages 19/20 for installing
nails / staples.
Setting the Single or Contact Firing
Function
1. To set the ring function to single shots, slide
the single/contact ring slider knob (9) to the
left (Fig R). Single ring is suitable for precise
single nail / staple placement.
2. To set the ring function to multiple contact
shots, slide the single/contact ring slider
knob (9) to the right (Fig S). Continual contact
ring is good for quick and multiple nail /
staple ring.
A. Single Firing
1. Once the single/contact ring slider knob (9)
is set to single ring, depress the safety striker
pin ush on the contact surface (Fig T), and
then press the trigger switch (6) to re a single
nail or staple (Fig U).
2. Release the trigger switch (6), and lift the brad
nailer / stapler away from the contact surface,
hence also releasing the safety striker pin (1).
3. Repeat the process for single ring of
individual nails or staples.
NOTE: The safety striker pin (1) MUST be
depressed at the same time as pressing the
trigger switch (6), otherwise the Brad nailer /
stapler will not re / function.
Q. U.
P.
T.
O.
S.
N.
R.