Lawn Mowing Robot EN
11
4. Remote Mobile Control (only for specific model, please check
Technical data & Declaration of Conformity)
Your Landroid
®
L could be connected to smart phone. All the general settings could be set on your phone. It will also show the
current working status, even errors. For the details settings, please refer to the Landroid
®
L Wifi Connection Guide.
5. Boundary Wire Basics
5.1 Pegging the Boundary Wire
Use the Boundary Wire Distance Gauge (26) to set the correct distance
from the border of your lawn (More than 45cm *).
* This is the recommended distance. Use the provided distance gauge to
ensure proper installation.
If your neighbor also uses a Landroid
®
L, then you must keep a spacing of at
least 0.5 metres between your Boundary Wire and your neighbors.
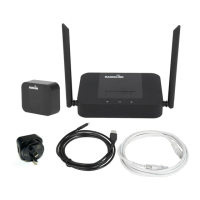
The boundary wire must outline the intended mowing area exactly. Your
Landroid
®
Lwill become confused by extra bends or coils of Boundary
Wire that are not part of its mowing area (See Fig. H). If there is excess
Boundary Wire after the mowing area has been outlined, then cut it off and
store this additional wire in a separate location. However, it is important to
leave the necessary length where it connects to the Charging Base so it can be connected and still remain buried.
5.2 Burying the Boundary Wire
If you are planning to bury the Boundary Wire then it should be noted that when entering its Charging Base for the first time,
your Landroid
®
L may find problems with the way you have laid the wire. It is recommended to first peg down the Boundary
Wire to the lawn so it is easy to make adjustments if necessary. This will allow the Landroid
®
L to become adjusted to its new
environment and ensures it will successfully work with the charging base before the Boundary Wire is buried.
When you have completed installing the boundary wire, it is recommended that you ask Landroid
®
L to follow the boundary wire
by pressing the home button.
Whilst observing Landroid
®
L locating the charging station you can then make alterations to the boundary wire route to ensure
trouble free tracking of the boundary wire by Landroid
®
L when locating the charging station.
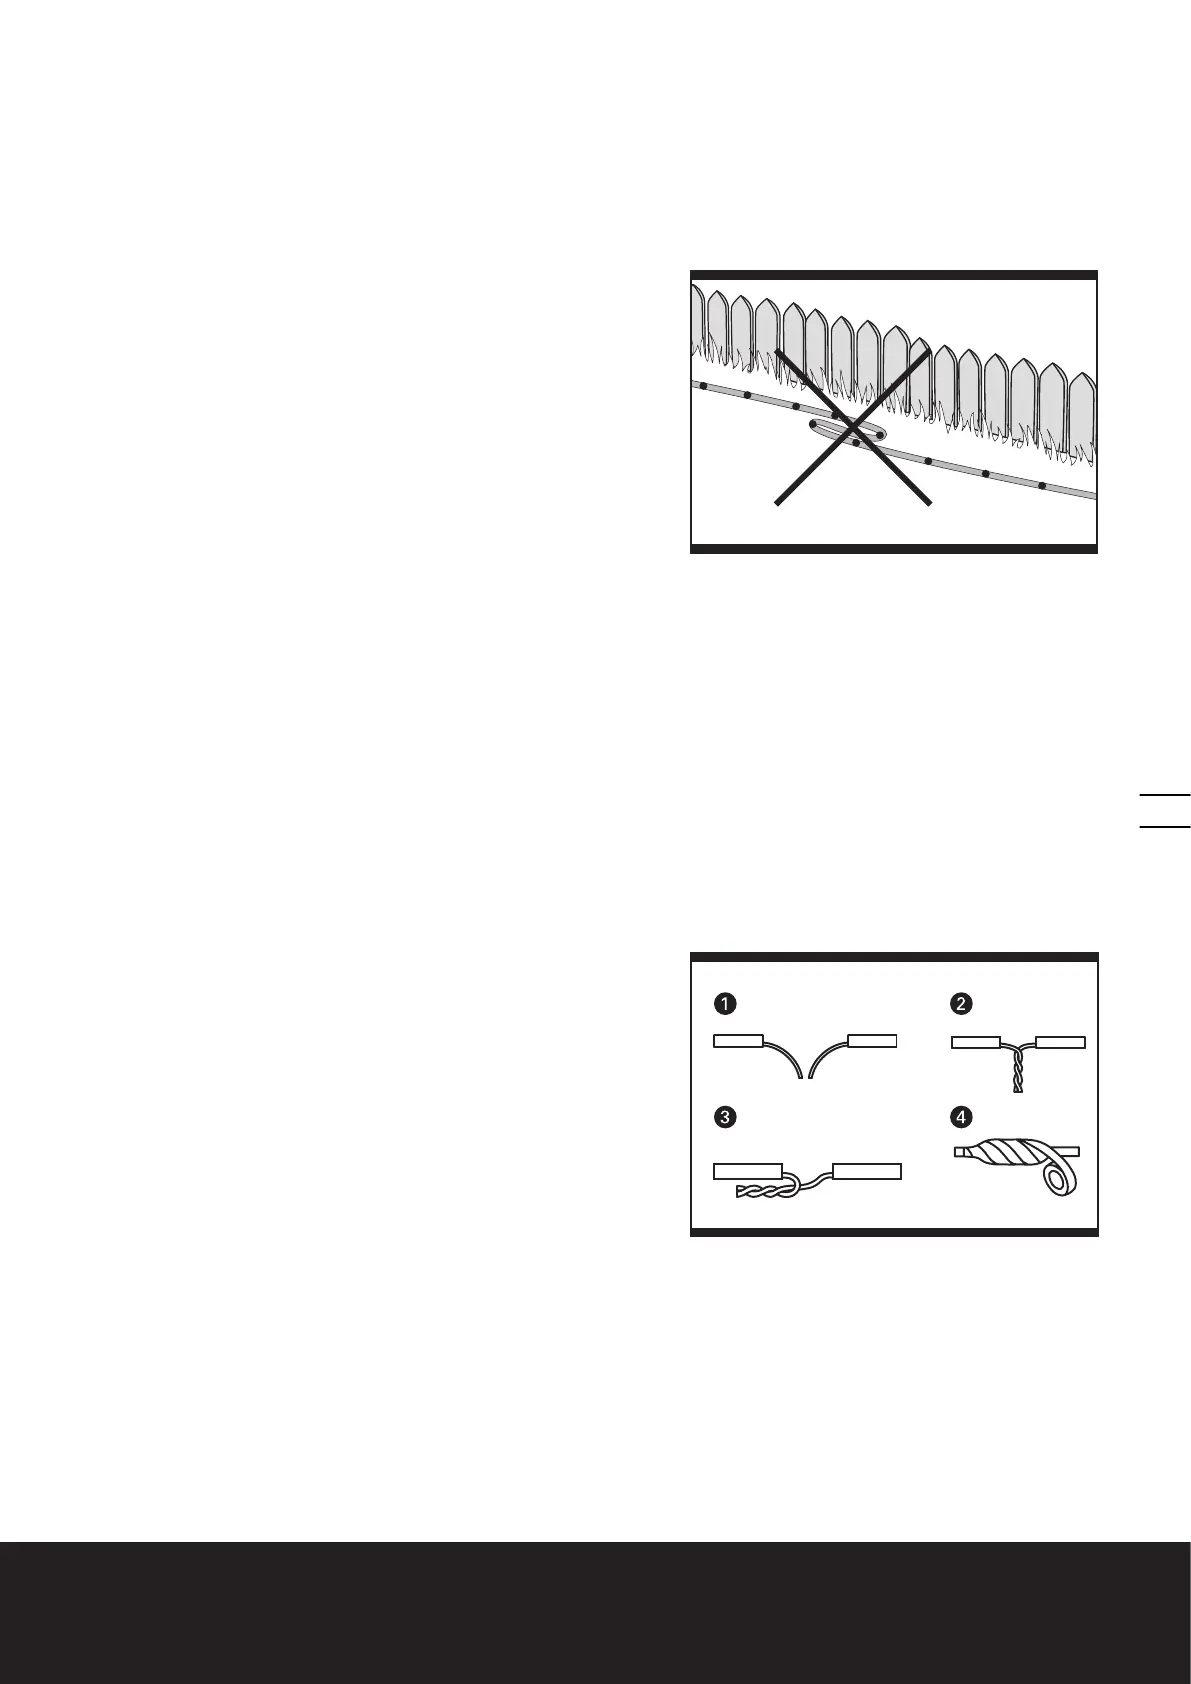
5.3 Joining the Boundary Wire
The Boundary Wire (23) can be extended simply by splicing the ends and
connecting it to the ends of another piece of wire. You can use insulating
tape to secure the joined part of the wire. (See Fig. I)
H
I

 Loading...