Maintenance
EN
26
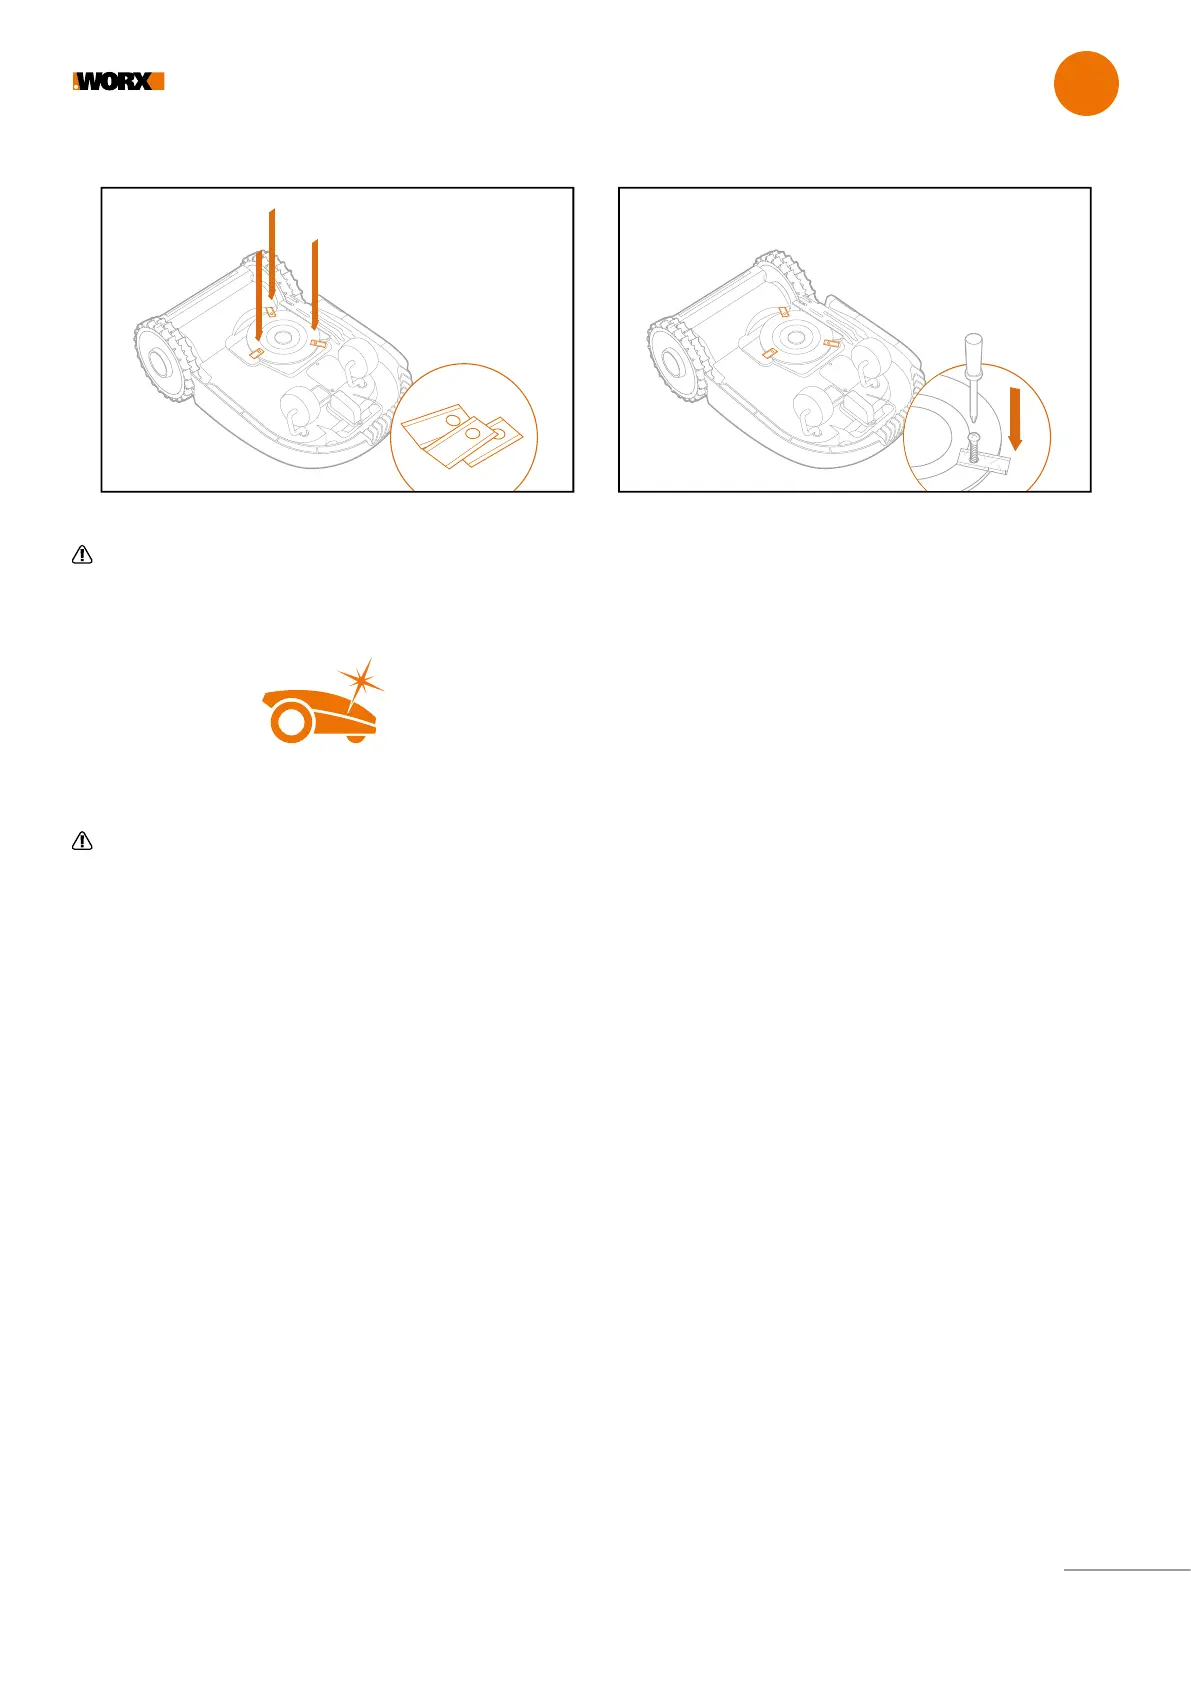
Firmly screw on the new blades (fig. 5 - 6)
6 5
Attention: When fitting new blades, make sure you replace ALL the blades.
• Always use new screws when fitting blades. This is important to ensure blade retention and balance the blade turning disc. Failure to
use new screws could cause serious injury
• Important: After screwing the blade to the blade disc, make sure the blade is able to spin freely
KEEP IT CLEAN
Your Landroid should be cleaned regularly. This helps keep it in good condition, especially removing dirt, debris and the build-up of grass
from daily mowing. Turn Landroid off before cleaning it. For extra safety, remove the battery.
WARNING! DO NOT use a hose, high pressure washer or otherwise pour running water on your Landroid. High pressure water can go
inside the sealings and damage electronic and mechanical parts.
Cleaning the upper body
• Clean with a spray bottle filled with water. Don’t use solvents or polishers
• Use a brush or a clean cloth to remove built-up dirt
Cleaning the Bottom
• Flip Landroid upside down
• Remove debris and grass clippings using a brush to remove
• Be careful not to touch the blades with your hands. Wear gloves for protection
• Clean the blade disc, the chassis and the front wheel(s) thoroughly with a soft brush or moist rag
• Rotate the blade disc to ensure it rotates freely. Remove any obstructions. Remove any lodged debris so that they don’t cause a crack
in the blade disk. Even the tiniest crack effects mowing performance
• Check the blades spin freely around the fixing screws. Remove any obstructions
Cleaning the drive wheels
• Remove mud from wheels with a brush in order to ensure good grip of the tread
Clearing the charging contacts
• Clean the contact pins located on the charging base and the charging strips located on the Landroid using a cloth
• Periodically remove any build-up of grass clippings or debris around the contact pins and the charging strips to ensure Landroid
successfully charges each time

 Loading...