13
3
in
1
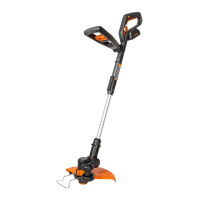
Grass Trimmer/Edger
WG169E WG169E.5
WG169E.9
AUTOMATIC LINE FEED SYSTEM
When initially switching on the trimmer, a small length
of line is fed out. Each time the tool is started from rest
it will advance about 6.35mm of trimmer line.
A ‘clattering’ noise will be heard when the lines hit the
Line Cutter. DO NOT BE ALARMED this is quite normal.
After about 5 seconds the line will be cut to the correct
length and the noise will reduce as the motor gains full
speed.
If the noise of the line being cut can’t be heard, more
line will need to be fed out.
To feed more line, it is first necessary to allow the
trimmer to stop completely; it must come to a
complete rest, then restart, allowing the motor to reach
full speed.
Repeat above until you hear the line hitting against the
Line Cutter.
TO MANUALLY FEED THE LINE
(See Fig. K1)
Turn off the trimmer and remove the battery.
If required, line can be fed out manually.
To operate, press and release manual Line Feed Button
(17), while gently pulling out the line until it is long
enough to reach the Line Cutter.
If the line extends past the Line Cutter, too much line
has been fed out.
If too much line is fed out, remove the Spool Cap and
turn Spool counter-clockwise until the line is at the
desired length.
TO REMOVE THE SPOOL CAP COVER
(See Fig. K2)
Press and hold in the two Cap Release Latches (19) (See
Fig. K2).
Pull the Spool Cap Cover (18) away from the Cutting
Head (21). Keep the Spool Cap Cover and the inside
of the Cutting Head clean from debris. To replace
the Spool Cap Cover, press it firmly onto the Spool
Holder. Ensure that it is correctly connected by trying
to remove it without depressing the two Cap Release
Latches.
REPLACE THE TRIMMER LINE AND SPOOL
(See Fig. K3).
Turn off the trimmer and remove the battery.
Remove Spool Cap Cover.
Remove the old Spool from Spool Holder. Clear any
broken line or cutting debris from the spool area. Pull
the line from the new replacement Spool through the
22
18
19
20
21
17

 Loading...