13
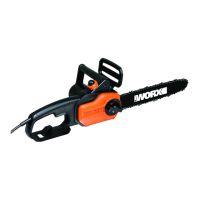
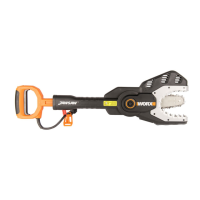
ASSEMBLY
WARNING! Do not connect the
chain saw to the power supply
before it is completely assembled.
Always use gloves when handling the
chain.
CHAIN AND GUIDE BAR ASSEMBLY
1. Unpack all parts carefully.
2. Place the chain saw on a solid, level
surface.
3. Use only genuine WORX chains
designed for Guide Bar.
4. Slide the Chain (10) in the slot around the
Guide Bar (9). Ensure the Chain is in correct
running direction by comparing it to the
Chain Direction Symbol (16) found on the
saw body. Ensure the Bar Tensioning Plate
(22) is facing outwards. (See Fig. A)
5. Fit the Chain onto the Drive Sprocket (15),
so that the Fastening Bar Bolt (19) and
the two Bar Locating Tabs (20) on the Bar
Clamp (18) into the keyway of the opening
on the Guide Bar (9). (See fig. B )
6. Check to see if all parts are seated properly.
(See Fig. C )
NOTE: Chain should rotate freely and
be free of kinks.
7. Fit the Chain Cover (12) and tighten
the Chain Cover by turning the Chain
Tensioning Knob (11) clockwise until it is
tight. (See Fig. D)
WARNING! The chain is not
yet tensioned. Tensioning the
chain applies as described under
“TENSIONING CHAIN”. The chain now
needs to be inspected to make sure it is
properly tensioned.
TENSIONING CHAIN (See Fig. E)
NOTE: New saw chains will stretch. Check the
chain tension frequently when first used and
tighten when the Chain (10) becomes loose
around the Guide Bar (9).
WARNING:
• Unplug chain saw from power source
before adjusting saw chain tension.
• Cutting edges on chain are sharp.
Use protective gloves when handling
chain.
• Maintain proper chain tension always.
A loose chain will increase the risk
of kickback. A loose chain may jump
out of guide bar groove. This may
injure operator and damage chain. A
loose chain will cause chain, bar, and
sprocket to wear rapidly.
1. Place the chain saw on any suitable flat
surface.
2. Turn the Chain Tensioning Knob (11)
clockwise until it is hand tight. The tension
is automatically set while the Chain
Tensioning Knob is being tightened.
The ratchet mechanism prevents the chain
tension from loosening.
3. Double check the tension set by the
automatic Chain Tensioning Knob. The
correct chain tension is reached when the
Chain (10) can be raised approx. 0.12–
0.24” (3-6mm) from the Guide Bar (9) in the
center. This should be done by using one
hand to raise the chain against the weight
of the machine.
4. The Chain will stretch from use and lose
proper tension. To turn knob counter
clockwise (3x), secure the chain cover, and
retension the chain simply repeat steps 1 -
3 listed above.
LUBRICATION
IMPORTANT: The chain saw is
not supplied filled with oil. It is
essential to fill with oil before use. Never
operate the chain saw without chain
oil or at an empty oil tank level, as this
will result in extensive damage to the
product.
Filling oil tank:
1. Set chain saw on any suitable surface with
Oil Filler Cap (5) facing upward.
2. Clean area around the Oil Filler Cap with
cloth and unscrew the cap by turning it
counter clockwise.
3. Add bar and chain oil until reservoir is full.
4. Avoid dirt or debris entering oil tank,
refit Oil Filler Cap and tighten by turning
clockwise until hand tight.
 Loading...