9
EN
4. START THE LANDROID VISION
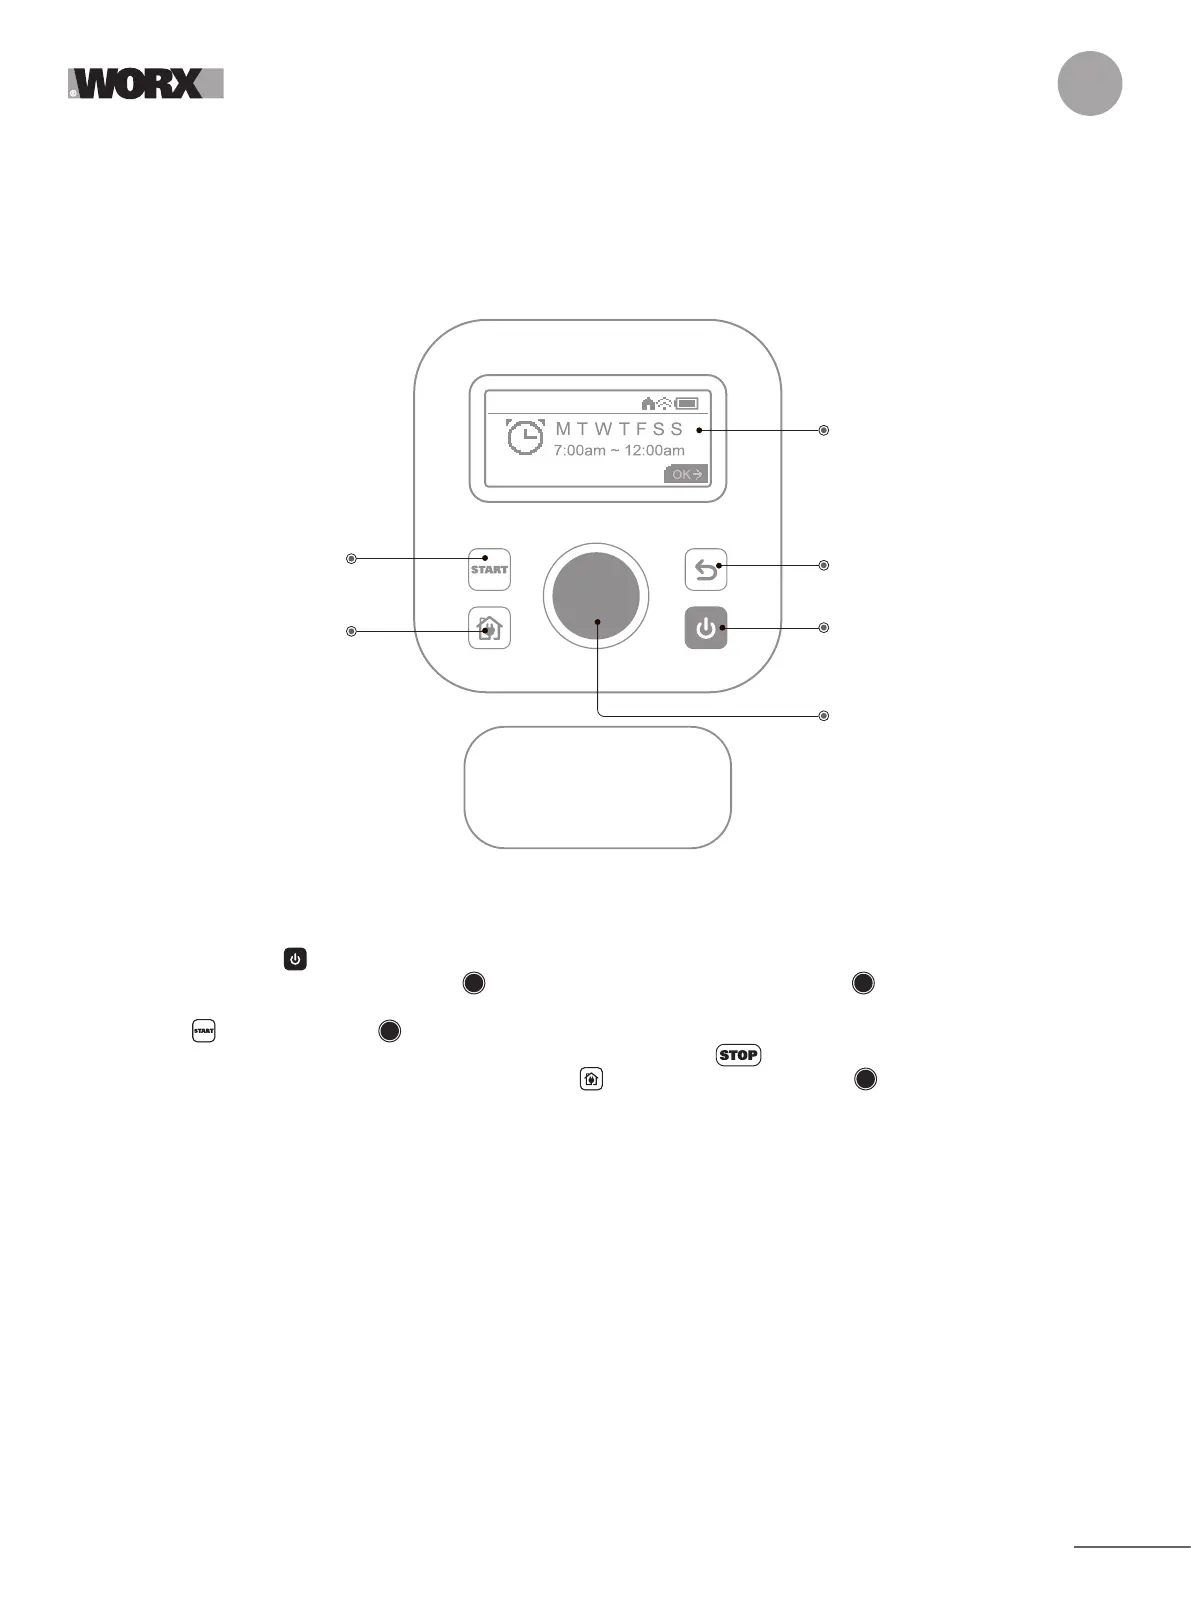
Get familiar with the control panel
Landroid Vision’s control panel provides the key functions in a minimalistic design.
For advanced functions, the free Landroid Vision App provides further options in a richer interface: your smartphone.
Wed.11/29 09:00PM
STOP
RETURN
Back to proceeding menu
POWER ON/OFF
Turns Landroid Vision on and off
DISABLING DEVICE
Prevents operation of
Landroid Vision
KNOB (Select and Enter)
DISPLAY
HOME
Sends Landroid Vision to its
charging base during operation
and activates charging
START
start mowing
4.1 Start Landroid Vision (See Fig. 29)
A. Position Landroid Vision in the charging base and get it charged.
B. Press and hold down until the display lights up.
C. Enter the default PIN code 0000 by pressing three times. The display will show 0000. Press again to confirm. The
display will show “PIN code OK”.
D. Press the button and then the button to confirm. The Landroid Vision will start mowing the lawn.
E. You can stop the Landroid Vision at any time by pressing the large red button .
F. To send the Landroid Vision to the charging base, press the button and confirm by pressing .
NOTE: For optimal performance of the Landroid Vision, it is recommended to perform “Update the software” during its initial
setup.
4.2 Update the software
It is recommended you to update the software to the latest firmware. It helps Landroid Vision become smarter. Please note that
Landroid Vision should be updated to the latest firmware at the first time.
Over-the-Air (OTA) updates
If your Landroid Vision is connected to your Wi-Fi network, you will be notified that new software is available via the App. Once you
confirm, the update will happen automatically Over-the-Air.
NOTE: Make sure Landroid Vision is charging or the battery capacity has reached 50% prior to starting the firmware update.
4.3 Single zone: Identify the zone (See Fig. 30 - Fig. 31)
During the initial startup, Landroid Vision needs to confirm the working area. If you have a single lawn, please follow the steps
below:
A. Position Landroid Vision in the charging base within the designated working area and ensure it is charged.
B. Start Landroid Vision, and it will exit the charging base to search for the lawn edge.
C. Upon encountering the lawn edge for the first time, Landroid Vision will rotate in place, and a message “Is it your identified
 Loading...