EasyManuals Logo

Worx WR206E Installation Manual

Worx WR206E
16 pages
To Next Page IconTo Next Page
To Previous Page IconTo Previous Page
Page #10 background imageLoading...
Page #10 background image
10
EN
zone” will be displayed on the screen.
D. Press to confirm “Yes” and Landroid Vision will start working.
4.4 Multi-zone: Lawn explore (See Fig. 32 - Fig. 33)
If your lawn is multi-zone, Landroid Vision needs to follow the lawn edge in a circle to explore the zone during the initial startup.
Steps to explore zones:
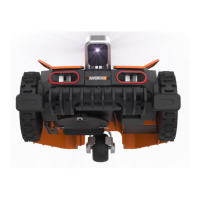
A. Position the Landroid Vision inside the working area, in the charging base and get it charged.
B. Rotate clockwise to access the main menu, select “General settings” and press .
C. Rotate to select “Lawn explore”, press to confirm.
D. Landroid Vision will start from and return to charging base to complete the zone exploration process.
NOTE: Make sure the first time Landroid Vision starts at the charging base and has at least 50% battery.
The App is being prepared for you to fully take advantage of this feature. Please stay tuned for upcoming OTA upda-
tes.

Other manuals for Worx WR206E

Questions and Answers:

Question and Answer IconNeed help?

Do you have a question about the Worx WR206E and is the answer not in the manual?

Worx WR206E Specifications

General IconGeneral
TypeRobotic lawn mower
BluetoothYes
Noise level59 dB
Display typeLCD
Cutting width180 mm
Product colorBlack, Orange, Red, Silver
Cutting systemRotary blades
Number of blades3
Number of wheels3 wheel(s)
Maximum lawn area600 m²
Mulching function-
Maximum cutting height60 mm
Minimum cutting height30 mm
Suitable for slope up to30 %
International Protection (IP) codeIPX5
Battery typeBuilt-in battery
Power sourceBattery
Battery capacity2 Ah
Weight and Dimensions IconWeight and Dimensions
Depth626 mm
Width460 mm
Height265 mm
Weight13500 g

Related product manuals