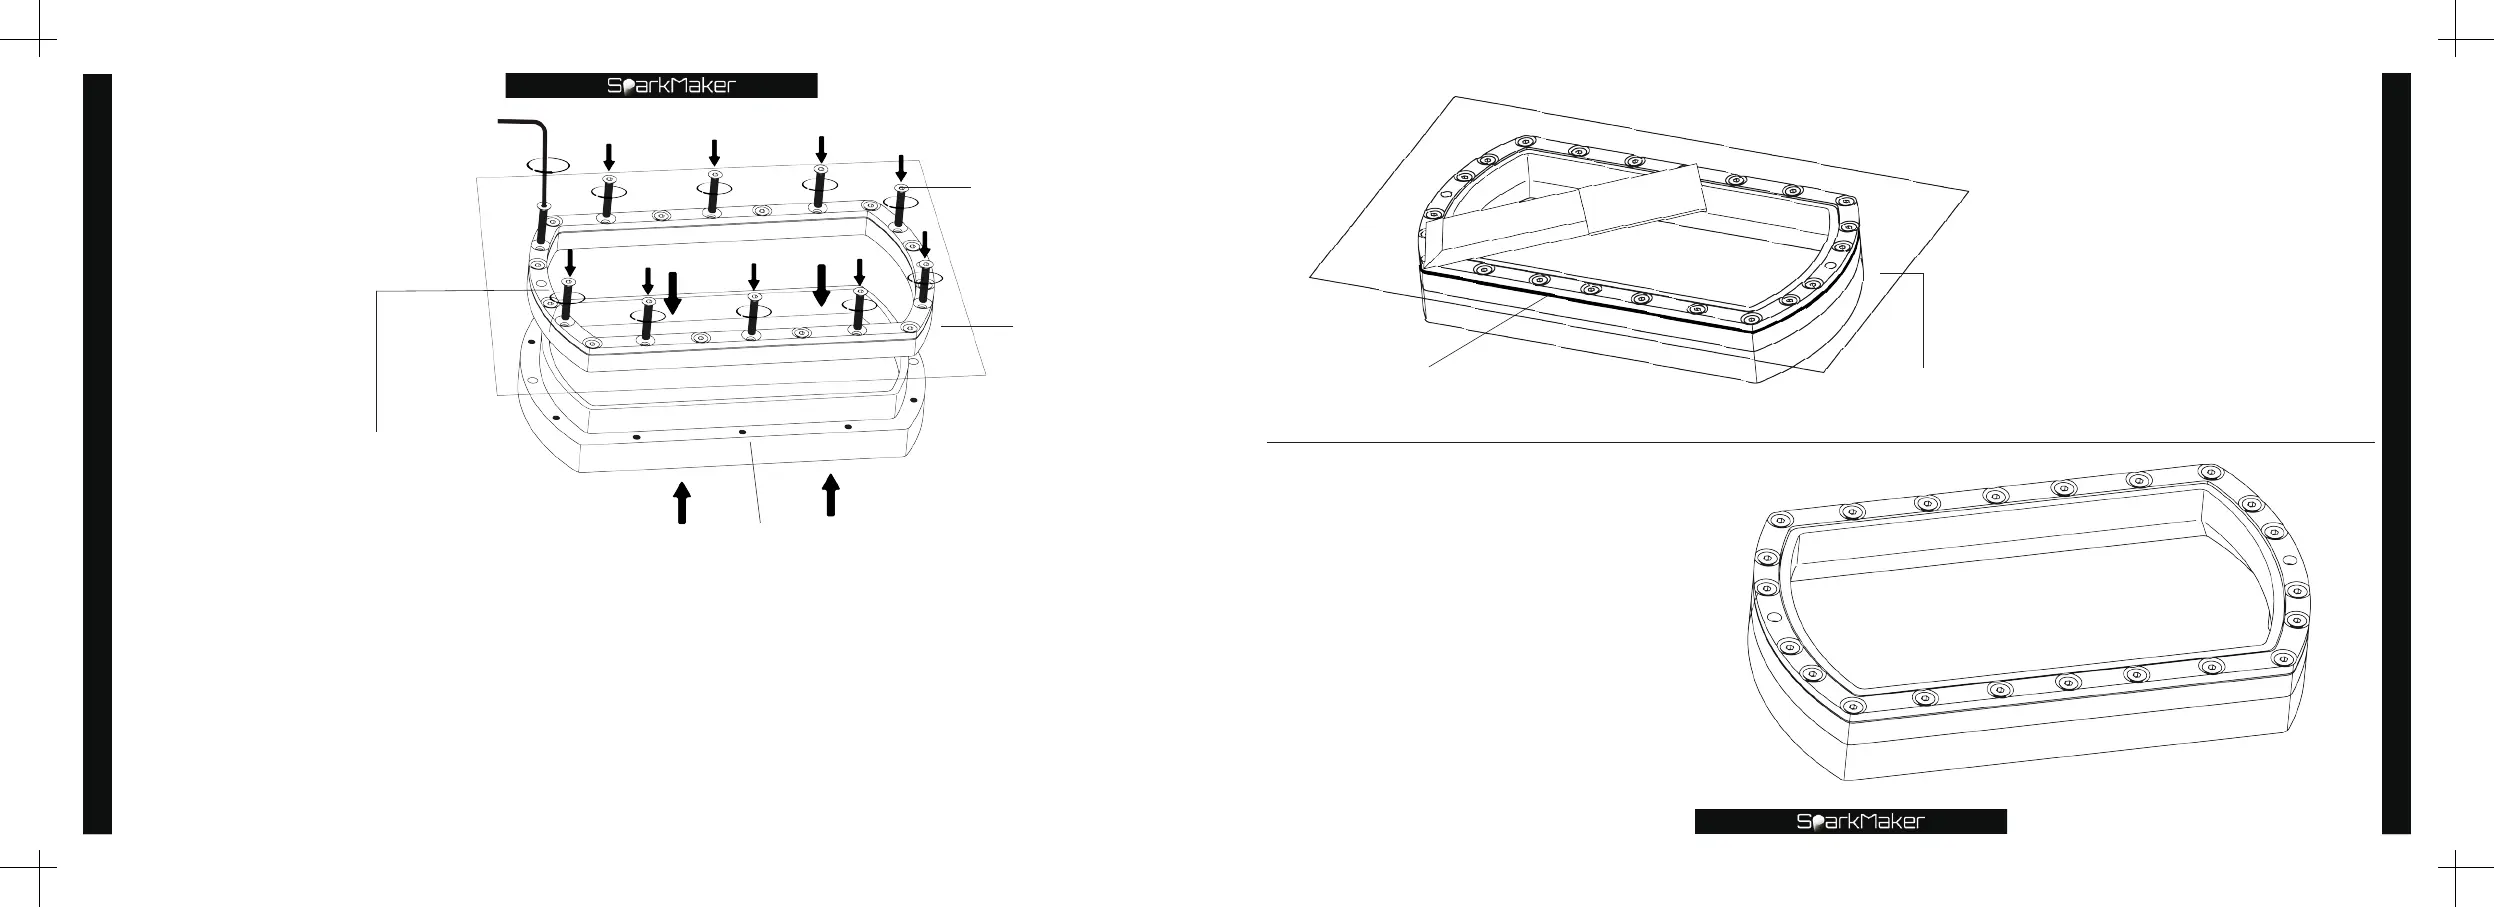
52
Small hex wrench
M3 long screw
Lower layer of the tank
FEP lm
Upper layer of the tank
Insert 10 M3 long screws into the remaining holes
,
use a small hex wrench to tighten the
screws clockwise
,
so that the lower layer of the tank is tightly attached to the upper layer
of the tank
,
and the rubber washer is pressed to tighten the FEP film.
*
Notice:
❶
Do not overtighten the individual screws so that the other screws cannot be tightened. The screws
should be tightened evenly.
❷
Make sure that the lower and top layer of the tank are tightly pressed so that the FEP film is higher than
the lower plane of the tank
,
and all the screw heads do not protrude to hinder the tank installation.
Replace the FEP film
53
Use a knife along the
outer edge of the tank to
remove the excess FEP
film and rubber washer
neatly.
*
Notice:
❶
Please use the knife carefully
to avoid accidental injury.
❷
Do not damage the FEP film in
the tank.
❸
Do not scratch the tank.
Outer edge of the tank
FEP lm
knife
Get a new tank.
*
Notice:
Before installing and using
,
clean the
tank with alcohol wipes to ensure that
there is no obstruction on the FEP film
and no resin residue on the tank.
Replace the FEP film