7-5
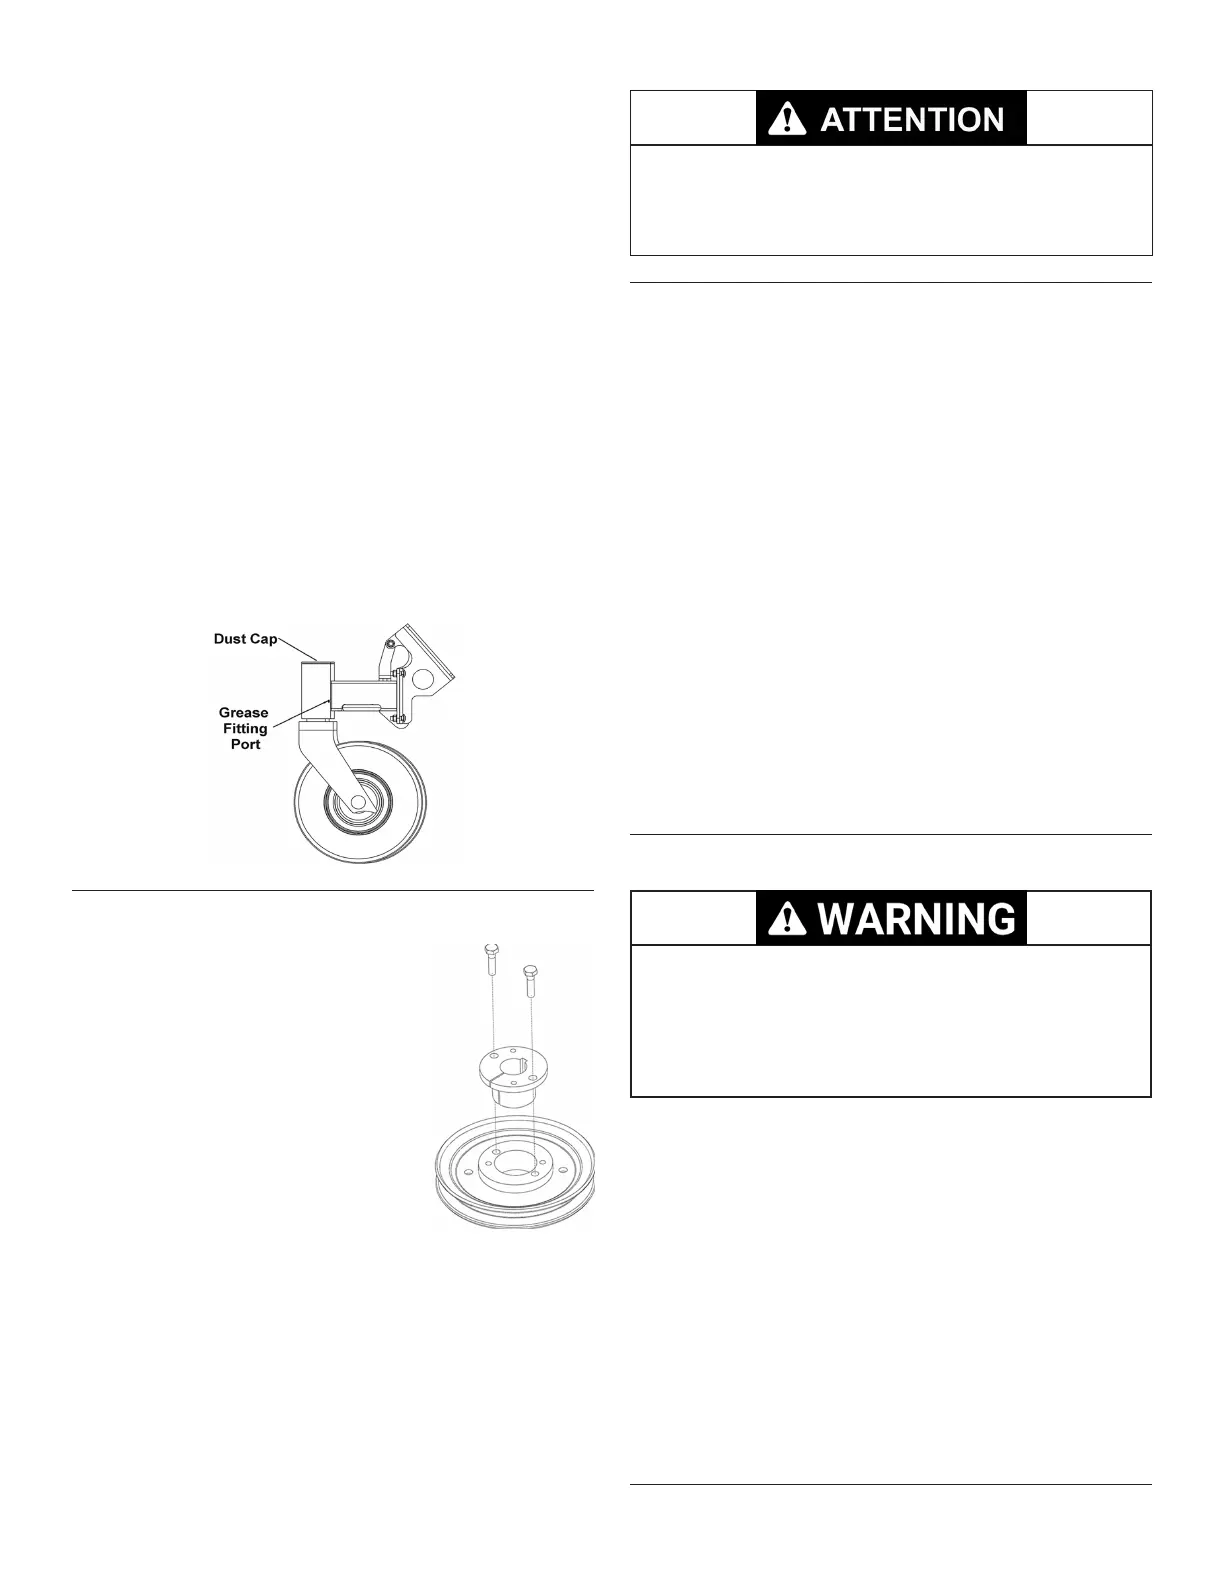
Lubrication
Your machine is made with sealed bearings, oil
based bushings and with limited grease ttings
therefore only the front caster pivots need to be
greased. (See maintenance chart for service
intervals) Use lithium complex or compatible base
grease.
1. Set parking brake, stop the engine and remove
the key.
2. Remove hex bolt from the ll port and install a
zerk tting
3. Fill until grease begins to ooze out from the
bearings.
4. Remove zerk tting and re-install hex bolt. If
tting is left installed during normal operation it
may become damaged.
5. Wipe o excess grease.
• Do not use spray lube of any kind on choke
and/or throttle cables.
Spindle/Drive Pulley R&R
1. Remove the two (2) bolts from
split hub. These are 1/4-20
thread and should not require
excessive force. If they are
stuck, a tap with a hammer can
be used to help loosen them.
2. Re-install bolts into the threaded
holes of the hub.
3. Slowly tighten each bolt,
alternating as you tighten bolts
against the pulley.
4. The hub will separate from the pulley.
5. Replace grade 8 bolts and install in reverse
order using the assembly holes to tighten
hub onto pulley and spindle shaft. Do not
overtorque.
We recommend using new grade 8 bolts when re-
installing the hub to the pulley in order to ensure
maximum performance.
Do not use a gear puller. It will not pull the hub
o and may frustrate you. Properly performed
this procedure should not require excessive
force.
Cutting Blades
In order to maintain the best cut, it is important that
the blades are well sharpened and not damaged.
Bent or cracked blades or blades with large nicks
need to be replaced. Blades must be balanced after
sharpening.
To change the blades:
1. Stop engine, remove the key and wait for all
moving parts to stop.
2. Engage the parking brake
3. Lift front of mower and secure in the raised
position with jack stands.
4. Remove the blade bolt by turning
counterclockwise.
5. Install new or re-sharpened blade. (Ensure the
blade spacers are reinstalled with the same qty
and location)
6. Torque blade bolt to 70-80 ft./lbs. / 95-108 N
Battery Service
CALIFORNIA Proposition 65 Warning. Battery
posts, terminals, and related accessories
contain lead and lead compounds, chemicals
known by the state of California to cause
cancer and reproductive harm. Wash hands
after handling.
The battery is 12 volts and is a maintenance free
battery. Charge the battery only if it will not start the
machine properly.
Remove the battery from the machine before
charging.
Follow the instructions of the battery charger for
proper and safe charging of the battery.
To access the battery, rst, park the machine safely.
Lift the seat and remove battery cover.
Follow all warnings and cautions on the battery label
and issued by the battery manufacturer.