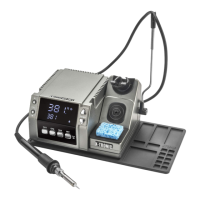
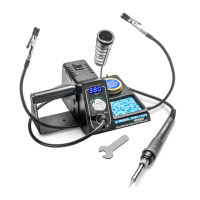
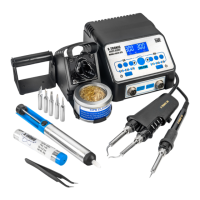
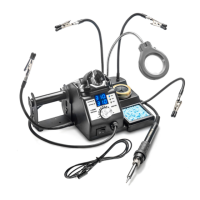
The X-TRONIC USA 4040-PRO-X is a professional soldering and hot air rework station designed for reliability and precision. It combines a 75W soldering iron and a 600W hot air gun in a single unit, offering a versatile solution for various soldering and desoldering tasks.
Function Description:
The 4040-PRO-X serves as a dual-function station, providing both a soldering iron for traditional soldering applications and a hot air gun for surface-mount device (SMD) rework, heat shrinking, and other heat-related tasks. The unit features independent power switches for the soldering iron and hot air gun, allowing for simultaneous or individual operation. It incorporates a PID (Proportional-Integral-Derivative) indicator for precise temperature control and stability. The hot air gun includes an auto cool-down and sleep/standby mode for safety and to extend the life of the heating element. The soldering iron also has a sleep function to conserve energy and prolong tip life. The unit offers temperature conversion between Celsius and Fahrenheit and a mute/unmute function for audible alerts.
Important Technical Specifications:
General:
- Model: XTR-4040-PRO-X
- Power Consumption: 700 Watts
- Power Cord: USA Type B - 3-pin Grounded Plug
- Voltage: AC 110V 60Hz
- Current: ≤ 8 Amps
- Fuse: 15 Amps
- Dimensions: 9.0 L x 9.5" W x 5.5" H
- Weight: 7.5 lbs
- Working Environment: 32°F ~ 104°F / 0°C ~ 40°C
- Storage Environment: -4°F ~ 176°F / -20°C ~ 80°C
- Storage Humidity: 35% - 45%
- Sound Intensity: ≤ 69dB
Hot Air Rework:
- Total Output: 600W
- Airflow Type: Brushless DC Vortex Blower
- Airflow Volume: 55 L/Min
- Airflow Velocity: 3.4 M/S
- Programmable Air Flow: 20-100
- Temperature Range: 212°F ~ 932°F / 100°C ~ 500°C
- Temperature Stability: ± 1°C
- Cord Length: ≥ 33.2 in
- Cord Material: Silicone
Soldering Iron:
- Total Output: 75W
- Temperature Range: 392°F ~ 932°F / 200°C ~ 500°C
- Temperature Stability: ± 1°C
- Output Voltage: 24 V AC
- Tip Impedance: < 2Ω
- Cord Length: ≥ 33 in
- Cord Material: Silicone
Usage Features:
The 4040-PRO-X is designed for ease of use with clear controls and displays.
- Initial Set-Up: The hot air gun holder can be attached to either side of the unit or used in the upright tower holder. The soldering iron plugs into a front receptacle and its holder is integrated into the upright tower. The unit requires a 3-prong grounded outlet.
- Power On/Off: Separate power switches for the hot air gun (I) and soldering iron (II) are located on the front panel. The main power switch is on the back. Upon startup, the display briefly indicates "C - C" or "F - F" for Celsius or Fahrenheit readouts.
- Soldering Iron Operation: The bottom display shows the current temperature, which heats up to the last set temperature. Temperature is adjusted via a knob, with a range of 392°F ~ 932°F (200°C ~ 500°C). The display shows the set temperature temporarily before reverting to actual temperature.
- Hot Air Gun Operation: The top display shows "SLP" in sleep/standby mode. Temperature is adjusted using up/down buttons, with a range of 212°F ~ 932°F (100°C ~ 500°C). Airflow is controlled by a knob, adjustable from 20-100.
- Safety Features: A caution is issued for hot air gun use: when temperatures exceed 300°C, airflow should be set at 45 or higher to prevent damage and extend heating element life. The hot air gun automatically starts blowing air when removed from its holder and ramps up to programmed settings. When returned to its holder, it enters an auto cool-down and sleep/standby mode, continuing to blow air until 100°C is reached. This is a built-in safety feature.
- Soldering Iron Sleep Function: The soldering iron enters sleep mode after a few minutes in its holder, indicated by "SLP" on the display. The temperature will drop to 392°F / 200°C. When removed, it quickly ramps back to the set temperature. The sleep timer can be set from 0 to 30 minutes.
- Hot Air Gun Cool Down Sleep/Standby Function: As described above, this function automatically cools down the hot air gun when placed in its holder, increasing airflow if needed during the cooling process.
- Temperature Conversion: With the unit OFF and both tools in their holders, turn ON both front power switches. Then, press and hold the right Hot Air Temperature Button while turning ON the main power switch on the back. The display will show "C - C" or "F - F".
- Mute/Unmute Function: With the unit OFF and both tools in their holders, turn ON both front power switches. Then, press and hold the left Hot Air Temperature Button while turning ON the main power switch on the back. The display will show "on" or "off" for sound status.
Maintenance Features:
Proper maintenance ensures longevity and optimal performance of the unit.
- Soldering Tip Preparation & Care:
- Always keep the tip properly tinned using solder with sufficient rosin flux. A well-tinned tip will be bright when hot.
- To tin the iron: plug in, reach melt temperature, flood the tip with solder for one minute, apply more solder, let idle for one-two minutes, then wipe lightly on a wet sponge, leaving some solder on non-tinned areas.
- Do not file or reshape the tip, as this destroys plating and shortens tip life. Avoid chloride and acid fluxes.
- For maximum tip life, apply solder to heated connections/joints, not directly to the tip.
- WARNING: Do NOT use anti-seize or any other lubricant on the tip retainer or heater.
- Replacing Soldering Iron Tip:
- Turn off the station, unplug, and allow the iron to cool completely. Never attempt to remove a hot tip.
- Unscrew the larger metal tip retaining screw ring, slide off the retaining collar, and then slide the tip forward to remove.
- Slide a new tip over the ceramic heating element, replace the metal retaining collar, and tighten the screw ring snugly (do not overtighten).
- Plug the iron back in to resume soldering.
- Replacing Soldering Iron Heating Element:
- Turn off the unit, unplug, and allow the iron to cool. Never handle a hot tip.
- Unscrew the Black Bakelite Screw Cap and slide off the full tip assembly.
- Push the cord through the bottom of the iron while gently pulling the heating element to expose it.
- De-solder the 2 thin (red/white) and 2 thick (blue) wires from the circuit board, noting their locations for reinstallation.
- Solder the new heating element wires to the circuit board (thin wire to 1, thick wire to 2 on one side; thin wire to 3, thick wire to 4 on the other side). Wires can be soldered to either side as there is no polarity.
- Pull the cord back, align the circuit board to the iron's slots, and replace the Bakelite Retaining Cap, hand-tightening it.
- Install the soldering tip and metal retaining collar, then plug the AC cord back in.
- Replacing Hot Air Gun Nozzle:
- Turn off the unit, unplug, and allow the gun to cool. Never touch a hot air gun to install a nozzle.
- The nozzle is held by a clamp ring. Use the Metal Nozzle Extractor to remove the nozzle.
- Place the desired new nozzle on the end of the hot air gun, applying gentle pressure to clamp it into place.
- Replacing Hot Air Gun Heating Element:
- Turn off the unit, unplug, and allow the gun to cool. Never handle the gun while it is hot.
- Slide the ergonomic grip up and unscrew the retaining cap, then pull the ergonomic grip down off the handle.
- Unscrew both screws at the base of the handle and separate the two handle sides.
- Pull the heating element out of the Mica Paper and Discharge Tube, being careful not to disconnect the grounding wire.
- Unscrew the two screws holding the circuit board.
- Desolder the four wires to the heating element, noting their thickness/color for reinstallation.
- Solder the new heating element into place and reassemble the hot air gun.
Troubleshooting:
- Unit does not have power: Ensure the power cord is securely plugged into the outlet and the unit is powered on at both the back and front. Verify the outlet is functional.
- S-E Error: Ensure the soldering iron and/or hot air gun are securely plugged into the front of the unit. The heating element may need replacement.
- Tip is not heating up as expected: The soldering tip may be oxidized; tin and clean it regularly. The heating element may need replacement. The unit may need calibration.
Warranty:
The X-Tronic 4040-PRO-X comes with a 3-Year Limited Warranty, covering defects in materials and workmanship. The warranty is divided into an Initial Warranty Period (first 30 days) for replacement or refund, and a Remainder Warranty Period for free repair (shipping/handling fees apply). It does not cover damage from improper use, failure to follow instructions, modifications, unauthorized repair, normal wear and tear, or external causes.