EasyManuals Logo

Xerox AltaLink B8170 User Manual

Xerox AltaLink B8170
404 pages
To Next Page IconTo Next Page
To Previous Page IconTo Previous Page
Page #34 background imageLoading...
Page #34 background image
CCoonnffiigguurriinngg TTrraayy 66
Tray 6 is a high-capacity tray. You can configure Tray 6 to support the paper size that you need. For
details on supported paper sizes, refer to Supported Paper.
To configure Tray 6:
Note: Before you make any tray adjustments, compare the paper size to the current Tray 6
configuration. If the paper size matches the tray configuration, no tray adjustment is needed.
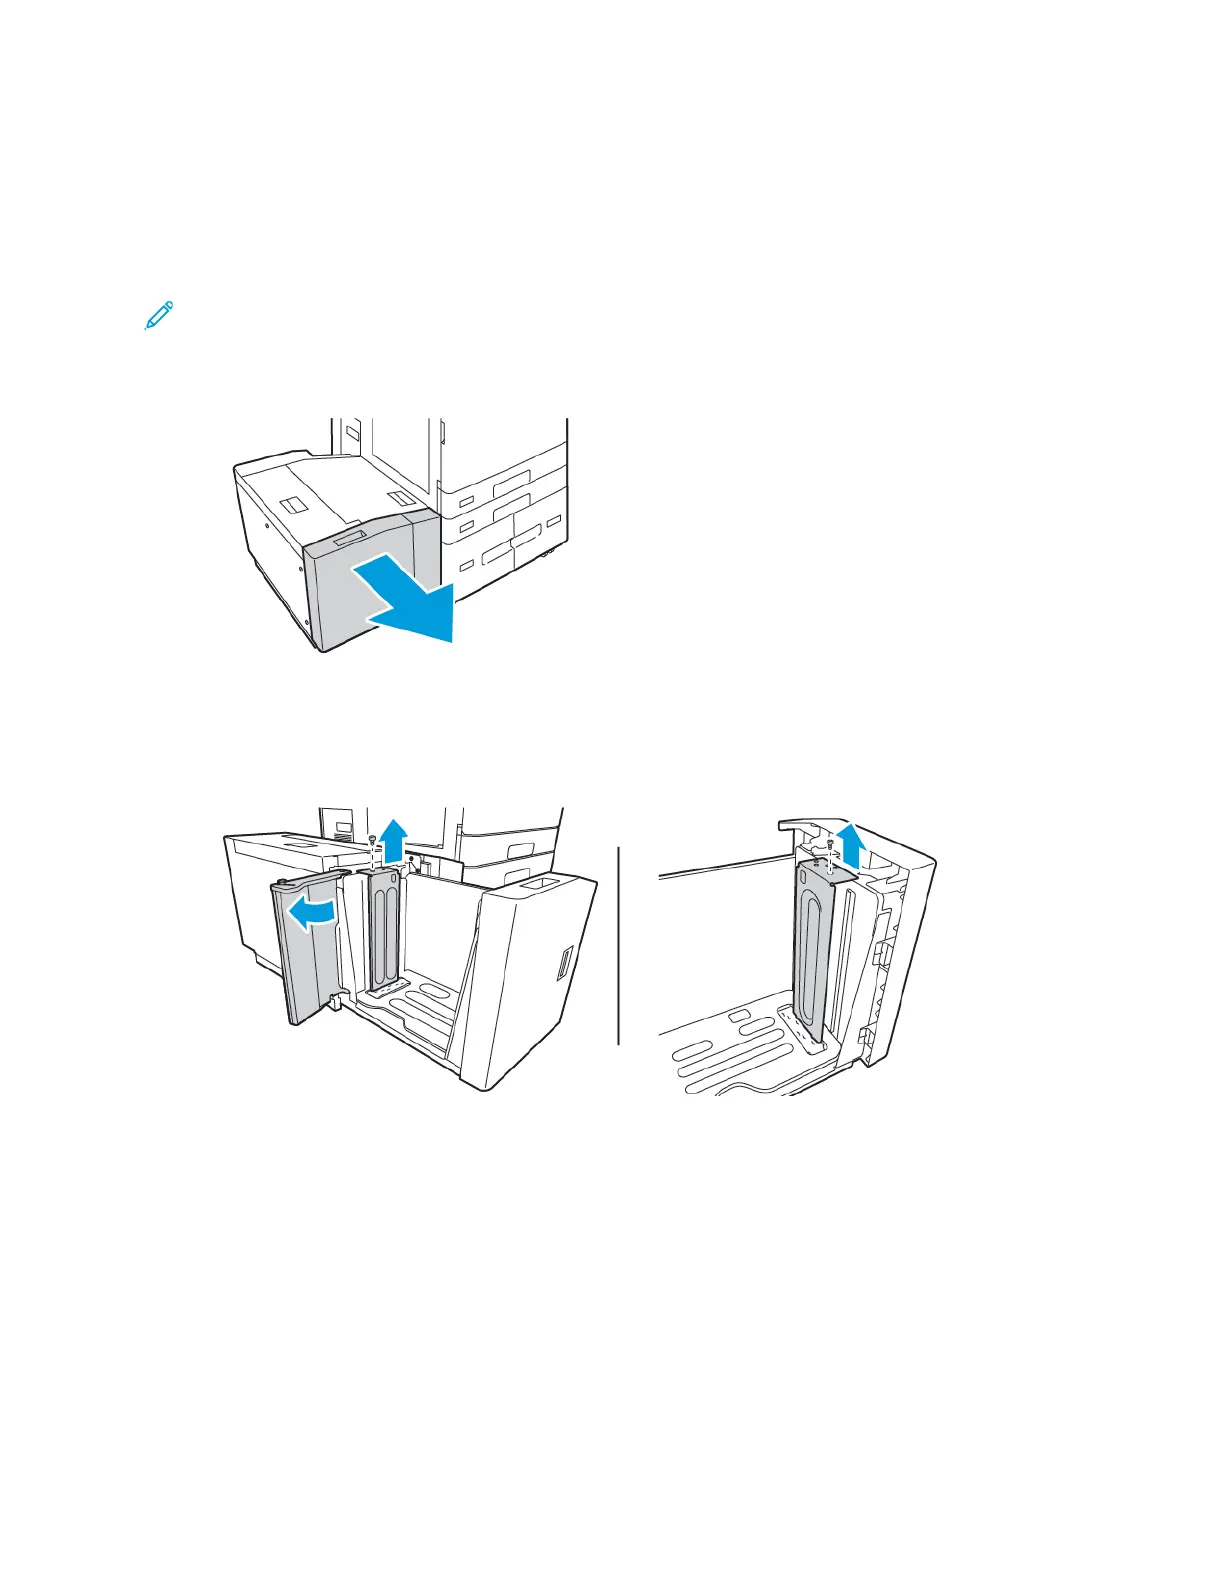
1. At the high capacity feeder, squeeze the handle, and pull out Tray 6 until it stops.
2. Open the side gate. Remove the screw that holds the spacer plate at the back of the tray, then lift
the spacer plate out of the tray. Repeat the procedure for the spacer plate at the front of the
tray.
34
Xerox
®
AltaLink
®
B81XX Series Multifunction Printer
User Guide
Getting Started

Table of Contents

Other manuals for Xerox AltaLink B8170

Questions and Answers:

Question and Answer IconNeed help?

Do you have a question about the Xerox AltaLink B8170 and is the answer not in the manual?

Xerox AltaLink B8170 Specifications

General IconGeneral
CategoryAll in One Printer
Memory (Standard)8 GB
Energy Star CertifiedYes
FunctionsPrint, Copy, Scan, Fax
Hard Drive320 GB
Duplex PrintingYes
ConnectivityEthernet
Scan Resolution600 x 600 dpi
Copy Resolution600 x 600 dpi
Network ConnectivityEthernet
Operating System CompatibilityLinux
Print Speed (Black)Up to 70 ppm
Copy SpeedUp to 70 ppm
Mobile PrintingApple AirPrint, Google Cloud Print, Xerox Print Service Plug-in for Android, Mopria

Related product manuals