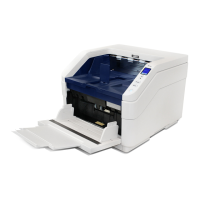
What to do if my Xerox W130 shows 'USB Disconnected' error?
- AAdam RiggsAug 26, 2025
If your Xerox Scanner displays a 'USB Disconnected' error, verify that the USB cable is securely plugged into both the scanner and the computer.

What to do if my Xerox W130 shows 'USB Disconnected' error?
If your Xerox Scanner displays a 'USB Disconnected' error, verify that the USB cable is securely plugged into both the scanner and the computer.
What to do if my Xerox W130 Scanner misfeeds paper?
If your Xerox Scanner is misfeeding, remove the paper from the input tray. Fan the documents, then load the document with its edges slightly touching the paper guides. Rescan.
What to do if my Xerox W130 is multi-feeding?
If your Xerox Scanner is multi-feeding, and the sensors identify a double feed, the scanner LCD menu will display options: Ignore, Continue, or Cancel scan. Select an option using the arrow buttons and confirm with the Duplex button. If you select Continue, open the scanner, remove the pages, then close the scanner, ensuring no pages are stuck together. If the problem persists, clean the rollers and paper sensors.
Why won’t my Xerox W130 function after a Windows system restore?
After performing a system restore on Windows, it's recommended that you reinstall your Xerox Scanner driver.
Why won’t my Xerox Scanner work after my computer has been idle?
If your Xerox Scanner doesn’t work after your computer has been idle for several hours, simply turn the scanner power off and then back on again.
How to prevent paper jams in the Xerox W130 Scanner ADF?
To reduce paper jams in the ADF of your Xerox Scanner, smooth and straighten the paper before scanning and adjust the guides to fit the paper size. Also, try cleaning the roller with a soft cloth dampened with isopropyl rubbing alcohol.
How to fix poor image quality from Xerox W130?
If the scanned images from your Xerox Scanner are of poor quality, try cleaning the scanner.
Why won't my Xerox Scanner scan?
Inspect the cable connections to ensure they are secure. Also, verify that the scanner's power is on. If the status light remains off, try plugging the power supply into a different electrical outlet, bypassing any UPS battery backup or power strip by connecting directly to a wall outlet. Restarting both your computer and the scanner might help. If you're using a USB hub, connect the scanner's USB cable directly to the back of the computer, as USB hubs, especially those without their own power supply, can cause issues. Finally, ensure the USB cable is 6’ or less in length. If another image source is selected in the scanning software, ensure that Xerox[®] W130 Scanner is selected as the scanner.
How to clear an ADF Paper Jam in my Xerox Scanner?
To clear an ADF paper jam in your Xerox Scanner, where paper has jammed and the document sensors are dirty, open the scanner, remove the jammed pages, and then close the scanner. If the issue continues, clean the rollers and paper sensors.
What causes ADF Paper Jam in Xerox W130 Scanner and how to resolve it?
An ADF paper jam in your Xerox Scanner occurs because paper has jammed while being fed through the scanner, and the document sensors are dirty. Open the scanner, remove the pages, and then close the scanner. If the problem persists, clean the rollers and paper sensors.
Power receptacle must meet data plate requirements. Socket outlet should be accessible.
Operate from indicated electrical supply. Ensure outlet is correctly grounded.
Visit website, launch installer, connect USB cable, turn on scanner, and confirm.
Select scanner from list, click Proceed, choose installation language, and click OK.
Choose Scanner Driver, Visioneer OneTouch, and any other desired applications for installation.
After download, click Install. Follow prompts for driver setup and accept the license agreement.
Connect AC adapter and USB cable, turn on scanner. Return to hardware window, click OK, then Close.
Follow prompts to install OneTouch software. It initializes and searches for the scanner.
Fan, flatten, and pinch document edges to prevent jams and skewing.
Scan using on-screen panel. Click icons for Scan, Print, Email, Archive functions.
Use TWAIN/WIA interface to scan. Select options, place document, click Scan.
Wear gloves, avoid flames, read instructions, unplug cables before maintenance.
Pull cover release, lift lid, remove jammed page. Close door and continue scanning.
Clean rollers, glass, and background plates weekly or after 20,000 pages.
Use Clean Mode via LCD menu. Rotate rollers and clean with roller cleaning paper or wet cloth.
Lift lid, wipe glass with soft cloth or roller cleaning paper for residue.
Replace all rollers simultaneously. Reset roller count after replacement.
Access rollers by pulling cover, remove old rollers, install new ones, and secure cover.
Access rollers by pulling cover, release arms, remove old rollers, install new ones, secure cover.
Lists error images, causes, and resolutions for common scanner status messages.
Table details ADF jams: remove pages, clean rollers/sensors for persistent issues.
Table details multi-feed (double pages) and ADF Cover Open errors and their resolutions.
Table details misfeed (failed pick) and fan errors with causes and resolutions.
Table details stapled document, USB disconnection, tray errors, and their causes/resolutions.
Table details firmware, buffer, and ADF lamp errors with resolutions.
Check cables, status light, restart, avoid hubs, check cable length, select correct source.
Check document quality and clean scanner glass. Dirty glass causes poor image quality.
Use Windows Control Panel (Programs and Features) to remove driver and modules.