8 expansion devices
FG
Y0
COM0
Y1
Y2
Y3
COM1
Y4
Y5
Y6
Y7 COM3
Y24Y23
Y22
Y21
Y20
COM2
Y25
Y26
Y27
0V
24V
Y20
Y23
Y23
Y24
COM5 Y25
Y25
Y32
COM7
Y33
Y30
Y31
Y27
COM6 Y34
Y35
Y36
Y37
COM4 Y22
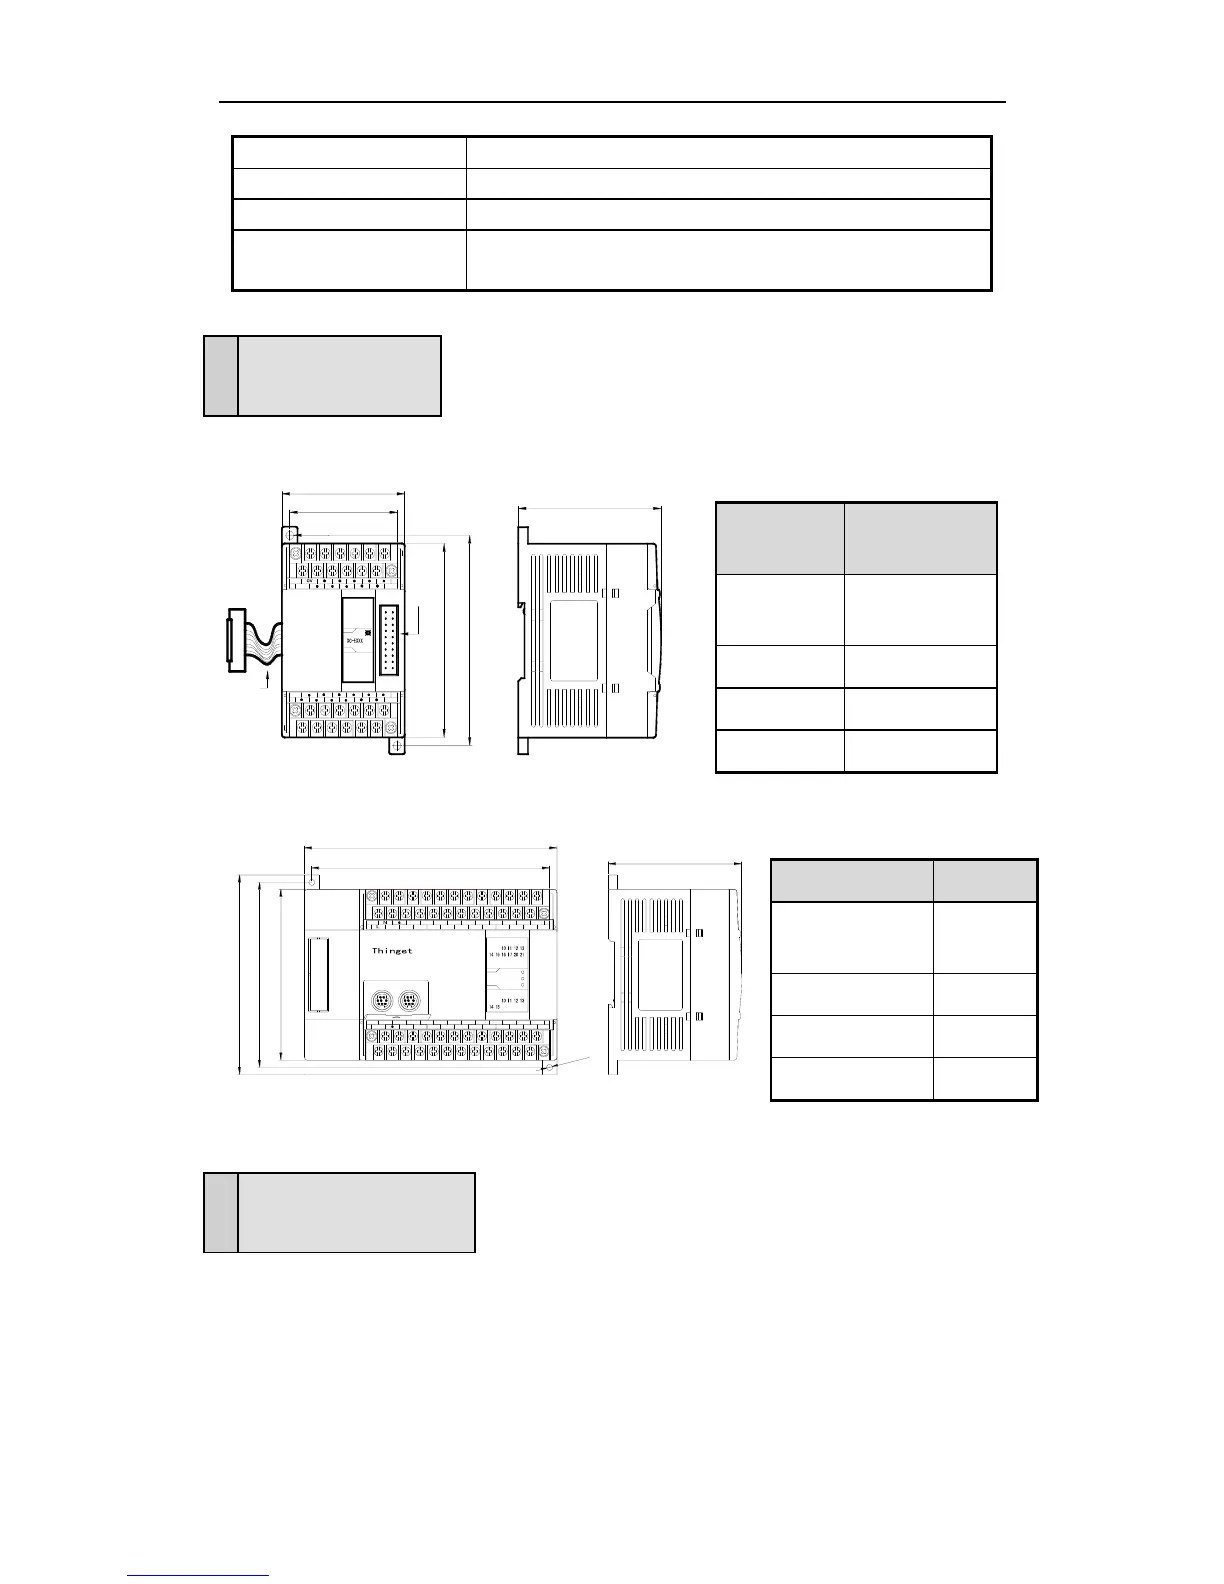
l XC-E16X16YR
X17
X10
X11
X12
X13
X14 X16
X15X7
X6
X5
X4
X3
X2
X1
X0COM
COM
FG
Y1COM0
Y17
Y16
Y15
Y14
COM2
Y7
Y11
Y10
Y13
COM3
Y12
Y6
Y5COM1
Y4
Y2
Y3
Y0
24V
0V
8-3.Analogue、Temperature Modules
As the special modules of XC series PLC, analogue and temperature modules can work with XC
series PLC, apply in process controls like temperature, pressure, flow etc.
For details, please refer to《XC series analogue/temperature expansions manual》
The detailed modules are listed below:
Model Function
XC-E8AD 8 channels analog input (14bit);4 channels current input, 4
channels voltage input
XC-E4AD2DA 4 channels analog input (14bit); 2 channels analog output (12bit);
current、voltage selectable
XC-E4AD 4 channels analog input (14bit);current、voltage selectable
XC-E4DA 4 channels analog output (12bit);current、voltage selectable
XC-E2DA 2 channels analog output (12bit);current、voltage selectable
XC-E6PT-P -100℃~350℃, 6 channels Pt100 temperature sampling, 0.1
degree precision, include PID operation
XC-E6TCA-P 0℃~1000℃, 6 channels K type thermocouple temperature
sampling module, 0.1 degree precision, include PID operation
XC-E3AD4PT2DA
3 channels current input (14bit)、4 channels Pt100 temperature
sampling and 2 channels 10 bits voltage output
XC-E2AD2PT2DA
2 channels current input (14bit)、2 channels Pt100 temperature
sampling (16bit), and 2 channels 10 bits voltage output
 Loading...