16 17
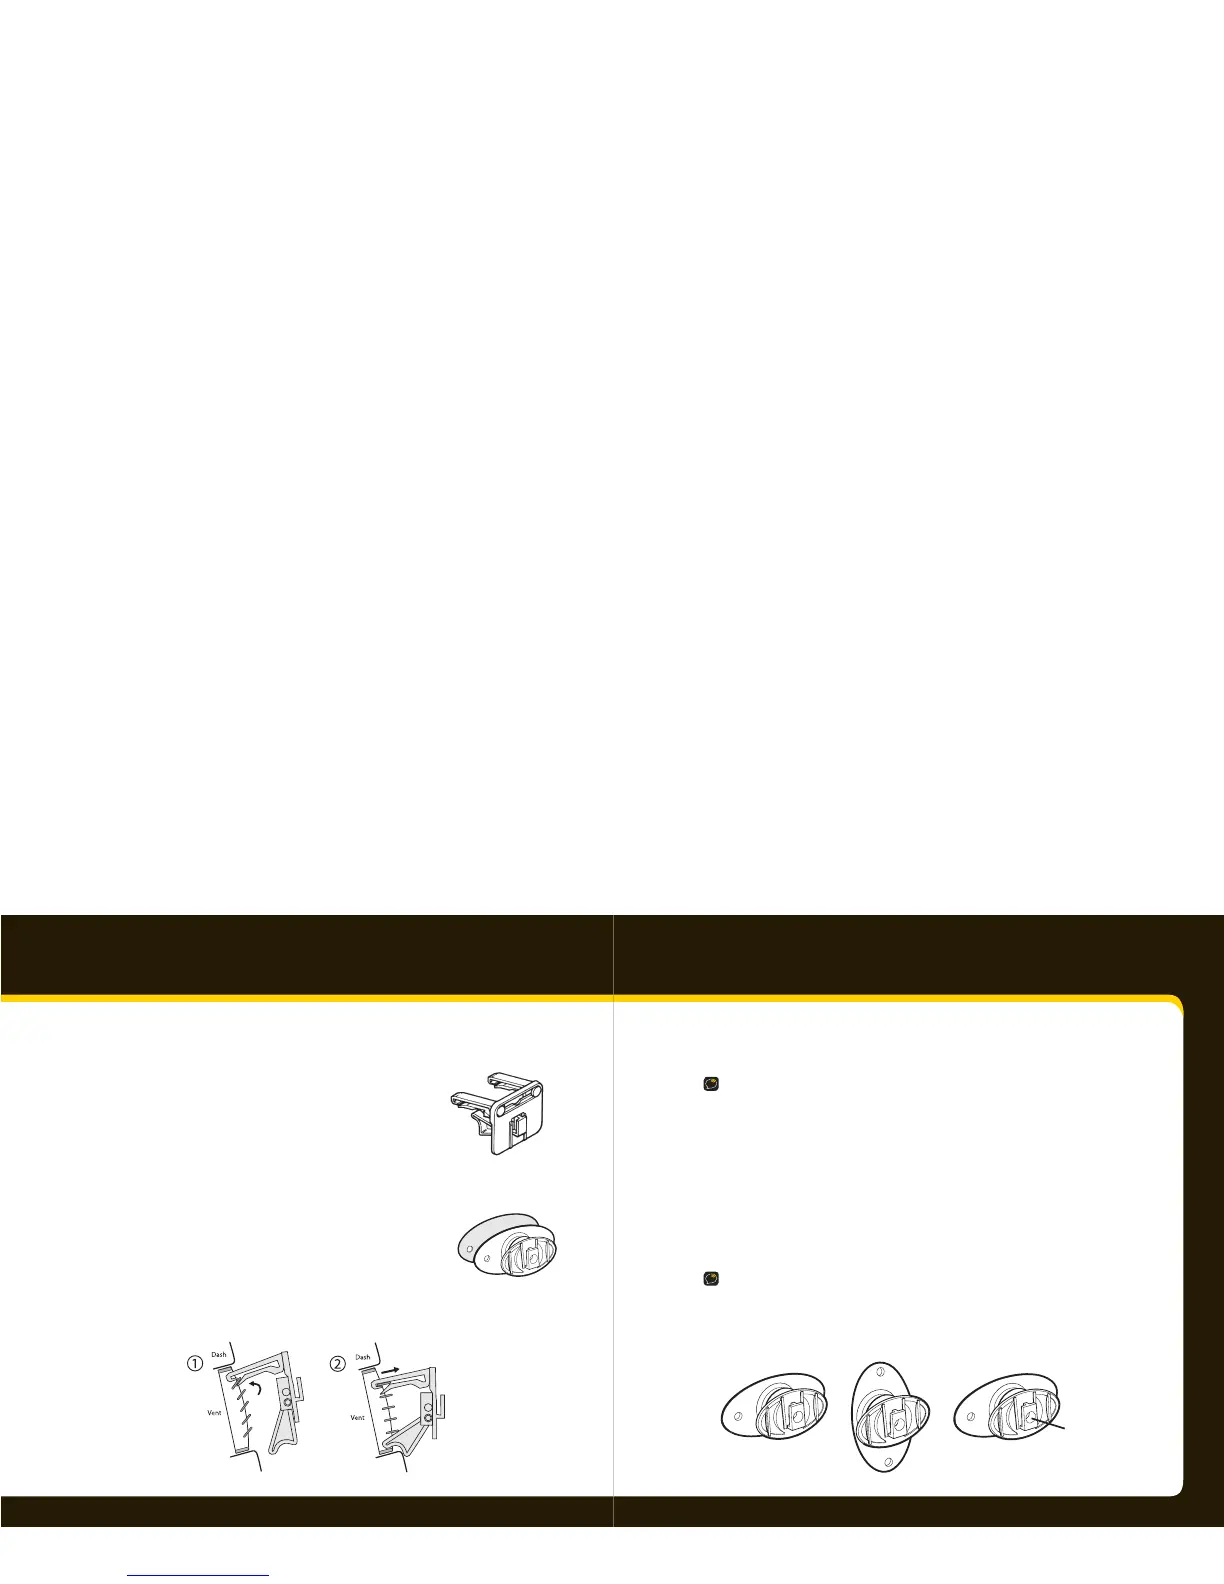
Swivel Mount
Vent Mount
Vehicle Installation
Step 2: Install the vent or swivel
mount.
You can use either the vent mount or the swivel
mount for your Xpress
RC
depending on your
particular situation.
Installing the vent mount
1 Locate a vent with horizontal slats
sturdy enough to hold your XM cradle and radio.
2 Adjust the clamps to t your vent.
3 Snap the mount onto the vent.
To remove, push the mount into the vent, then lift up.
Installing the swivel mount
CAUTION! The adhesive used with the swivel mount may make it di cult
to remove. Do not install this mount on leather surfaces and make sure
the air temperature is at least 60°F (15°C).
1 Locate a at surface for the mount. Make sure there is ample room
for the XM cradle and radio when installed.
2 Clean the surface with the preparation kit and let it dry thoroughly.
Peel o the adhesive liner. Position, press, and hold the swivel mount
in place for 30 seconds.
IMPORTANT! Let the adhesive cure for 24 hours before attaching the XM
cradle and radio to the mount.
Turn the swivel to accommodate the XM cradle and radio. Adjust the
tension via the center screw.
You can adjust this screw
to adjust the tension of the
mount with a screwdriver.
 Loading...