EasyManuals Logo

Xo FLEX Installation Instructions

Xo FLEX
59 pages
To Next Page IconTo Next Page
To Previous Page IconTo Previous Page
Page #43 background imageLoading...
Page #43 background image
XO FLEX Installation instructions Installation
43
Figure 57 Patient chair support
Tighten the nuts thoroughly with a 19 mm top wrench. See Figure 58.
Figure 58 Fitting the patient chair
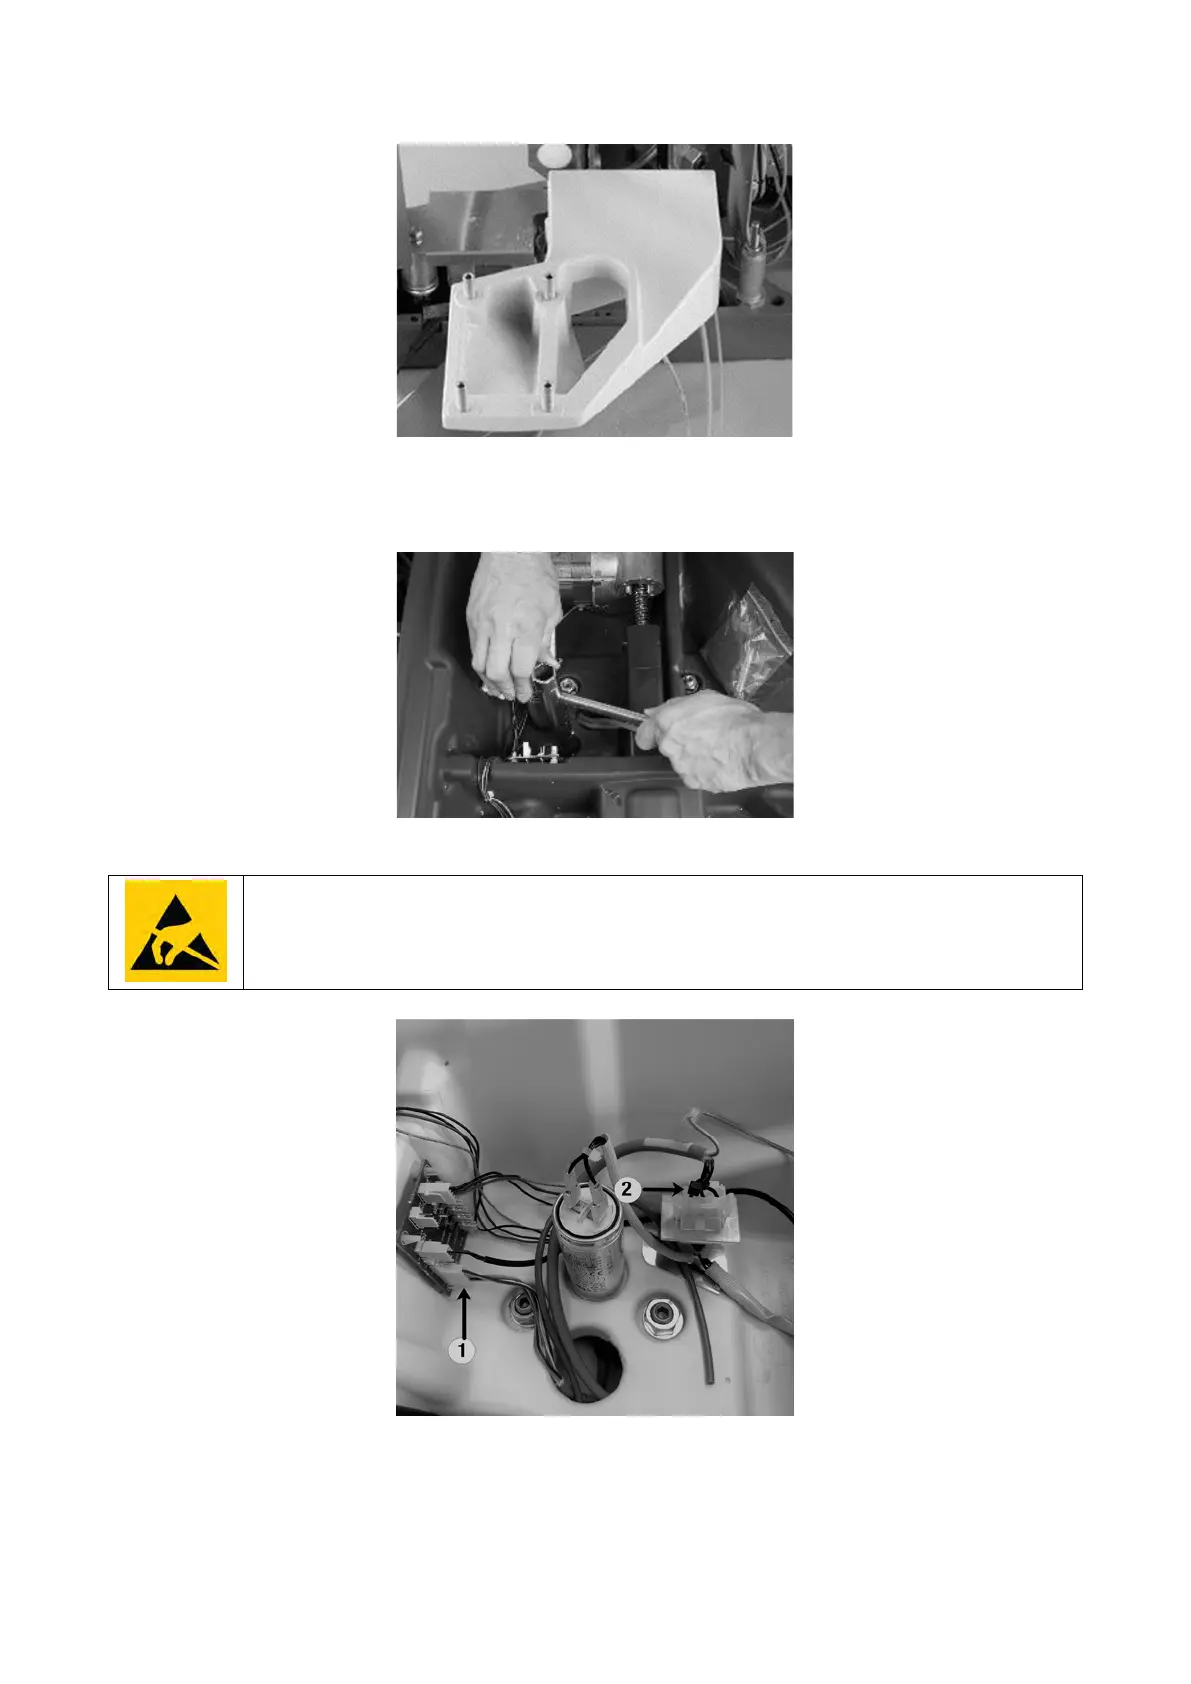
Lead the chair cables through the hole in the patient chair support and attach the
control cable (1) to the PCB and the power cable (2) to the plug.
Be sure to connect the earth wire.
See Figure 59.
Figure 59 Connecting the cables: (1) chair control cable, (2) chair power cable
Refit the cover under the patient chair support.

Table of Contents

Other manuals for Xo FLEX

Questions and Answers:

Question and Answer IconNeed help?

Do you have a question about the Xo FLEX and is the answer not in the manual?

Xo FLEX Specifications

General IconGeneral
BrandXo
ModelFLEX
CategoryDental equipment
LanguageEnglish

Related product manuals