XO FLEX – Installation instructions Installation
44
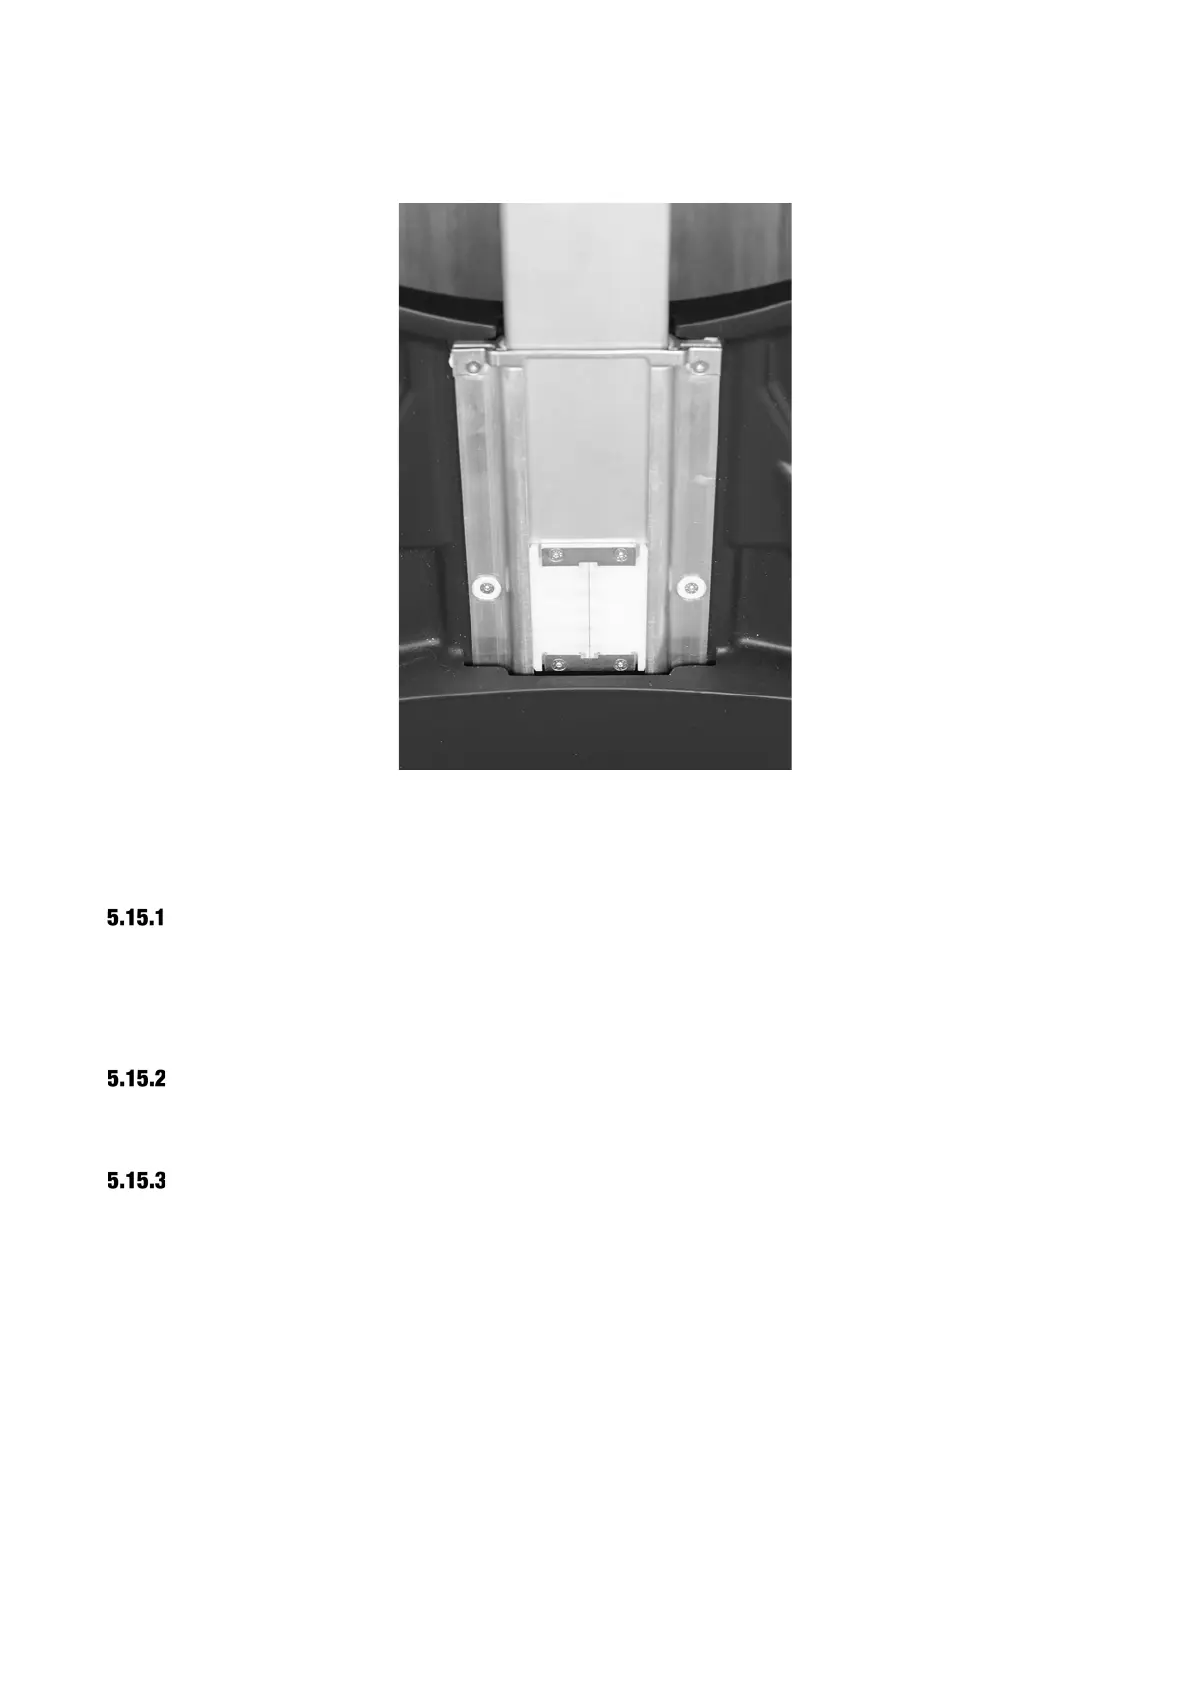
Install the neck rest and secure the end-stop bracket as illustrated in Figure 60.
Figure 60 – Securing the end-stop bracket
5.15 FINALIZING THE INSTALLATION
ATTACH THE PATIENT CHAIR SEAT UPHOLSTERY
Unpack the upholstery and position it over the dowels embedded in the patient chair seat.
Press the upholstery into place.
Secure the seat upholstery with the four screws that should be inserted from under the chair.
FIT THE CUSPIDOR BOWL AND CUP HOLDER
Fit the cuspidor protection disk, the cuspidor with gold trap and the cup holder.
FIT XO WATER DISINFECTION AND XO SUCTION DISINFECTION CARTRIDGES
If the unit is equipped with XO Water disinfection and/or XO Suction Disinfection, fit the cartridges
as shown in Figure 61 and Figure 62.
 Loading...

