970121
O 12.1x1.6
970050
O 5x1
971031
O 3.1x1.6
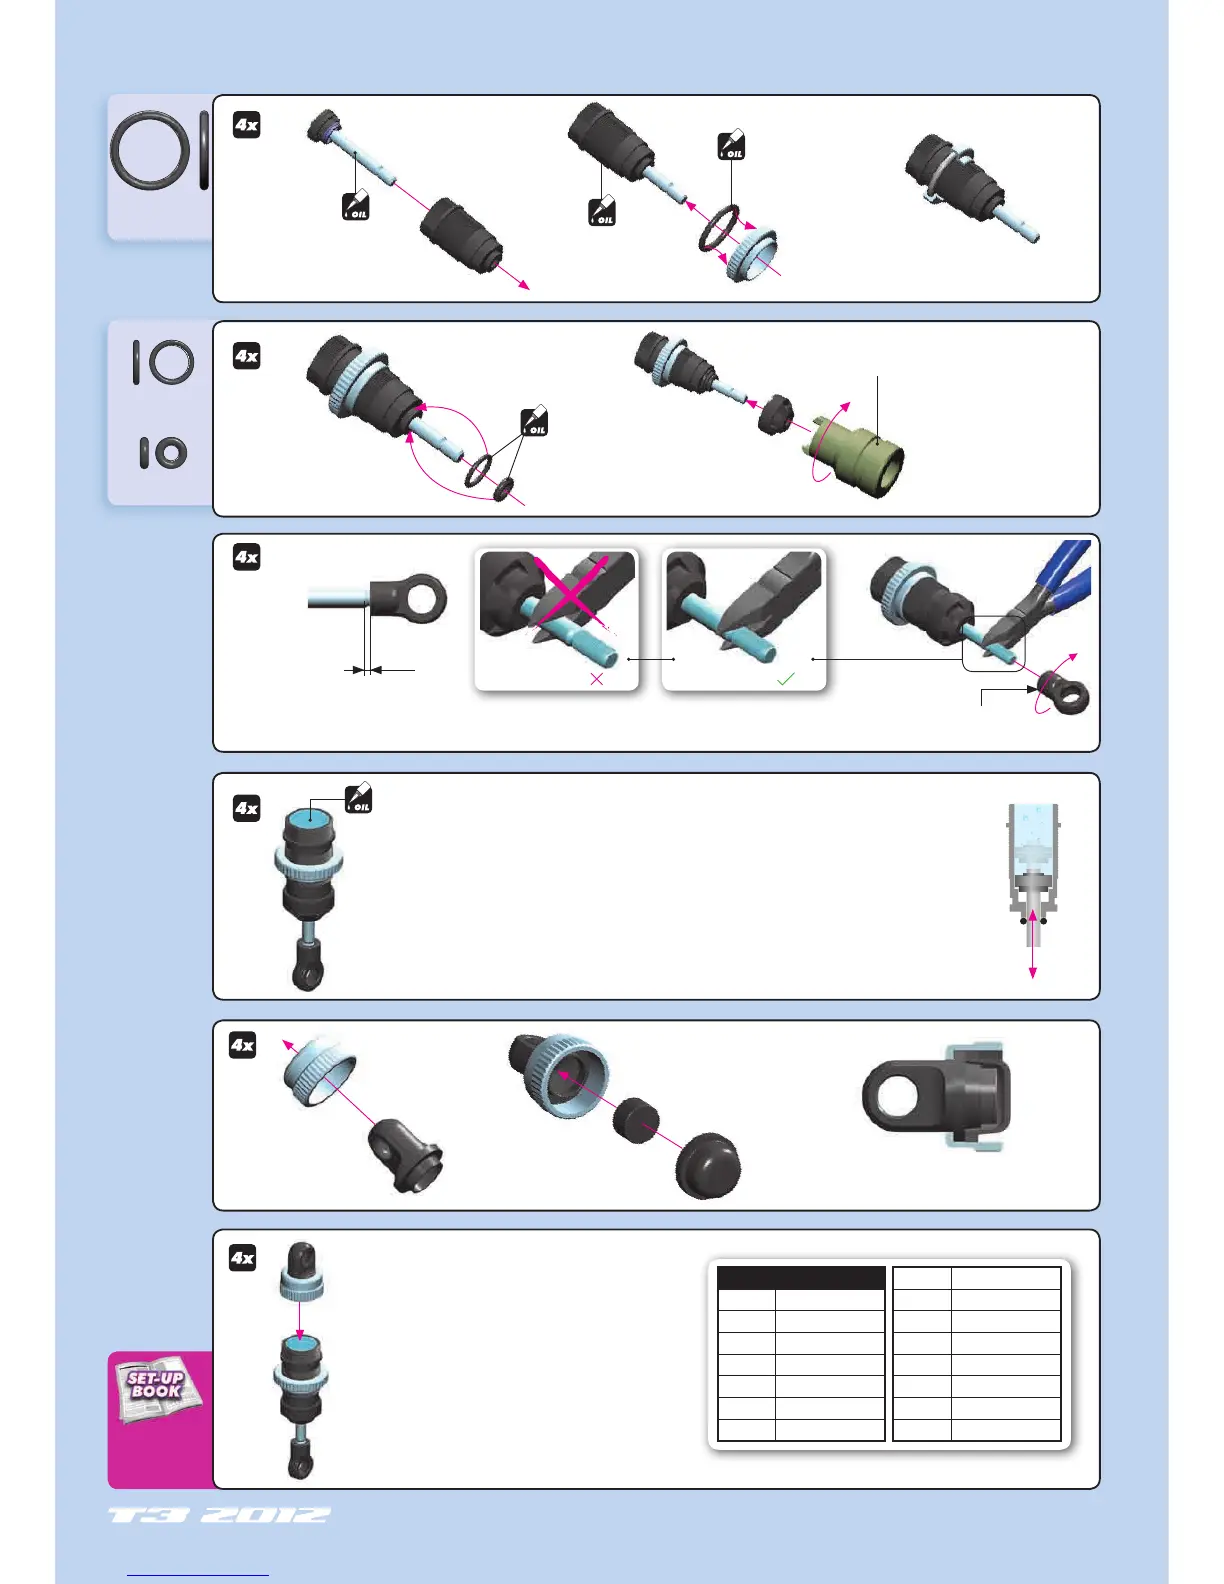
OPTIONAL SHOCK TOOL
(HUDY #183010)
CUTAWAY VIEW
1mm
HINT: Pre-thread the ball joint using an M3 screw.
WARNING! Be careful not to pre-thread too far, since the
ball joint may split or the plastic threads may strip out
INCORRECT
DETAIL
Fully extend the piston rod so the piston is at the bottom of the shock body.
Hold the shock upright and slightly overfill the shock body with shock oil.
Let the oil settle and allow air bubbles to rise to the top. Slowly move the piston up and down until
no more air bubbles appear. Add shock oil as necessary.
Pull the piston rod most of the way out of the shock body. Let the shock rest for 5 minutes to allow
the air bubbles to escape.
➊
➋
➌
➍
SHOCK OIL
SHOCK OIL
SHOCK OIL
➊
➋
SHOCK OIL
SHOCK
OIL
After you insert the membrane ensure that
it sits properly all around the alu cup.
CUTAWAY VIEW
When installing the shock cap assembly on the shock
body, some oil will leak out... this is normal.
Tighten the cap gently and clean off any excess oil. If the
cap it tightened too much, rebound is difficult to adjust.
If the cap is not tightened enough, the cap may unscrew
slightly and the shock may leak.
After the shock is assembled, the shock rod will push itself
out of the shock body fairly quickly.
Follow the next procedure to adjust the rebound.
SHOCK FILLING
Be careful not to cross-thread the
collar on the shock body.
FOAM
INSERT
CORRECT
O 5x1
O 3.1x1.6
6. SHOCK ABSORBERS