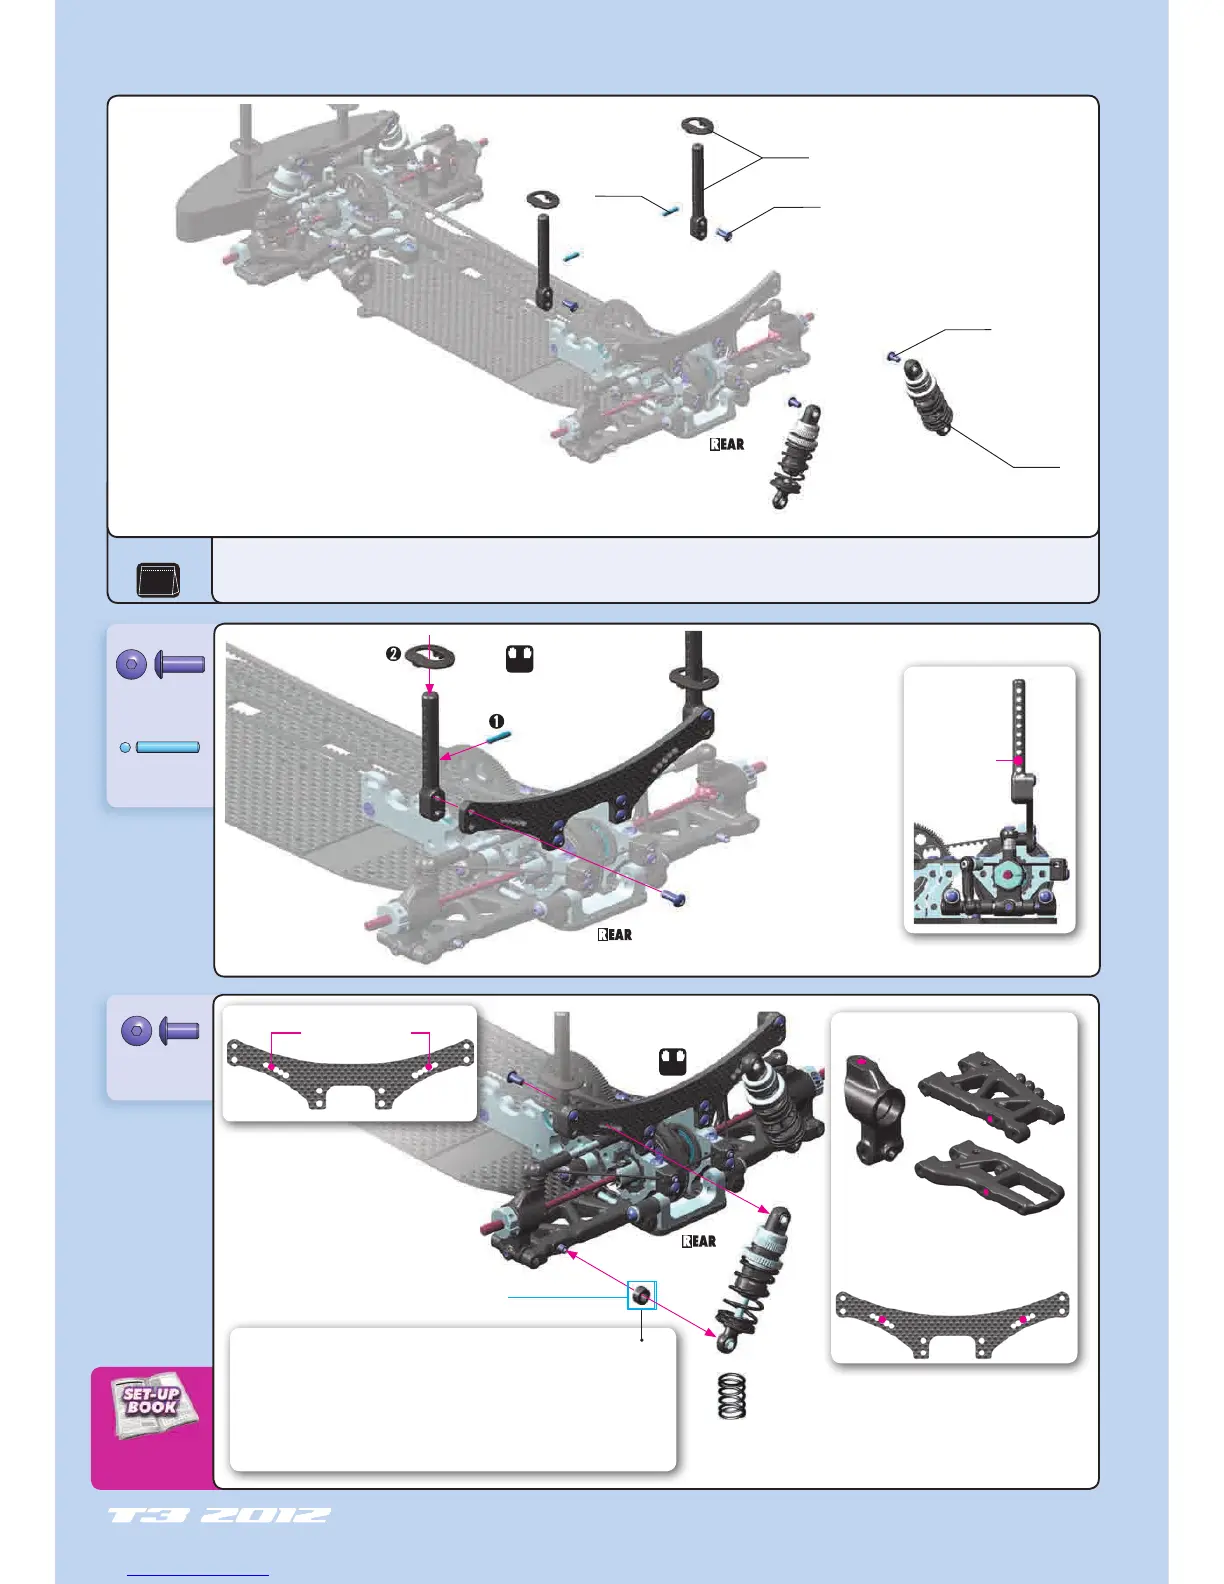
BAG
07
902306
SH M3x6
981212
P 2x12
902308
SH M3x8
L=R
308302
902308
902306
981212
301334
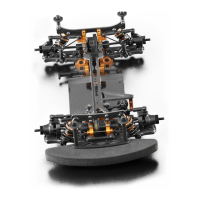
To make the car more stable and easier to drive, move the rear shocks rearward. Stability increases
mainly in chicanes. Note that the car will have less steering into corners.
• Upper mount (shock tower): Add a plastic nut and use a longer screw 3x8mm (NOT INCLUDED) to
space the upper end of the shock away from the shock tower.
• Lower mount (lower arm): Add shims and use a longer setscrew 3x10mm (NOT INCLUDED) on the
lower arms to space the lower end of the shock away from the arm.
When using optional 2-hole arms and optional
1-hole rear upright, use the second hole from the
bottom on the shock tower.
30 1334 REAR BODY MOUNT SET +2MM HEIGHT
90 2306 HEX SCREW SH M3x6 (10)
90 2308 HEX SCREW SH M3x8 (10)
98 1212 PIN 2x12 (10)
30 8302 XRAY SHOCK ABSORBER-SET 4-STEP - SHORT (2)
30 8306 XRAY ALU SHOCK ABSORBER-SET (2) (OPTION)
REAR SHOCK
(C2 .6 SPRING)
L=R
7. FRONT & REAR ASSEMBLY
INITIAL POSITION
308019 Set of Shock
Shims & Nuts