4
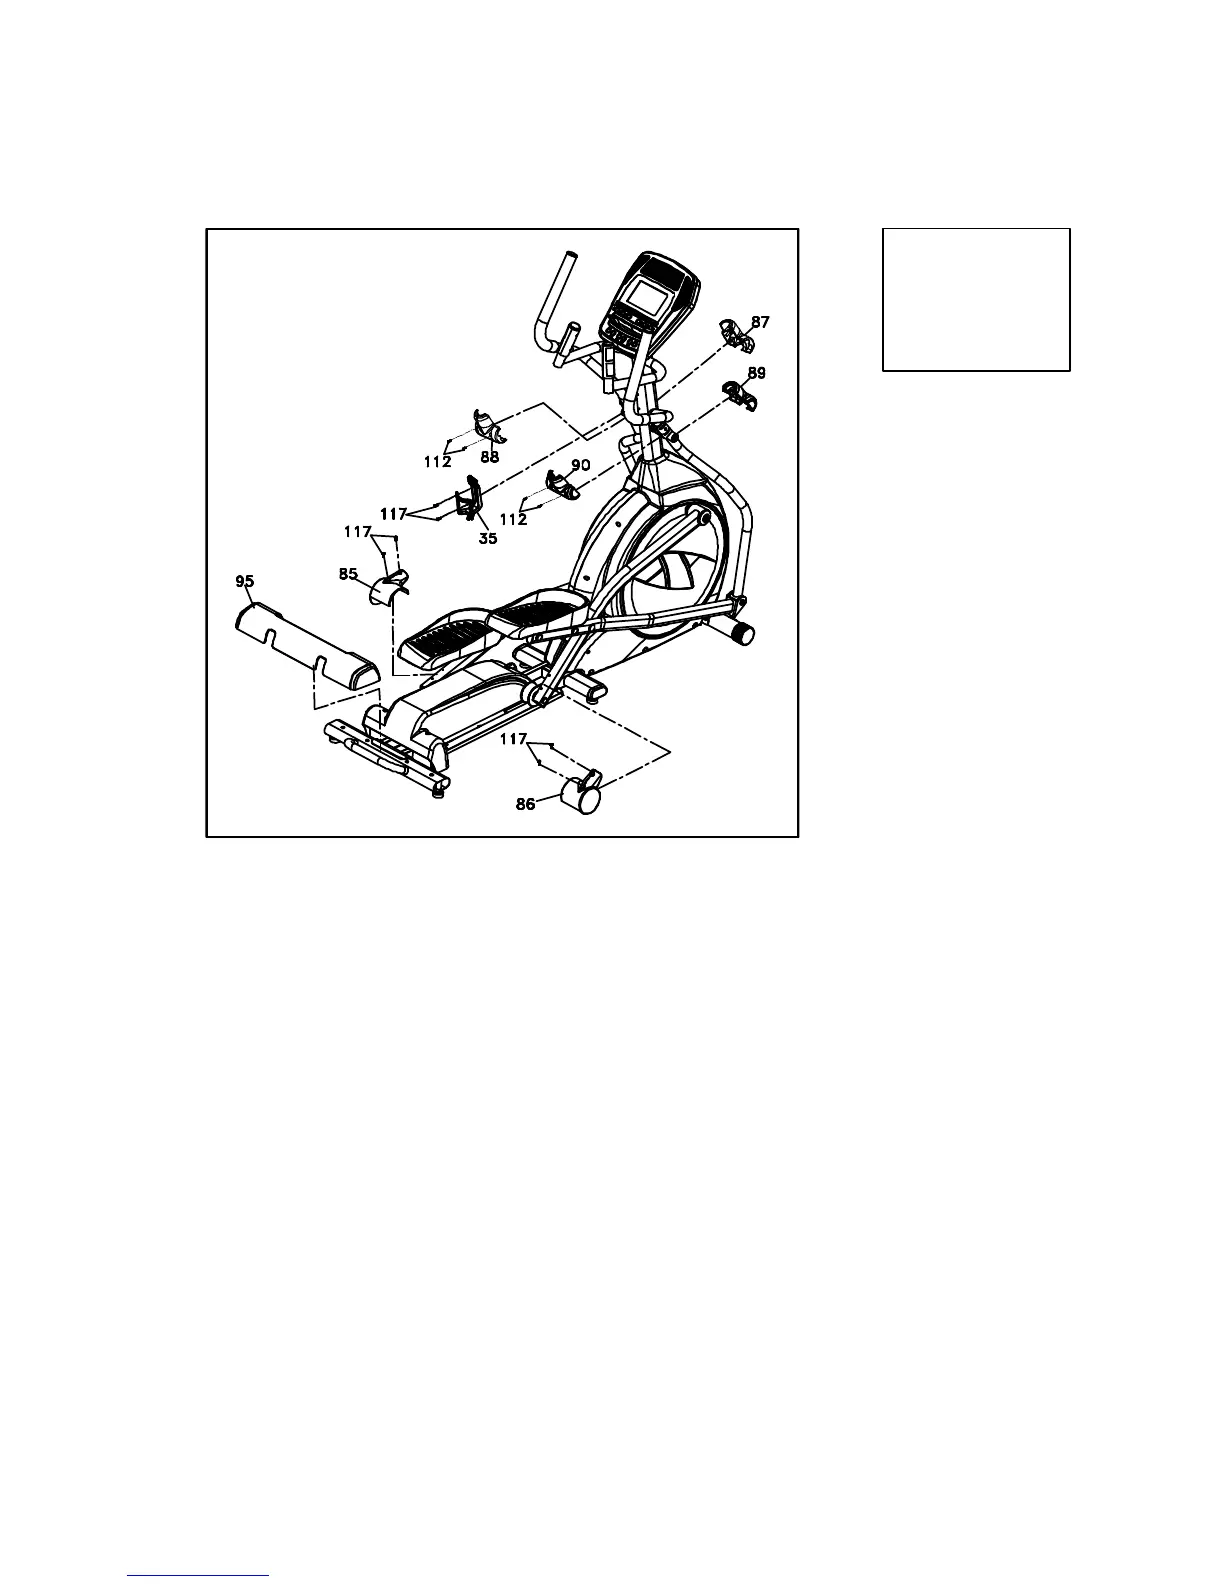
Plastic Covers
Note: Use the Phillips Head Screw Driver (158) to tighten the
hardware in this step.
1. Bring the front (87) and rear (88) Handle Bar Covers together on
the left Lower Handle Bar shaft and secure using two Sheet
Metal Screws (112) and a Screwdriver (158). Repeat this step
on the right side with the front (89) and rear (90) Handle Bar
Covers.
2. Attach the Slide Wheel Cover (85) to the left Pedal Arm (2) with
two Phillips Head Screws (117). Tighten with the Screwdriver
(158). Repeat this step on the right side with Slide Wheel Cover
(86).
3. Line up the Rear Bar Cover (95) to the holes in the rear of the
Incline Rail Assembly and snap into place.
4. Use Phillips head screw driver to secure the Drink Bottle Holder
(35) on the console mast with two Phillips head screws (117).
Your unit is now fully assembled. Ensure all nuts and bolts are firmly
tightened prior to use.
Hardware Step 4
#117. M5 x 15mm
Phillips Head Screw
(6 pcs)
#112. 3.5 x 12mm
Sheet Metal Screw
(4 pcs)
 Loading...