9
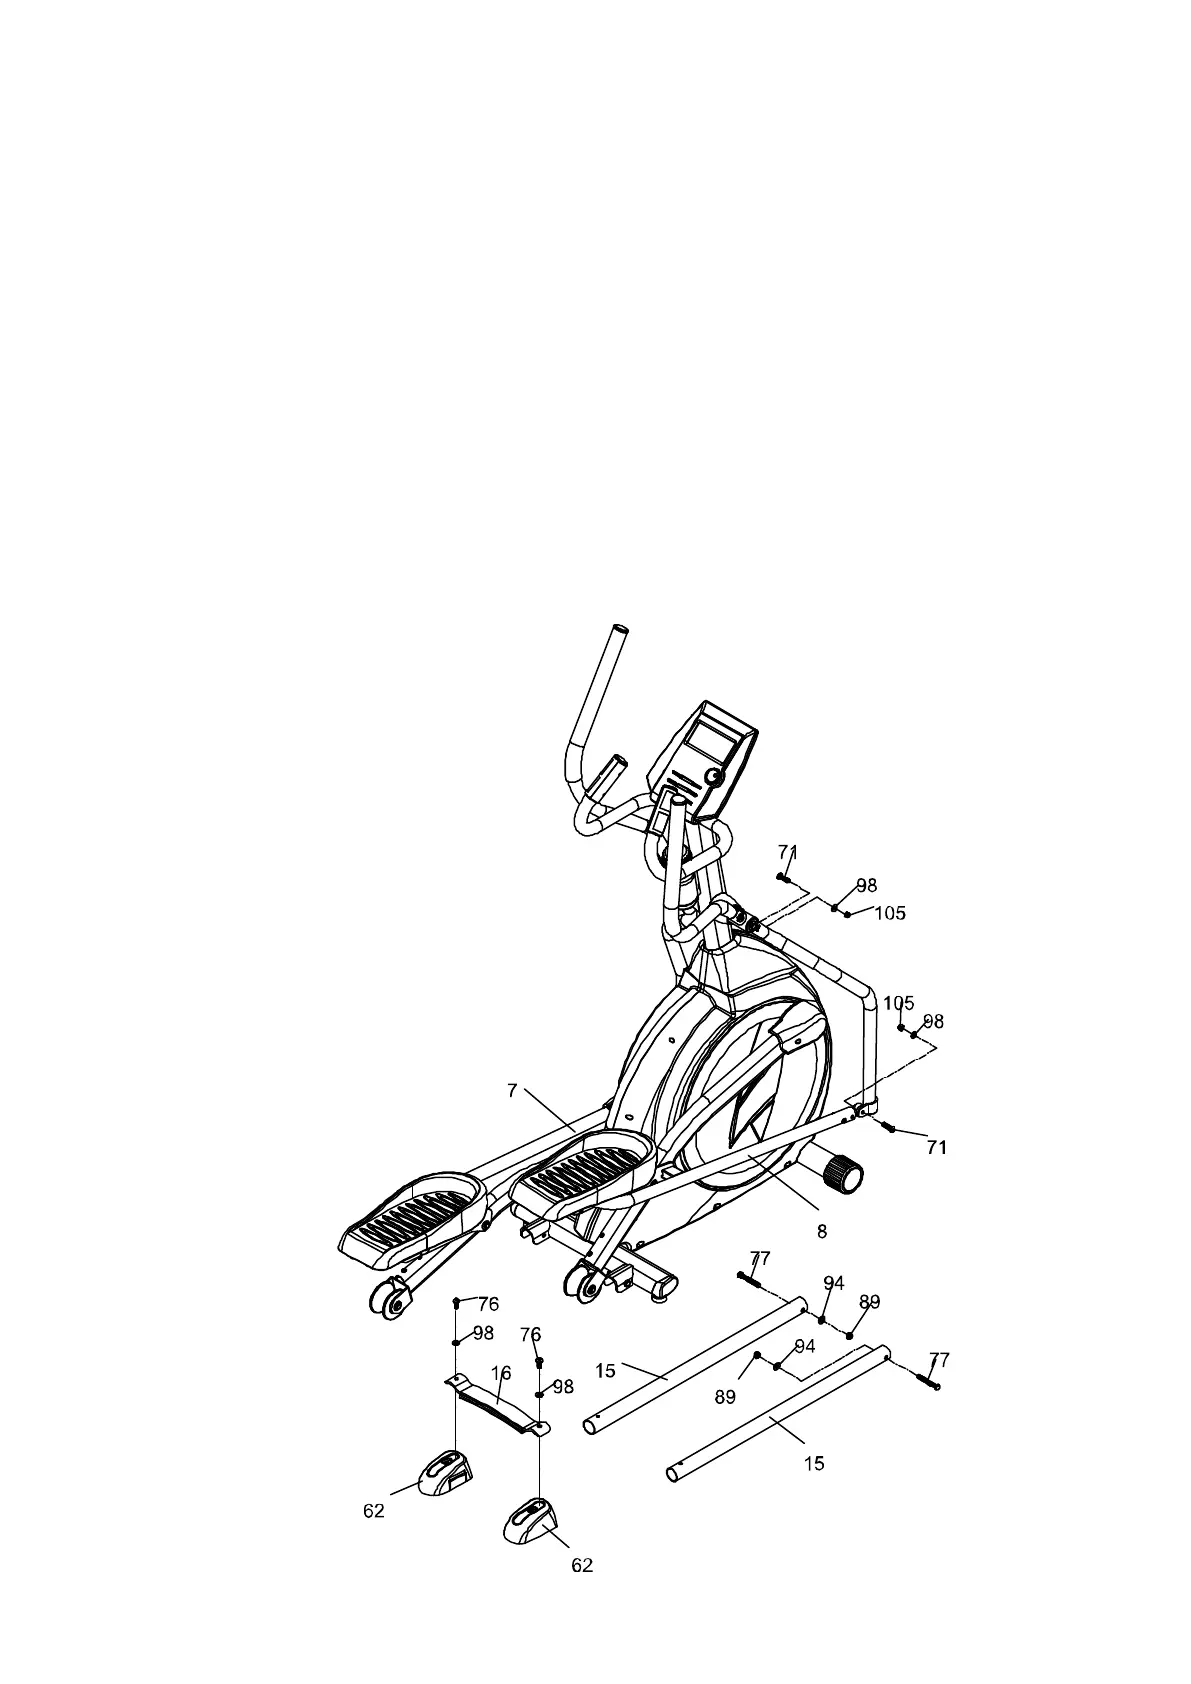
3 CONNECTING ARM ASSEMBLY
1. Align the hole in the end of the Connecting arms (L & R)(7 & 8)(pivoting rod end) with the
hole in the bracket of the Lower Handle Bars (L & R)(4 & 5). The rod end should be on
the inside of the Lower Handle Bars (L & R)(4 & 5). bracket. Take 2pcs of 5/16" x 32m/m
Hex Head Bolts (71) and install it through the Lower Handle Bars (L & R)(4 & 5) bracket
and the rod end. Install 2pcs of 5/16" x 20 x 1.5T Flat Washers (98), 2pcs of 5/16" x 7T
Nylon Nuts (105) tighten firmly using the 13/14m/m Wrench (111) on the 5/16" x 7T Nylon
Nuts (105) and one on the 5/16" x 32m/m Hex Head Bolts (71).
2. Install the 2pcs of Rail Tubes (15) into the receiving bracket in the end of Main Frame(1)
with 2 pcs of 3/8” x 2-1/4” Button Head Socket Bolts (77) , 2pcs of 3/8" x 19 x 1.5T Flat
Washers(94) and 2pcs of 3/8" x 7T Nylon Nut (89) by using 2pcs of 13/14m/m Wrench
(111).
3. Put the Lug Cover (L) (61) and Lug Cover (R)(62) onto the Rail Strap (16).
Install the Rail Tubes (15) with 2 pcs of 5/16” x 3/4” Button Head Socket Bolts (76) and
2pcs of 5/16" x 20 x 1.5T Flat Washers (98) by using the Combination M5 Allen Wrench
& Phillips Head Screw Driver (108).
 Loading...