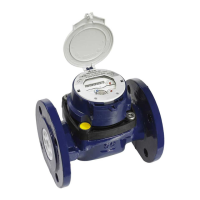
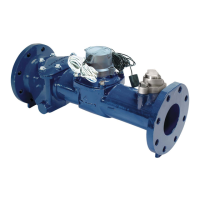
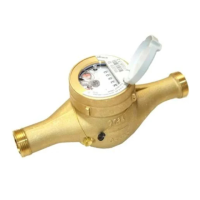
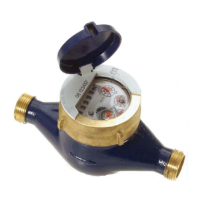
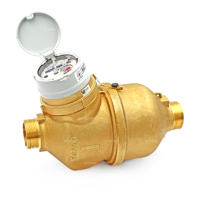
This manual is valid for the following meters: 620 series, 640 series
Supplied Material:
Each package contains:
• Water meter
• Optional connection kits if ordered
General Instructions:
Please read this guide prior to installing the water meter. The water meter is
hermetically sealed and therefore no servicing of the meter will be required. The
water meter is designed for use with potable water for residential activities. The
meters must be stored in a dry, cool place, free of contamination. Please make sure
that during installation all hygienic standards and recommendations are respected.
NOTE:
These installation instructions apply for volumetric water meters
• Volumetric meters with electronic register can be installed in all positions (see
picture )
• Volumetric meters with mechanical register can be installed in all positions,
except with a top down register (see picture ) (due to the risk of damaging the
gears in the register)
Permissible Operating Conditions
• Cold water meter: from 0.1°C up to 50 °C
• Pressure stage: MAP16
• Mechanical environment: M1 (MID) xed installation with minimum vibration
• Electromagnetic environmental class: E2 (MID) residential
• Climatic environment: from 5 °C up to 70 °C
• Meters have to be installed in a stress free condition
Please also note the directions in accordance with:
• ISO 4064-5:2017(installation requirements)
• DIN 1988-200 (TRWI-planning and implementation, components, ...)
Meters must be installed grounded and tension free, without any mechanical stress
on water pipes. For this we recommend installing meters using a metal meter bracket
with length compensation ttings (thread dimension acc. EN ISO 228-1:200 Class
B). In cases where the installation site is not prepared with these brackets, we
recommend the permanent use of a potential compensator (“grounding kit”). This
will prevent serious accidents during installation and operation due to hazardous
leakage currents.
The accessory grounding kit is also available for purchase from Sensus.
The meter does not need any straight upstream or downstream pipe (U0D0).
STEP 1:
Before uninstalling the old meter rst close outlet valve at output, then close inlet
valve!
Thoroughly ush pipe to prevent contamination of the new meter with dirt, sediments
and/or particulates.
The inltration of dirt, sediments and/or particles into the meter may damage it and
prevent it from operating correctly.
1/1A Use new sealing washers
2 Install the meter in the correct ow direction
STEP 2:
Connect meter on one side with the unions
3/3AUse your hands to fasten the unions! Then use key
STEP 3:
Finalizing meter connection
4 Prevent rotation of the meter while tightening unions
5 Repeat process for the remaining connection as described in pictures 1-2-3-4.
Then tighten the unions with a wrench. The torque should be min. 20 Nm and max.
30 Nm.
6 Turn register in proper position for optimum readout
STEP 4:
First lling
7 Inlet side: slowly open the inlet valve
8/8A Check for leaks
9 Outlet side: slowly open the outlet valve
Improper rst lling may lead to water hammer or piston overspeeding
which can damage the meter and prevent it from operating correctly.
Note:
When using a non return valve please use the appropriate gaskets depending on
the shape of the connection pipe.
Safety instructions
Water meters are calibrated measuring instruments. Exposing them to hard
shock or not protecting them against freezing can cause irreparable damage. Do not
expose the device to an open ame or extremely high temperatures.
Caution:
Failure to observe the safety instructions can result in re and other injuiries or
damage to the device or other property.
The housing of the following products consist of plastic: 620C, 620MC, 640C, 640MC.
640, 640C, 640M and 640MC contain sensitive electronic components and batteries
inside.
Orientation of the display
STEP 5:
All electronic register settings and functions will be automatically and correctly
activated once the rst volume of water goes through the meter or with an activation
radio command. Check Segment test and the mode of the display
End-of-life product disposal
Handle and dispose of all waste in compliance with local laws and regulations.
EU and UK only: Correct disposal of this product — waste electrical and
electronic equipment
• EU: Directive 2012/19/EU on waste electrical and electronic equipment (WEEE)
• UK: SI 2013 No. 3113
EU and UK only: Correct disposal of batteries in this product
This marking on the product, accessories, or literature shows that the
product should not be disposed of with other waste at the end of its work-
ing life.
This marking on the battery, manual, or packaging shows that the batter-
ies in this product should not be disposed of with other waste at the end
of its working life. Where marked, the chemical symbols Hg, Cd, or Pb
indicate that the battery contains mercury, cadmium, or lead above the
reference levels in 2006/66/EC or UK SI 2008 No. 2164. If batteries are
not properly disposed of, these substances can cause harm to human
health or the environment.
To protect natural resources and to promote material reuse, please sepa-
rate batteries from other types of waste and recycle them through your
local, free battery return system.
EN DE FR ES NL PL CZ SK SI SEIT
Installation instructions for volumetric water meters
 Loading...