4-21
E
q
w
e
r
t
602044
602053
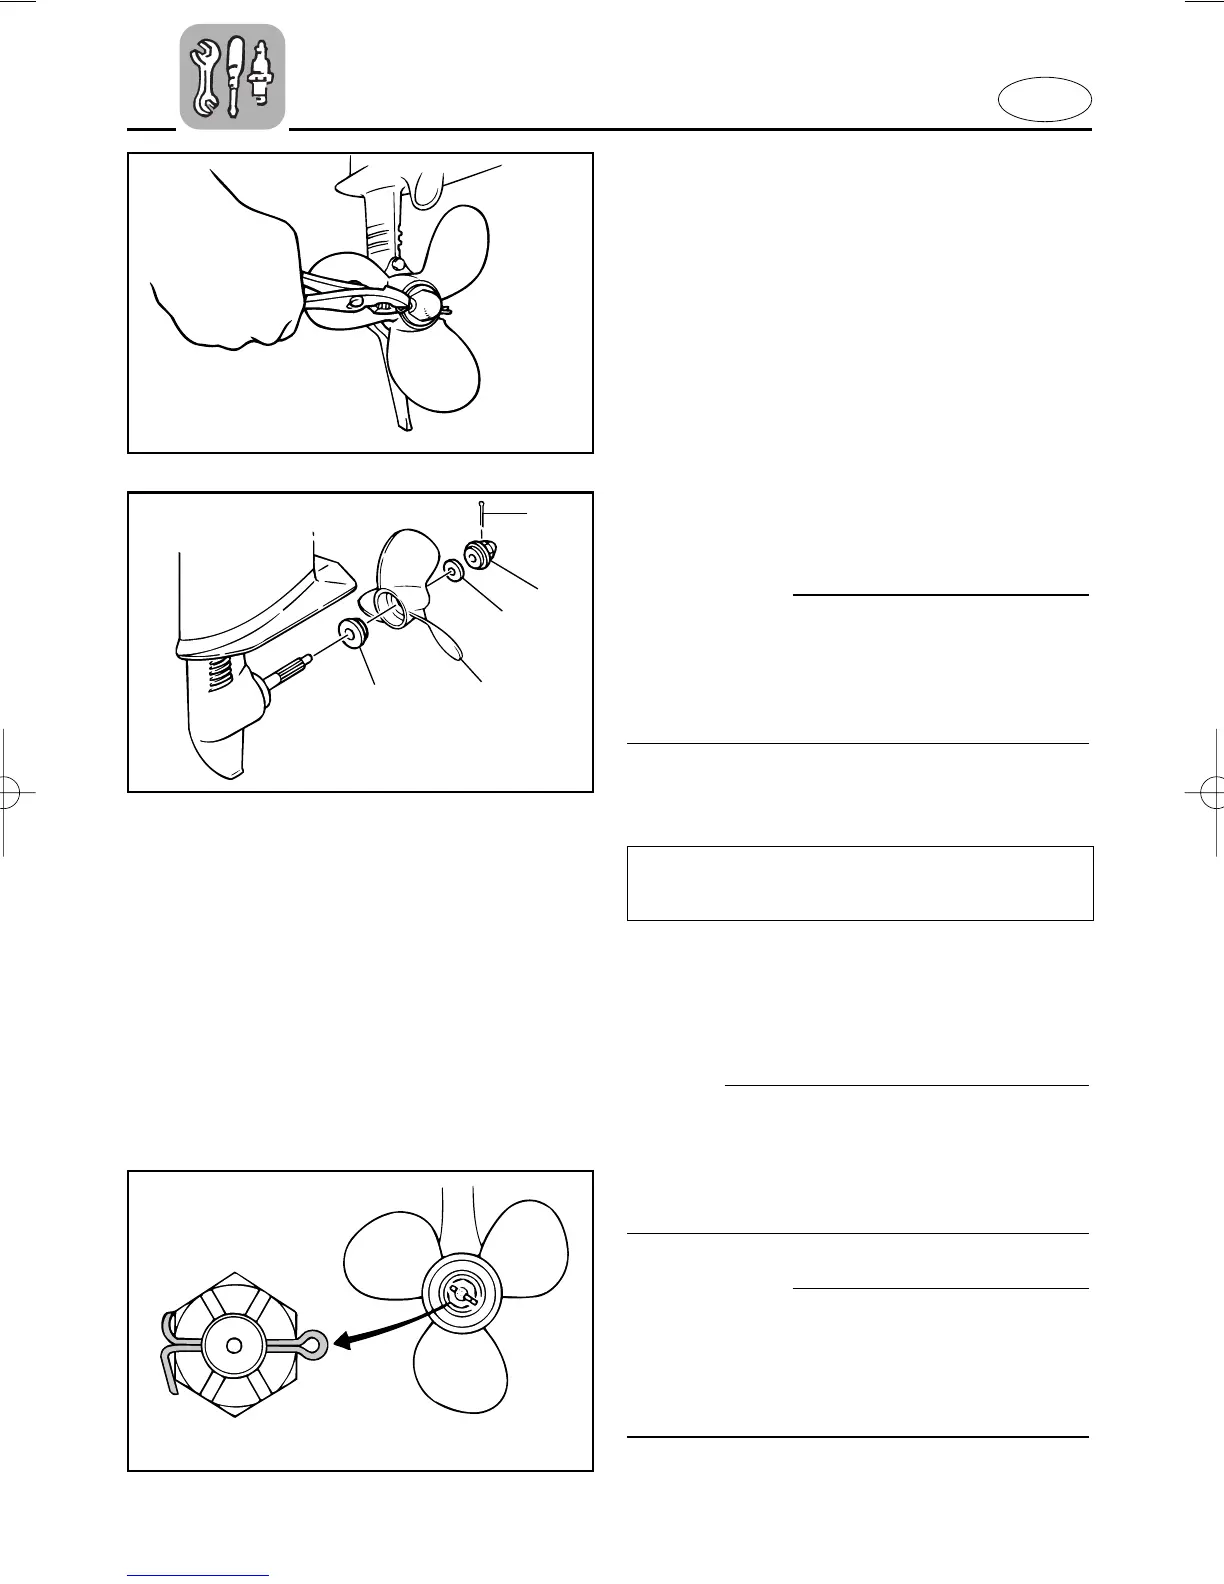
Removal
1) Using the pliers provided, straighten
the cotter-pin and pull it out.
2) Remove the propeller nut.
3) Remove the propeller.
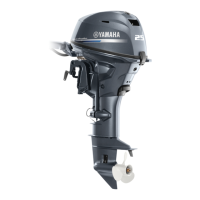
1 Thrust washer 4 Propeller nut
2 Propeller 5 Cotter pin
3 Washer
Installation
1) Apply Marine grease (water-resistant
grease) to the propeller-shaft.
2) Slide the propeller over the pro-
peller-shaft.
cC
Be sure to install the thrust washer
before installing propeller, otherwise,
lower case and propeller boss may be
damaged.
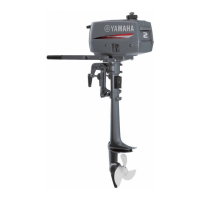
3) Tighten the propeller nut to the spec-
ified torque.
4) Align the propeller nut with the pro-
peller-shaft hole. Insert a new cotter
pin in the hole and bend the cotter
pin ends.
NOTE:
When the propeller nut does not align
with the propeller shaft hole after tight-
ening to the specified torque, then tight-
en it more to align the hole.
cC
Be sure to use a new cotter pin and
bend the ends over securely. Otherwise,
the propeller could come off during
operation and be lost.
Tightening torque:
Refer to SPECIFICATIONS, Page 4-1.
6A1-9-1L 4 4/20/01 11:58 AM Page 22