Song Creator
Song Creator
37
6 Press the [NEXT] button.
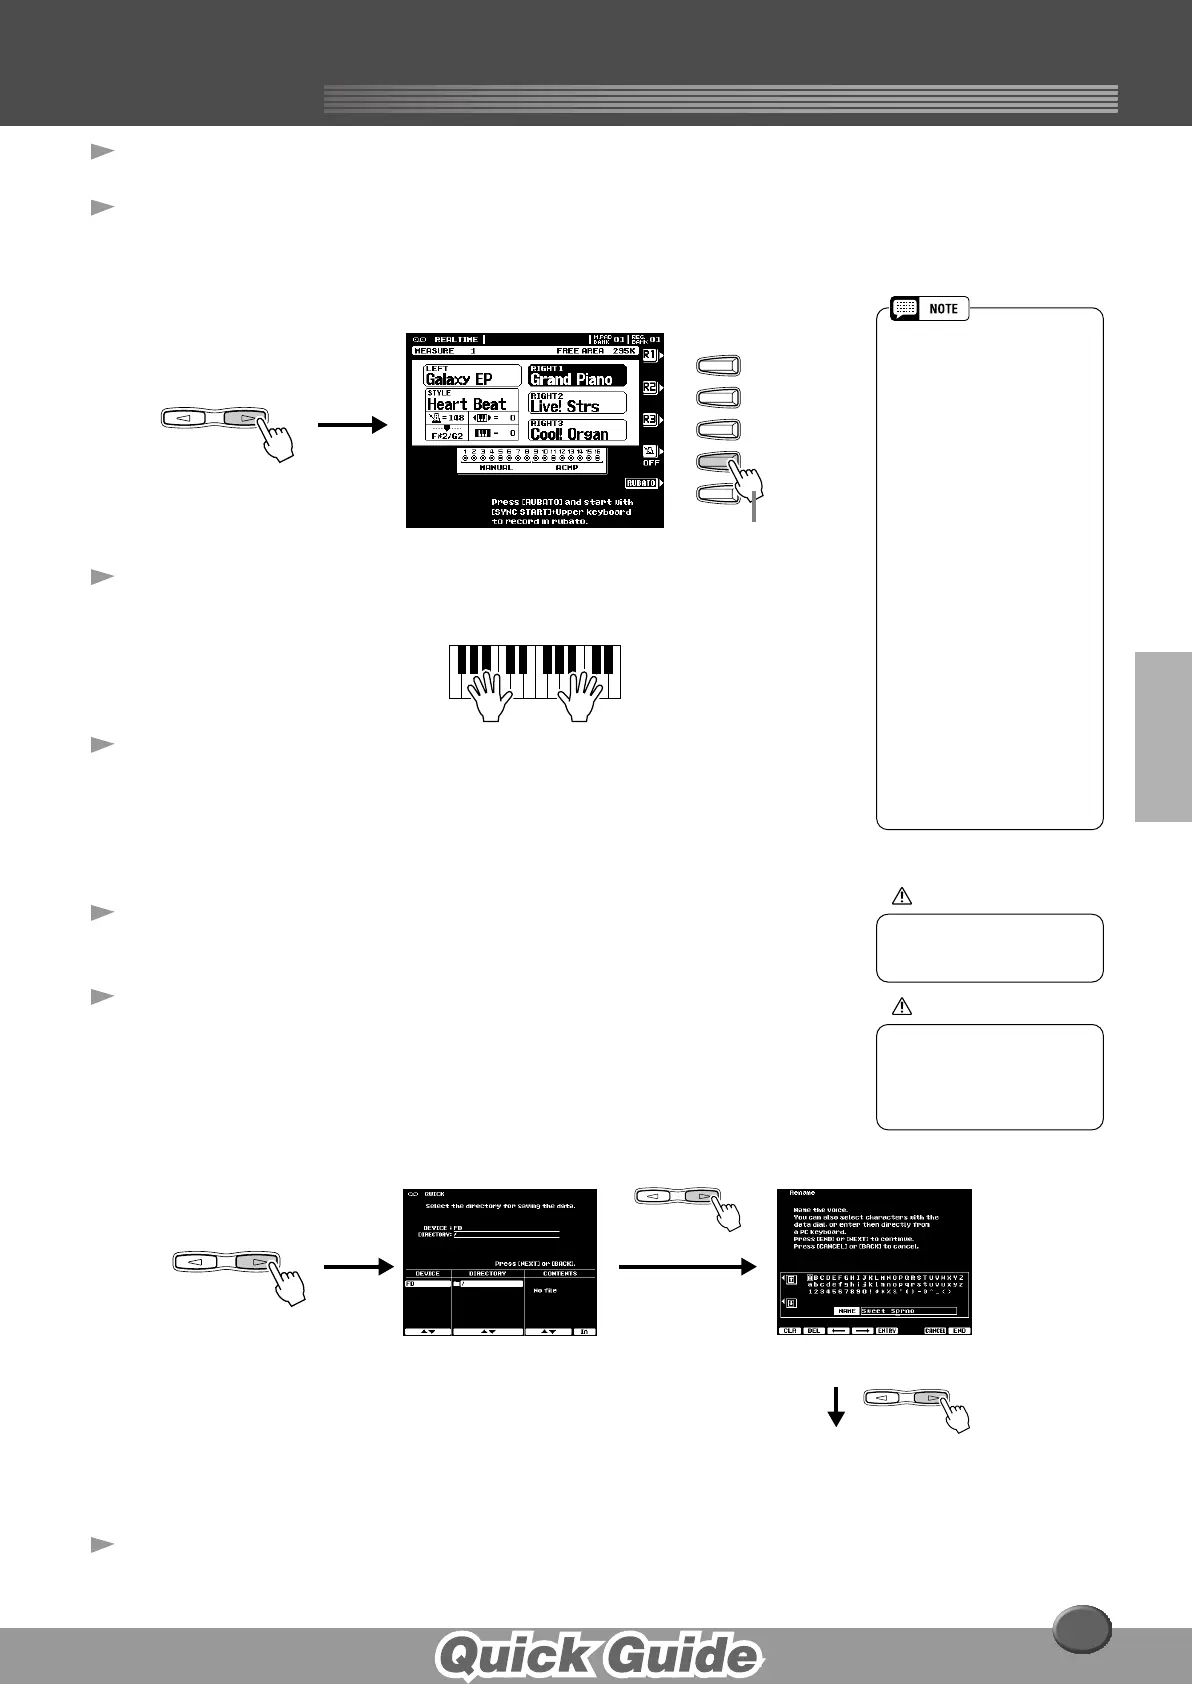
7 Set up for recording.
• Select the required voice(s), select a style, if required. Set up all parameters
as desired for recording.
• Turn the metronome on or off as required.
8 Start recording.
Recording starts as soon as you play a key on the keyboard.
9 Stop recording.
When you finish playing, press the [START/STOP] button.
If you have set ACMP track to REC in step #5 above, you can stop recording
by pressing the [ENDING] button. If you press the [ENDING] button, record-
ing will stop automatically after the ending section has finished.
10 Press the [START/STOP] button to hear your newly
recorded performance.
11 Save the recorded data to the disk.
Insert a blank recordable disk into the disk drive, and follow the instructions in
the illustrations below.
12 Press the [EXIT] button to exit from the Record mode.
NEXTBACK
PAGE CONTROL
F
G
H
I
J
Turn the metronome
on or off as required.
• If ACMP is set to "REC" in step
#5, you can start recording
your keyboard performance
first and then start recording
the Auto Accompaniment or
rhythm.
To do this,
1) Press the [RUBATO] LCD
button.
2) Play a key on the right side
of the split point to start
recording your keyboard
performance.
3) Play a chord on the left side
of the split point to start
recording the Auto Accom-
paniment with your key-
board performance.
• Using Registration Memory
(page 28), One Touch Setting
(page 24), and Music Data-
base (page 26) can make your
recording sessions much more
efficient, since various settings
(such as voices, etc.) can be
recalled by a single button
press.
CAUTION
• While the file is being saved,
never eject the floppy disk or
turn the power off.
CAUTION
• Please note that the
recorded data will be lost if
exiting from the Record
mode without saving the
data to disk.
NEXTBACK
PAGE CONTROL
NEXTBACK
PAGE CONTROL
Input a file name.
NEXTBACK
PAGE CONTROL
The LCD display will prompt you
to save the recorded data.
At the prompt, select “YES” to
save the recorded data.
35
 Loading...