Maintenance
94
EMU42632
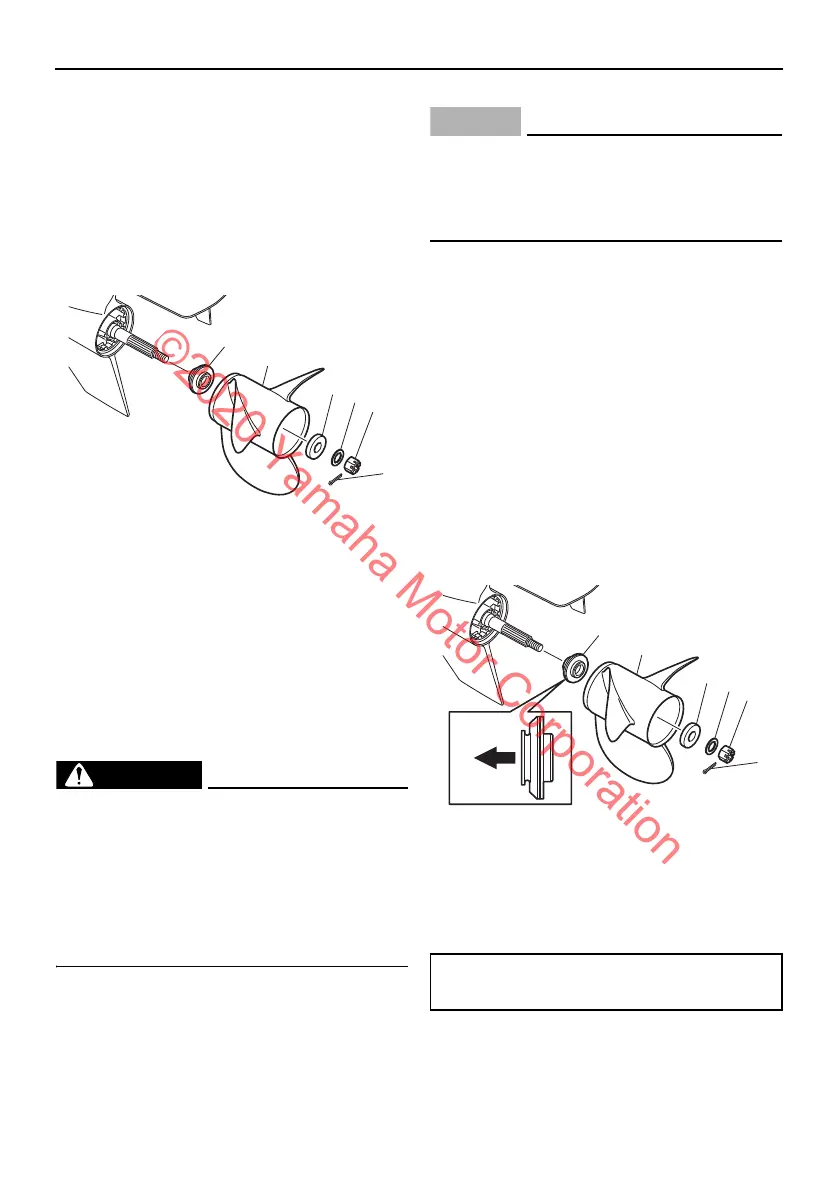
Removing propeller
1. Straighten the cotter pin and pull it out
using a pair of pliers.
2. Remove the propeller nut, washer, and
spacer. WARNING! Do not use your
hand to hold the propeller when loos-
ening the propeller nut.
[EWM01891]
3. Remove the propeller, spacer (if
equipped), and thrust washer.
EMU42646
Installing propeller
EWM00771
On counter rotation models, be sure to
use a propeller intended for counterclock-
wise rotation. These propellers are identi-
fied with the letter “L” after the size
indication on the propeller. Otherwise the
boat could move in the opposite direction
from that expected.
ECM00502
Make sure to use a new cotter pin and
bend the ends over securely. Otherwise,
the propeller could come off during oper-
ation and be lost.
1. Apply Yamalube Marine Grease or a cor-
rosion resistant grease to the propeller
shaft.
2. Install the thrust washer, spacer (if
equipped), and propeller on the propeller
shaft. NOTICE: Make sure to install the
thrust washer before installing the
propeller. Otherwise, the lower case
and propeller boss could be damaged.
[ECM01882]
3. Install the spacer, washer, and propeller
nut. Tighten the propeller nut to the
specified torque.
4. Align the propeller nut slot with the pro-
peller shaft hole. Insert a new cotter pin
in the hole and bend the cotter pin ends.
1. Cotter pin
2. Propeller nut
3. Washer
4. Spacer
5. Propeller
6. Thrust washer
1. Cotter pin
2. Propeller nut
3. Washer
4. Spacer
5. Propeller
6. Thrust washer
Propeller nut tightening torque:
54 N·m (5.4 kgf·m, 40 lb·ft)
U6EK35E0.book Page 94 Monday, December 10, 2018 9:06 AM
©2020 Yamaha Motor Corporation