PERIODIC MAINTENANCE AND ADJUSTMENT
7-24
7
1. Place the motorcycle on the cen-
terstand.
2. Remove cowling A. (See page 7-7
for removing procedure.)
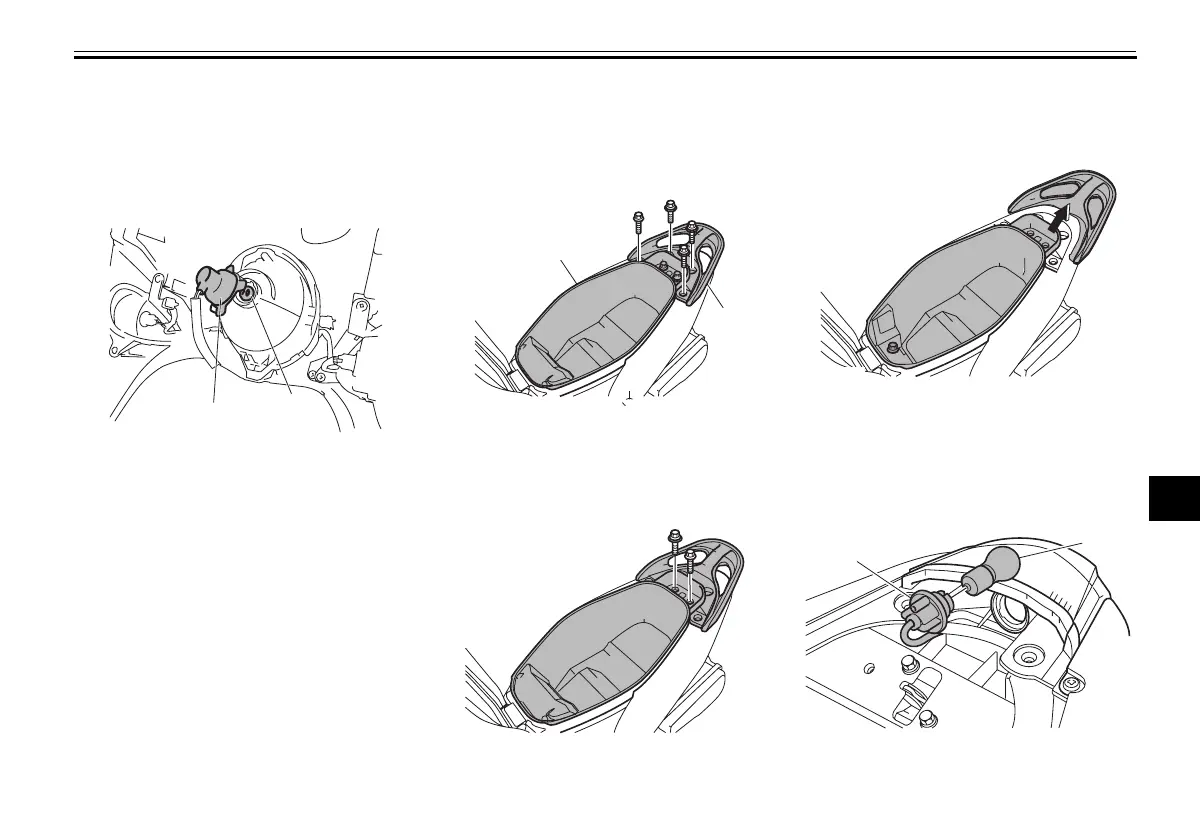
3. Remove the headlight bulb cover
by pulling it out.
4. Remove the headlight bulb holder
by pushing it inward and turning it
counterclockwise, and then re-
move the burnt-out bulb.
5. Place a new bulb into position, and
then secure it with the bulb holder.
6. Install the cowling.
7. Have a Yamaha dealer adjust the
headlight beam if necessary.
EAUU1200
Replacing the tail/brake light
bulb
1. Open the seat. (See page 4-8.)
2. Remove the grab bar bolts.
3. Remove the storage compartment
bolts.
4. Remove the grab bar by slightly
lifting the rear of the storage com-
partment upward, and then by
pulling the grab bar to the rear.
5. Remove the socket (together with
the bulb) by turning it counter-
clockwise.
6. Remove the burnt-out bulb by
pushing it in, and turning it coun-
terclockwise.
1. Head light bulb cover
2. Head light bulb holder
ZAUU0727
1
2
1. Storage compartment
2. Grab bar
1
2
ZAUU0728
ZAUU0734
1. Tail/brake light bulb
2. Tail/brake light bulb socket
ZAUU0735
ZAUU0729
1
2
52BF8199E0.book Page 24 Friday, December 10, 2010 10:23 AM


 To Next Page