Ping-Pong Recording
21
MT50 User’s Guide
Ping-Pong Recording
Ping-Pong Recording allows you to bounce previously-recorded tracks to
an unrecorded track. Using this technique, you can create a recording with
more than four tracks.
This section explains two applications: example 1, mixing Tracks 1, 2, and
3 to Track 4; and example 2, overdubbing a new sound source during
ping-pong recording.
This will free up Tracks 1, 2, and 3 for additional instruments, solos, or
vocals.
Example 1:
1. Begin by recording a different instrument on each of Tracks 1, 2,
and 3.
For example, you could record drums, bass, and synthesizer (or substi-
tute other instruments). See Chapter 3: Basic Recording for more infor-
mation. Don’t forget to set the ZERO STOP switch.
2. Rewind the tape to the start of the song.
3. Disconnect any instruments that may be connected to the
MIC/LINE inputs for Tracks 1, 2 and 3.
4. Set the MONITOR SELECT switch to CUE.
5. Set the MONITOR/PHONES control to about half-way.
Adjust it later if the monitors are too loud or too soft.
6. Turn the PAN controls for Modules 1, 2, and 3 all the way to the
right (R).
The signal from Modules 1, 2, and 3 is routed to stereo bus output R.
7. Set the REC SEL switch for Modules 1, 2, and 3 to OFF.
We don’t want to record anything over our previously-recorded tracks.
8. Set the REC SEL switch for Module 4 to R.
The REC indicator for Module 4 is flashing.
In this way, you can record Tracks 1, 2, and 3 onto Track 4.
9. Set the faders for Modules 1, 2, and 3 to about 7.
10.Set the CUE level of Module 4 to about 7.
11.Press the REC button to start a temporary recording.
12.Adjust the recording level of Track 4, while balancing the volume
level of Tracks 1-3.
Use the module 1, 2, and 3 faders to adjust the level balance so that the
level meter +6 of Module 4 will light up momentarily.
13.Once you have determined the correct position for the input fader
for Module 1–3, repeat the process for the final ping-pong.
! The procedure to the right stops
after we ping-pong Tracks 1, 2 and
3 onto Track4. However, there is no
need to stop there, as the following
illustration suggests. By repeatedly
bouncing tracks, you can make
your MT50 sound like a ten (or
more) track recording studio!
! You cannot apply effects to or
adjust the balance of the tracks
mixed in ping-pong recording.
We recommend you to make any
necessary adjustments before
ping-pong recording.
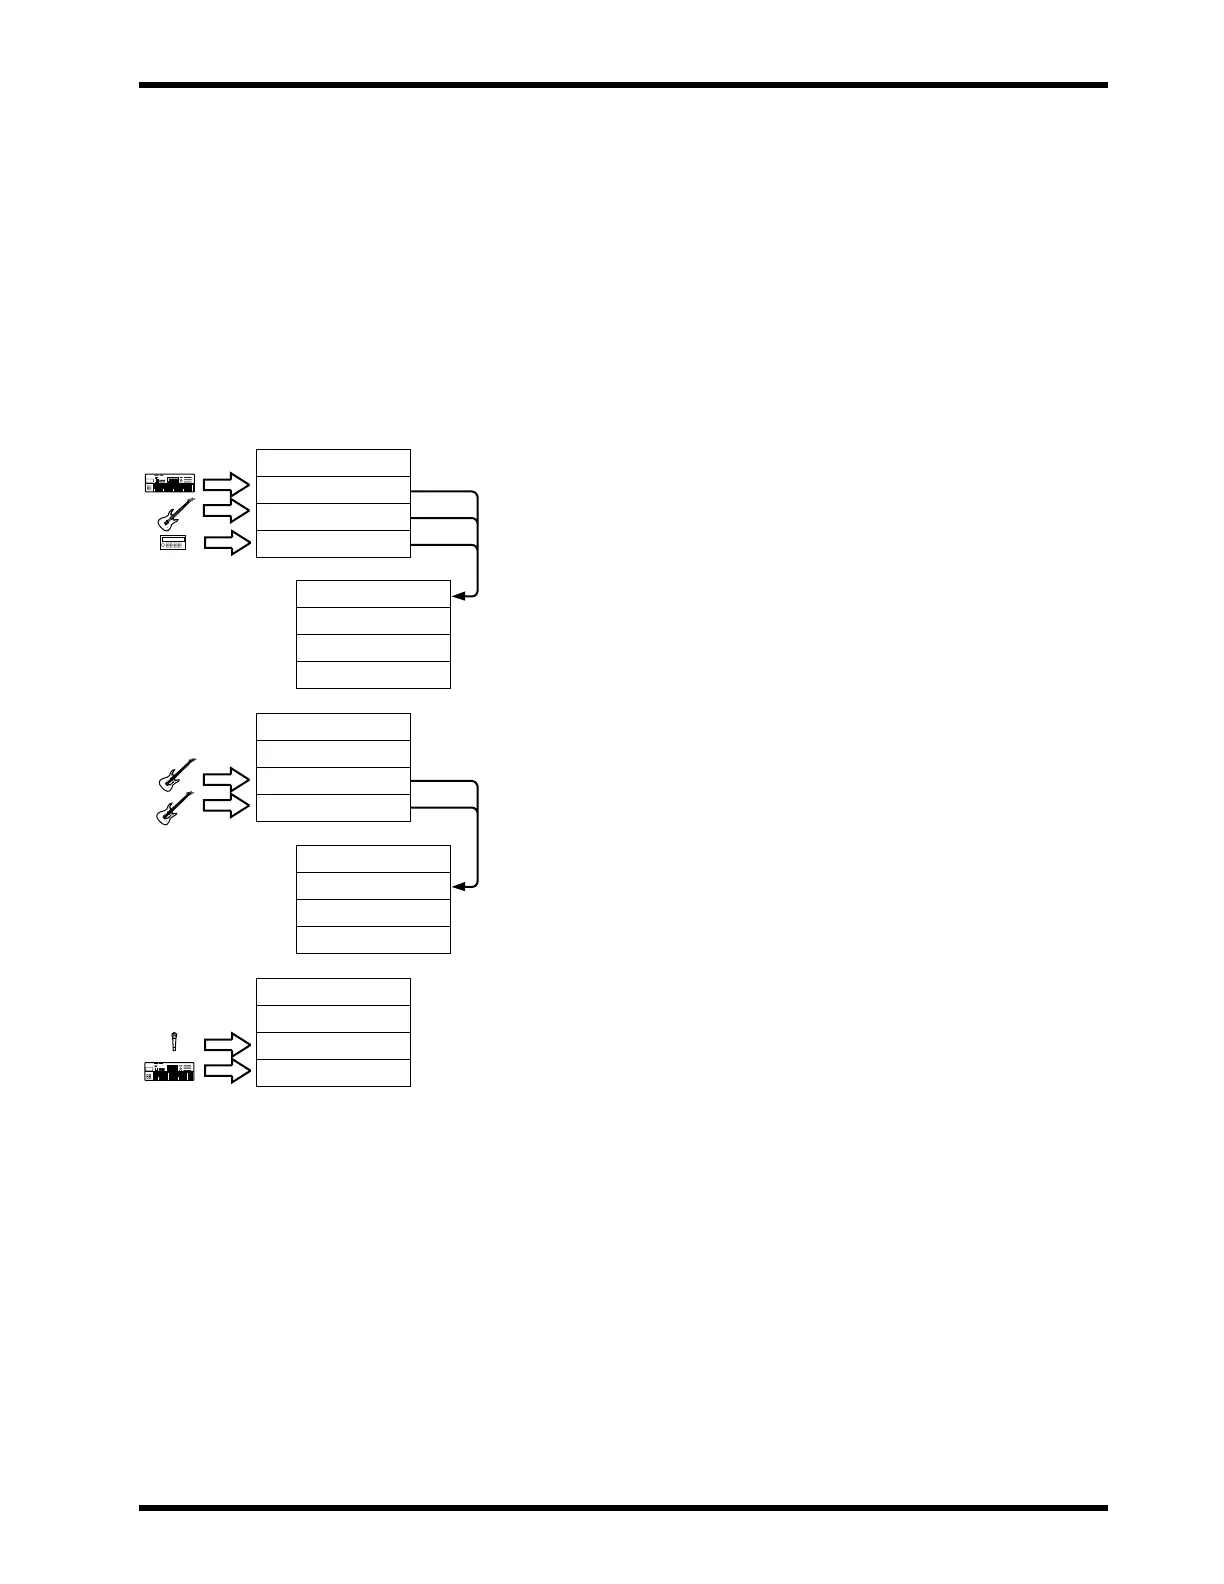
Track 3: Synthesizer
Track 2: Bass
Track 1: Drums
Track 4: Rhythm Mix
(Track 3: Synthesizer)
(Track 2: Bass)
(Track 1: Drums)
Track 4: Rhythm Mix
(Track 3: Synthesizer)
Track 2: Guitar2
Track 1: Guitar1
Track 4: Rhythm Mix
Track 3: Guitar Mix
(Track 2: Guitar2)
(Track 1: Guitar1)
Track 4: Rhythm Mix
Track 3: Guitar Mix
Track 2: Synth Lead
Track 1: Vocals
Drum Machine