Punch In/Out Recording
23
MT50 User’s Guide
Punch In/Out Recording
This technique is used to re-record mostly to correct mistakes by re-record-
ing a short section of tape on one track.
For example, say you just played a great guitar solo over some basic rhythm
tracks, but you flubbed a couple of notes in Bar 4. The solo was recorded to
Track 4. (Other instruments occupy Tracks 1, 2, and 3.)
You could punch-in at the start of Bar 4, play your part again (this time hit-
ting every note perfectly!) and punch out at the end of Bar 4. When you lis-
ten to the playback of the solo, the punch-in edits are flawless! Nobody will
ever know that you didn’t play the part perfectly the first time.
You can punch in and out with or without a footswitch. This section
explains both methods, but we recommend that you use the footswitch
since you can operate it with your foot.
Punch in/out recording using a footswitch:
1. Connect a footswitch to the PUNCH I/O jack.
2. Set the REC SEL switches for Modules 1, 2, and 3 to OFF.
3. Set the REC SEL switch for Modules 4 to “4.”
The REC INDICATOR for Track 4 will start flashing.
4. Set the MONITOR SELECT switch to MIX.
5. Make sure the MONITOR/PHONES control is set as it was before.
6. Make sure the input fader for Modules 4 is set to the same level as
it was during the original take of your guitar solo.
If you record the punch-in at a different volume level, it will not blend
into the previously-recorded track and your edit will be obvious.
7. Press the PLAY button to play the song for the actual punch-in.
8. Play along with your guitar solo, or get ready to start in tempo at
the start of Bar 4.
Tapping your foot can help a lot!
9. At the start of Bar 4, press the footswitch to start recording over
Track 4. Play Bar 4 of your solo. At this time, the REC indicator of
Module 4 lights up
.
The timing is critical. If you start too early, you will erase recorded
material before Bar 4--the stuff you want to keep!
10.At the end of Bar 4, step on the footswitch. The REC indicator of
Module 4 flashes.
Again, the timing is critical. If you step on the footswitch to stop record-
ing too late, you will erase material after Bar 4.
Punch in/out recording without using a footswich:
The basic procedure is the same as that with a footswitch, except for the fol-
lowing steps:
1’. (No connection.)
9’. Set the REC SEL switch while holding down the PLAY button to
4 at the beginning of Bar 4, start recording on Track 4 and play the
instrument.
10’. At the end of Bar 4, set the STOP to OFF.
! Make sure you re-play enough of
the solo to make it flow smoothly.
! Practice playing along with your
guitar solo a few times through the
end of Bar 4 to get ready for the
actual punch-in. Work on your tim-
ing, and try to make the new perfor-
mance of Bar 4 blend in smoothly
with the existing take.When you are
satisfied, rewind the tape.
Yamaha supplies an optional foot-
switch, FC-5. Note that using a foot-
switch other than Yamaha’s may
cause mistiming.
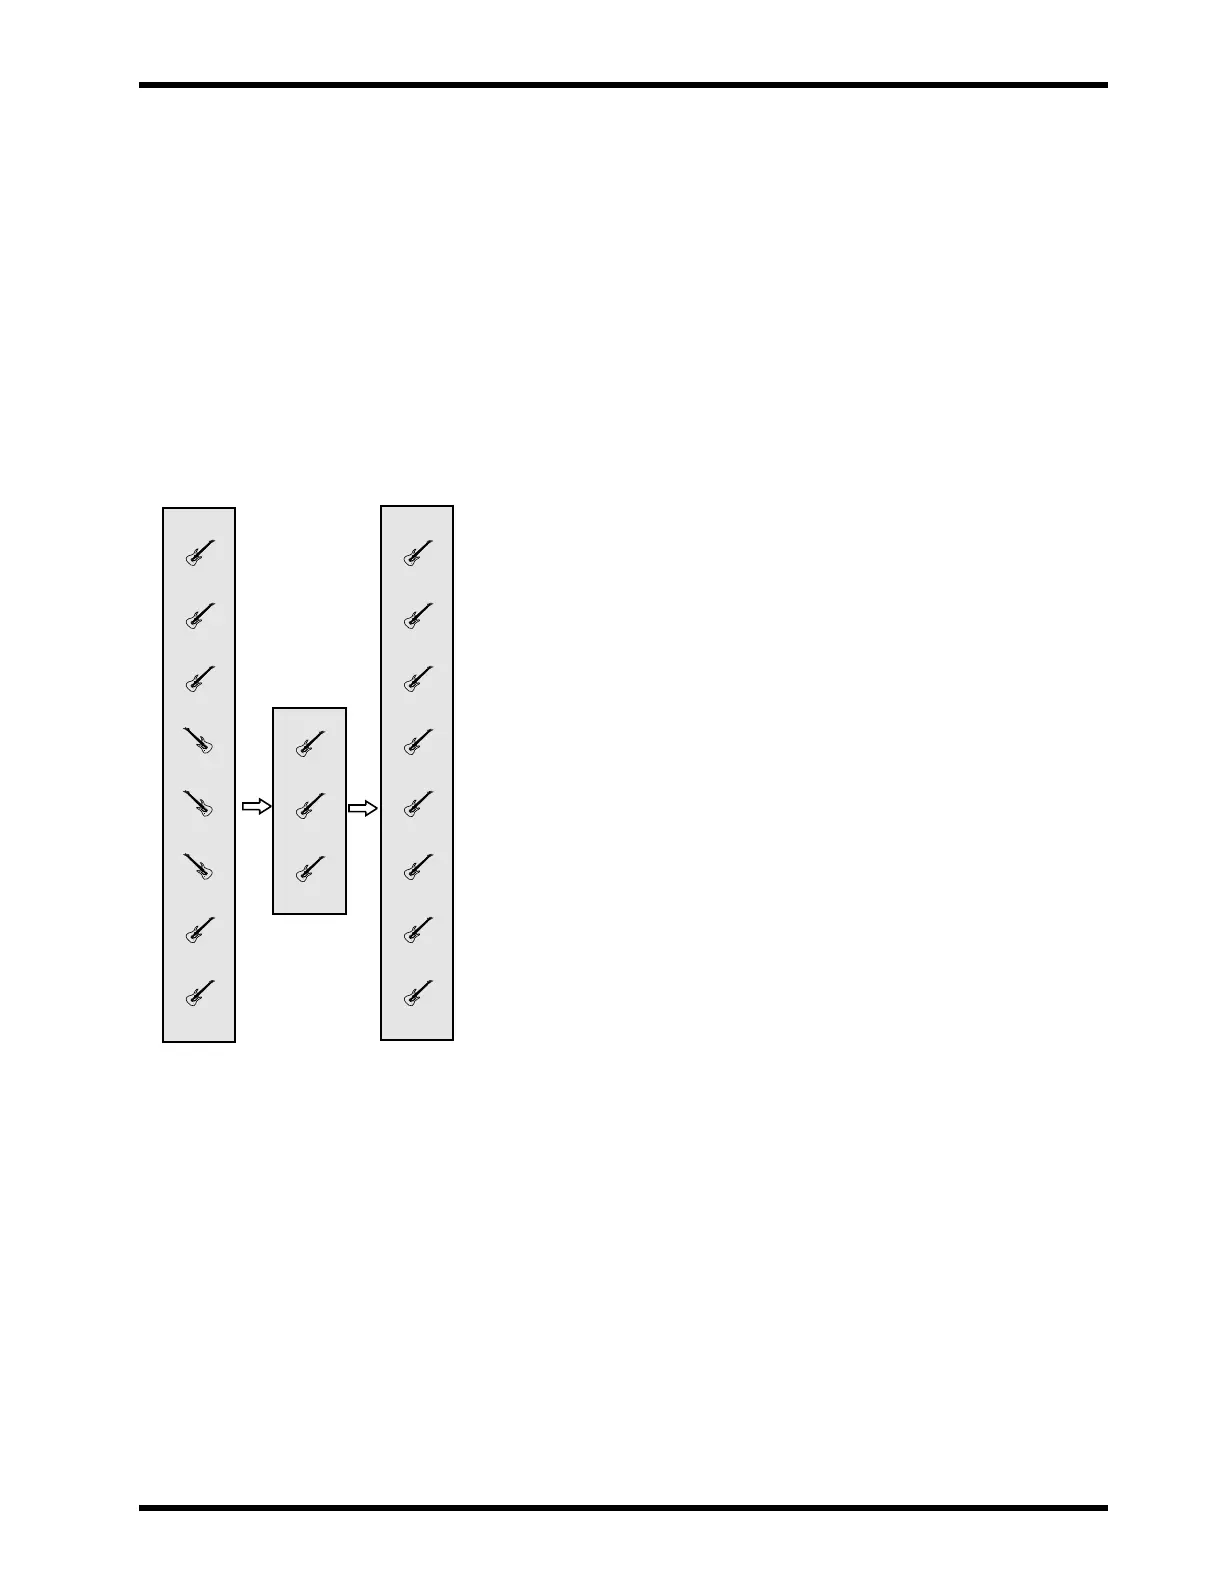
Track 4:
Guitar Solo
Track 4:
Repaired Guitar Solo
Track 4:
Solo Punch-In
Track 4:
Solo Punch-Out