This document is the Owner's Manual for the Yamaha Digital Piano P-35. It provides comprehensive instructions for setting up, operating, and maintaining the instrument, along with important safety precautions and MIDI information.
Function Description
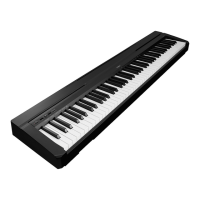
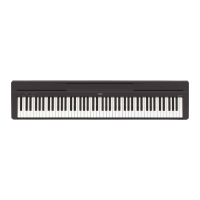
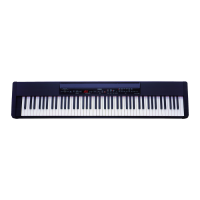
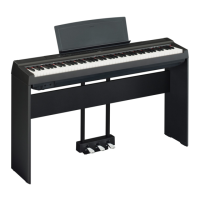
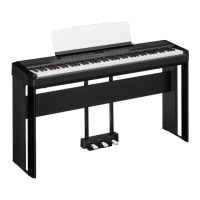
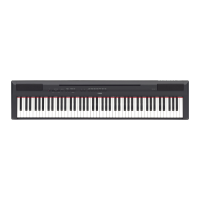
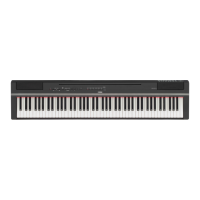
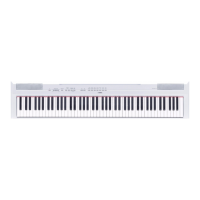
The Yamaha P-35 is a digital piano designed for both beginners and experienced players. It features a Graded Hammer Standard (GHS) keyboard with 88 keys, offering a realistic piano touch response. The instrument includes 10 preset voices, allowing users to explore various sounds such as grand pianos, electric pianos, pipe organs, strings, harpsichords, and vibraphone.
A core feature of the P-35 is its ability to layer two voices simultaneously (Dual mode), enriching the sound. For example, a piano voice can be combined with a string voice to create a fuller sound. The instrument also offers a Duo mode, which divides the keyboard into two sections with the same octave range, enabling two players to perform together on a single instrument.
The P-35 incorporates four different reverb types (Room, Hall1, Hall2, Stage) to add depth and ambience to the sound, simulating various acoustic environments. Users can adjust the reverb depth to suit their preferences.
For practice and performance, the digital piano includes a metronome with adjustable tempo and beat settings, helping users maintain accurate timing. It also features a transpose function, allowing the pitch of the entire keyboard to be shifted in semitone increments, which is useful for playing in different keys or matching other instruments/singers. Fine-tuning of the pitch in approximately 0.2 Hz increments is also possible, enabling precise adjustment to match other instruments or CD music.
The instrument comes with 10 demo songs and 10 preset songs for listening pleasure, showcasing the different voices and musical styles. Users can adjust the playback tempo of these songs.
MIDI IN/OUT terminals are provided, allowing the P-35 to connect with other MIDI instruments, devices, or computers. This expands its capabilities for recording, sequencing, and controlling other MIDI-compatible equipment. The instrument supports MIDI data transmission and reception, with adjustable MIDI transmit channels.
An Auto Power Off function is included to save energy, automatically turning off the instrument after 30 minutes of inactivity. This feature can be disabled or enabled as needed.
Usage Features
Setting Up:
To begin using the P-35, connect the AC power adaptor to the DC IN jack and then to an AC outlet. The power is turned on by pressing the [] (Standby/On) switch. The power lamp will light up when the instrument is on. It's crucial to use only the specified adaptor to prevent damage.
Volume Control:
The [MASTER VOLUME] slider allows for easy adjustment of the overall sound volume.
Voice Selection:
The Grand Piano 1 voice can be instantly recalled by pressing the [GRAND PIANO/FUNCTION] button. To select other voices, hold down the [GRAND PIANO/FUNCTION] button and press one of the C0 – A0 keys on the keyboard, each corresponding to a different voice.
Dual Mode (Layering Voices):
To engage Dual mode, hold [GRAND PIANO/FUNCTION] and simultaneously press two keys from C0 – A0. The left-side key selects Voice 1, and the right-side key selects Voice 2. Octave shifts for each voice can be adjusted by holding [GRAND PIANO/FUNCTION] and pressing F5 – A#5 keys. The balance between the two layered voices can be adjusted using the B5, C6, and C#6 keys while holding [GRAND PIANO/FUNCTION]. To exit Dual mode, simply press [GRAND PIANO/FUNCTION] again.
Duo Mode (Two Players):
To activate Duo mode, hold [GRAND PIANO/FUNCTION] and press the D3 key. The keyboard splits at E3, allowing two players to use the instrument simultaneously, each with the same octave range. Octave shifts for each voice in Duo mode are adjusted similarly to Dual mode. To exit Duo mode, press the D3 key again while holding [GRAND PIANO/FUNCTION].
Reverb Effects:
Reverb types can be selected by holding [GRAND PIANO/FUNCTION] and pressing one of the C5 – E5 keys. The reverb depth is adjusted by holding [GRAND PIANO/FUNCTION] and pressing the A4, A#4, or B4 keys.
Touch Sensitivity:
The touch sensitivity (how the sound responds to playing strength) can be set to Fixed, Soft, Medium (default), or Hard. This is adjusted by holding [GRAND PIANO/FUNCTION] and pressing one of the A2 – C3 keys.
Transposing Pitch:
To transpose the pitch up or down in semitones, hold [GRAND PIANO/FUNCTION] and press the F#6 (up) or F6 (down) keys. The original pitch can be restored by pressing G6.
Fine-Tuning Pitch:
Fine-tuning is done by holding [GRAND PIANO/FUNCTION] and pressing G#6 (lower pitch), A6 (raise pitch), A#6 (set to A3 = 442 Hz), or B6 (reset to A3 = 440 Hz default).
Metronome:
The metronome is started by holding [GRAND PIANO/FUNCTION] and pressing the E3 key. The tempo is adjusted by holding [GRAND PIANO/FUNCTION] and pressing the F3 – D4 keys. The beat can be selected using E4 and F4 keys, and the volume adjusted with F#4, G4, and G#4 keys while holding [GRAND PIANO/FUNCTION]. Pressing E3 again (or [GRAND PIANO/FUNCTION] alone) stops the metronome.
Listening to Songs:
Demo songs are played by holding [GRAND PIANO/FUNCTION] and pressing C1 – A1 keys. Preset songs are played by holding [GRAND PIANO/FUNCTION] and pressing A#1 – G2 keys. The tempo of song playback can be adjusted in the same way as the metronome tempo. Pressing [GRAND PIANO/FUNCTION] again stops playback.
Using Headphones:
Standard stereo headphones with a 1/4" stereo phone plug can be connected to the [PHONES] jack for private listening. The internal speakers are automatically muted when headphones are connected.
Using a Footswitch:
The included footswitch (or an optional FC3, FC4/FC5) connects to the [SUSTAIN] jack and functions as a damper pedal. The FC3 supports Half Pedal function, allowing for more nuanced sustain. It's important not to press the footswitch when turning the power on, as this can reverse its polarity.
MIDI Connectivity:
Connect MIDI devices using standard MIDI cables to the [MIDI IN] and [MIDI OUT] terminals. For computer connections, a USB-MIDI interface device may be required, along with its specific driver. MIDI transmit channels can be set by holding [GRAND PIANO/FUNCTION] and pressing D6 – E6 keys.
Auto Power Off:
To disable Auto Power Off, turn off the instrument, then hold the A-1 key and press the [] (Standby/On) switch. The power indicator will flash three times to confirm. To enable it, hold [GRAND PIANO/FUNCTION] and press the A#-1 key. If the instrument is already on, Auto Power Off can be disabled by holding [GRAND PIANO/FUNCTION] and pressing the A-1 key.
Maintenance Features
General Care:
The instrument should be kept away from heat sources, direct sunlight, excessive dust, vibrations, and extreme cold or heat to prevent damage and unstable operation. It should not be placed near TVs, radios, stereo equipment, or mobile phones to avoid noise interference.
Cleaning:
When cleaning the instrument, use a soft, dry or slightly damp cloth. Avoid using paint thinners, solvents, cleaning fluids, or chemical-impregnated wiping cloths, as these can discolor the panel or keyboard.
Power Cord and Plug:
Periodically check the electric plug for dirt or dust accumulation and remove it. Always hold the plug itself when removing it from the outlet, not the cord. Unplug the power cord from the wall AC outlet if the instrument will not be used for extended periods or during electrical storms.
Troubleshooting:
The manual provides a troubleshooting section to address common issues such as the instrument not turning on, automatic power off, noise from speakers/headphones, low volume, or pedal malfunction. Solutions typically involve checking power connections, volume levels, headphone connections, and footswitch polarity.
Service:
The instrument contains no user-serviceable parts. If it malfunctions, discontinue use immediately and have it inspected by qualified Yamaha service personnel. Service charges incurred due to lack of knowledge about functions (when the unit is operating as designed) are not covered by the manufacturer's warranty.