EasyManua.ls Logo

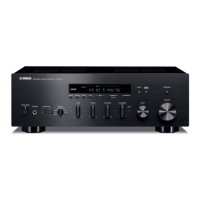
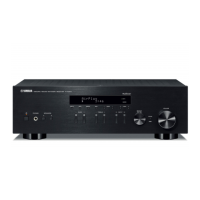
Yamaha R-S700 Service Manual

Yamaha R-S700
84 pages
To Next Page IconTo Next Page
Page #1 background imageLoading...
Page #1 background image
R-S700
101189
SERVICE MANUAL
IMPORTANT NOTICE
This manual has been provided for the use of authorized YAMAHA Retailers and their service personnel.
It has been assumed that basic service procedures inherent to the industry, and more speci cally YAMAHA Products, are already known
and understood by the users, and have therefore not been restated.
WARNING:
Failure to follow appropriate service and safety procedures when servicing this product may result in personal injury,
destruction of expensive components, and failure of the product to perform as speci ed. For these reasons, we advise
all YAMAHA product owners that any service required should be performed by an authorized YAMAHA Retailer or
the appointed service representative.
IMPORTANT:
The presentation or sale of this manual to any individual or rm does not constitute authorization, certi cation or
recognition of any applicable technical capabilities, or establish a principle-agent relationship of any form.
The data provided is believed to be accurate and applicable to the unit(s) indicated on the cover. The research, engineering, and service
departments of YAMAHA are continually striving to improve YAMAHA products. Modifications are, therefore, inevitable and
speci cations are subject to change without notice or obligation to retro t. Should any discrepancy appear to exist, please contact the
distributor's Service Division.
WARNING:
Static discharges can destroy expensive components. Discharge any static electricity your body may have
accumulated by grounding yourself to the ground buss in the unit (heavy gauge black wires connect to this buss).
IMPORTANT:
Turn the unit OFF during disassembly and part replacement. Recheck all work before you apply power to the unit.
CONTENTS
TO SERVICE PERSONNEL ........................................2–3
IMPEDANCE SELECTOR ...............................................3
FRONT PANELS .........................................................4–5
REAR PANELS ...........................................................5–6
REMOTE CONTROL PANELS .......................................7
SPECIFICATIONS .......................................................8–9
INTERNAL VIEW .......................................................... 10
SERVICE PRECAUTIONS ............................................ 10
DISASSEMBLY PROCEDURES ............................. 11–13
UPDATING FIRMWARE .......................................... 14–17
SELF-DIAGNOSTIC FUNCTION ............................ 18–31
AMP ADJUSTMENT ...............................................32–33
DISPLAY DATA .......................................................34–35
IC DATA ...................................................................36–38
BLOCK DIAGRAM ........................................................39
PRINTED CIRCUIT BOARDS .................................40–55
PIN CONNECTION DIAGRAMS ...................................56
SCHEMATIC DIAGRAMS .......................................57–62
REPLACEMENT PARTS LIST ................................63–73
REMOTE CONTROL ............................................... 74–79
ADVANCED SETUP ................................................80–82
RECEIVER
'10.10
P.O.Box 1, Hamamatsu, Japan
Copyright © 2010 All rights reserved.
This manual is copyrighted by YAMAHA and may not be copied or
redistributed either in print or electronically without permission.
R-S700
Table of Contents

Other manuals for Yamaha R-S700

Questions and Answers:

Yamaha R-S700 Specifications

General IconGeneral
Audio output channels2.1 channels
Signal-to-Noise Ratio (SNR)107 dB
Total Harmonic Distortion (THD)0.015 %
Dynamic power per channel (4 Ohm)220 W
Dynamic power per channel (8 Ohm)140 W
Power output per channel (20-20KHz@8 Ohm)100 W
Connectivity technologyWired
Speakers connectivity typeClamp terminals
Wi-Fi-
BluetoothYes
Ethernet LANNo
Product colorSilver
Apple docking compatibilityNot supported
Power consumption (standby)0.5 W
Weight and Dimensions IconWeight and Dimensions
Depth387 mm
Width435 mm
Height151 mm
Weight11200 g

Summary

Important Notices and Warnings

Component Replacement and Safety Warnings

Warnings regarding personal injury, component destruction, and static discharge during servicing.

To Service Personnel

Handling Precautions

Lithium Battery Safety

Precautions and warnings for handling and replacing lithium batteries.

Remote Control Panels

Specifications

Audio and Tuner Specifications

Detailed technical specifications for the audio section and FM/AM tuners.

Internal View and Service Precautions

General Safety Measures for Servicing

Essential safety measures, including handling high voltages and discharging capacitors.

Disassembly Procedures

Disassembly Procedures (Continued)

Firmware Update Process

Version Confirmation, Initialization, and Tools

Steps for confirming firmware, initializing backup IC, and listing required tools.

Firmware Update Connection and Operation

Connecting the Unit for Firmware Update

Diagram and instructions for connecting the PC to the unit via RS-232C.

Executing the Firmware Update Procedure

Step-by-step guide for running the firmware update software (FlashSta.exe).

Self-Diagnostic Function Overview

Starting Self-Diagnostic Function

Standard and Protection Cancel Mode Activation

Procedures for starting the diagnostic function normally or in protection cancel mode.

Self-Diagnostic Function Operation

Canceling Function and Display Behavior Scenarios

How to cancel the function and what displays when power is turned off.

Protection Function Trigger Scenarios and Notes

Explains protection triggers (excess current) and related cautions.

Navigating Self-Diagnostic Menus

Self-Diagnostic Menu Details: Version Information

Firmware Version, Checksum, SIRIUS, Model/Destination

Details on firmware version, checksum, SIRIUS version, and model/destination display.

Self-Diagnostic Menu Details: Display Functions

Self-Diagnostic Menu Details: Presets and AD Data

Factory Preset Options and AD Data (PS/DC)

Details on preset initialization and AD data for power supply/DC voltage.

Self-Diagnostic Menu Details: AD Data

AD Data for Heatsink Temperature and Key Input

AD data readings for heatsink temperature (TA/TB) and panel key status (KEY0/KEY1).

AD Data for REC OUT, DOCK, and Model/Destination

AD data readings for REC OUT switch, DOCK type, model, and destination.

Self-Diagnostic Menu Details: Dock Functionality

Self-Diagnostic Menu Details: Protection History

Self-Diagnostic Menu Details: SIRIUS Functionality

Self-Diagnostic Menu Details: Power Off History

Amplifier Adjustment Procedures

Idling Current Confirmation and Adjustment

Procedure for confirming and adjusting idling current in the amplifier section.

IC Data: Microprocessor Details

IC502 Microprocessor Pinout and Functions

Detailed pin configuration and peripheral functions of the microprocessor IC502.

Block Diagram of System Architecture

Functional Block Diagram of the R-S700

High-level block diagram illustrating signal flow and component interaction.

Printed Circuit Boards: MAIN PCBs (Side A)

Service Safety Measures for PCBs

Important safety measures to be taken when working with PCBs.

Pin Connection Diagrams

Component Pinouts (ICs, Diodes, Transistors)

Diagrams showing pin connections for various ICs, diodes, and transistors.

Replacement Parts List

Electrical Component Parts Identification

List of electrical components with part numbers and descriptions.

Overall Assembly Diagram

Remote Control Details

Remote Models and Schematic Diagram

Overview of remote models (RAX25, RAX27, RAX26) and their schematic.

Remote Control Panel Layouts

Illustrations of the physical button layouts for different remote models.

Remote Control Key Codes

Key Number Layout and Function Codes

Tables mapping remote key numbers to their corresponding function codes for different devices.

Remote Control Preset Code Procedures

Advanced Setup (U, C, A models)

Advanced Setup (R, G models)

Changing Setup Parameters and Remote ID

Procedures for changing setup parameters and switching the remote control ID.

Switching the Remote Control ID

Procedure for Changing Remote Control ID

Instructions on how to switch the remote control ID between ID1 and ID2.

Related product manuals