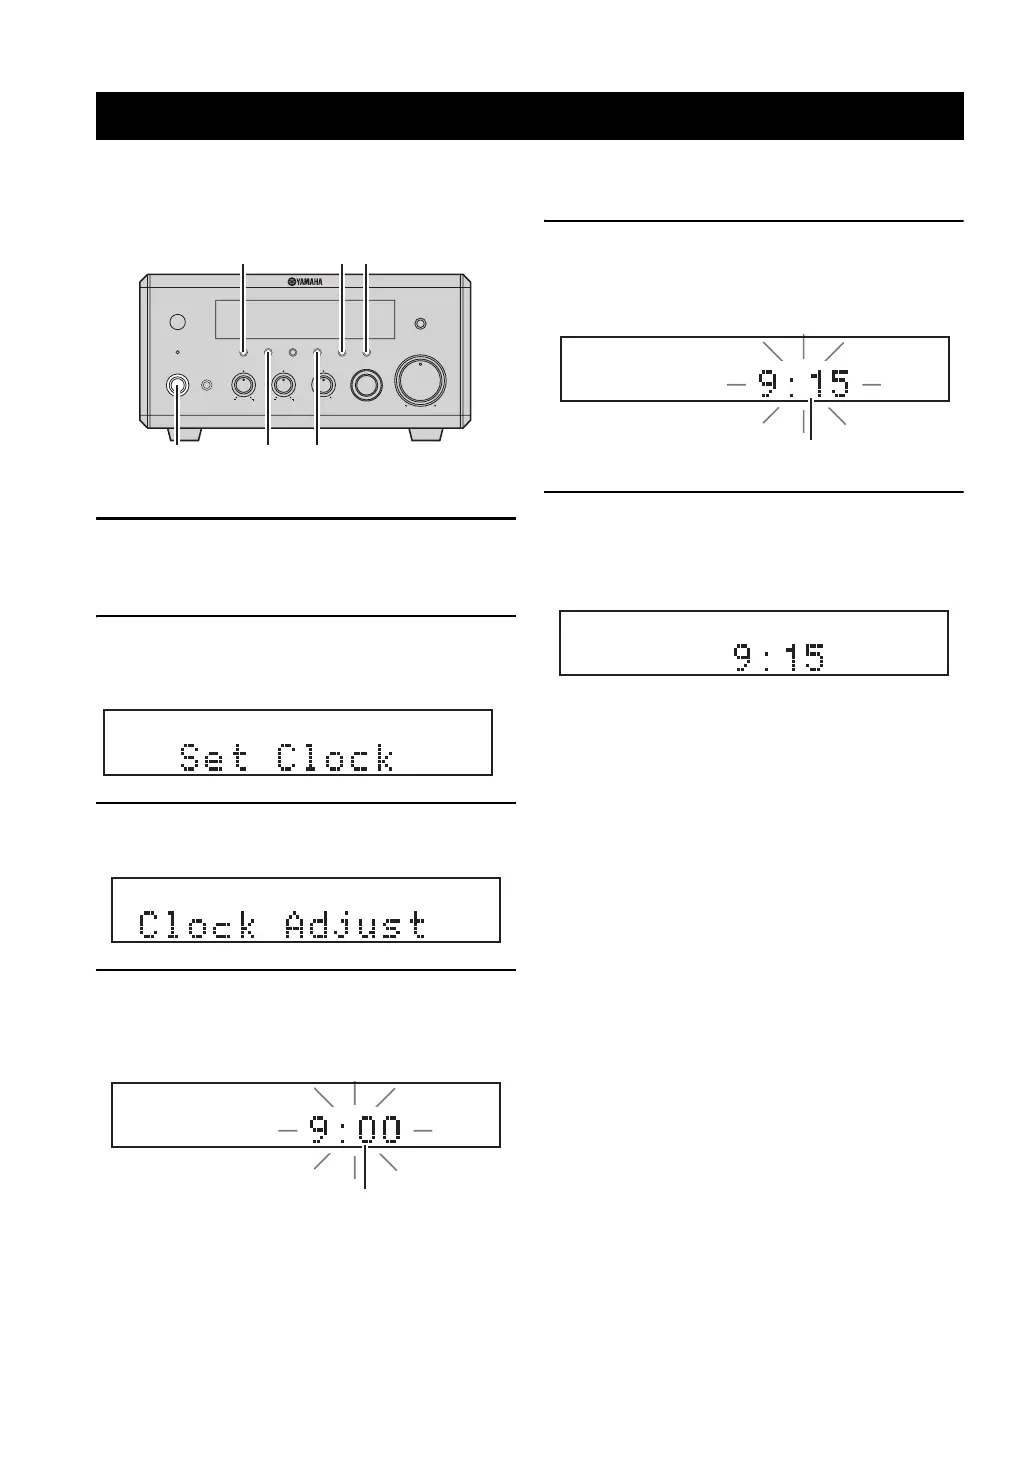
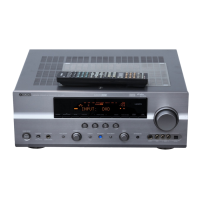
ADJUSTING THE CLOCK
18 En
Before starting playback operation, follow the procedure below to adjust the clock setting of the receiver.
1 Press STANDBY/ON on the front panel of the
receiver to turn on it.
The front panel display lights up.
2 Press DISPLAY.
“Clock Time” appears in the front panel display for a
few seconds, and then “Set Clock” appears.
3 Press TIME ADJ for about two seconds to
enter the clock setting mode.
4 To set the hour setting ahead, press HOUR
repeatedly. To set the hour setting backward,
press HOUR repeatedly while holding down
PRESET/BAND.
5 To set the minute setting ahead, press MIN
repeatedly. To set the minute setting
backward, press MIN repeatedly while
holding down PRESET/BAND.
6 Press TIME ADJ once again to confirm the
clock setting.
“Adjusted” appears in the front panel display for a
few seconds, and then the clock appears.
y
You can switch between 12-hour (AM/PM) format and 24-hour
format by pressing HOUR or MIN while the clock is displayed in
the front panel display.
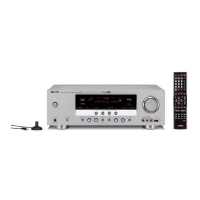
Adjusting the Clock
MIN MAX
VOLU ME
INPUT
BALANCE
LR
TREBLEBASS
PHONES
STANDBY/ON
TIMER
DISPLAY MEMORY
NATURAL SOUND STEREO RECEIVER RX-E410
PRESET/BAND
PRESET/TUNING
PURE DIRECT
HOURTIMER
TIME ADJ
MIN
AUTO/MAN'L
DISPLAY HOUR
MIN
TIME ADJ
PRESET/BAND
STANDBY/ON
Flashes
Flashes