Periodic maintenance and adjustment
7-33
7
If a fuse is blown, replace it as follows.
1. Turn the main switch off and turn
off the electrical circuit in ques-
tion.
2. Remove the blown fuse, and then
install a new fuse of the specified
amperage. WARNING! Do not
use a fuse of a higher amperage
rating than recommended to
avoid causing extensive dam-
age to the electrical system and
possibly a fire.
[EWA15132]
3. Turn the main switch on and turn
on the electrical circuit in question
to check if the device operates.
4. If the fuse immediately blows
again, have a Yamaha dealer
check the electrical system.
5. After the fuse is changed, place
the battery cover in the original
position, and then install the bolts.
6. Install the diagnostic connector by
pushing it downward.
7. Install the seat holder by installing
the bolts, and then tighten the
bolts to the specified torque.
8. Install the seat.
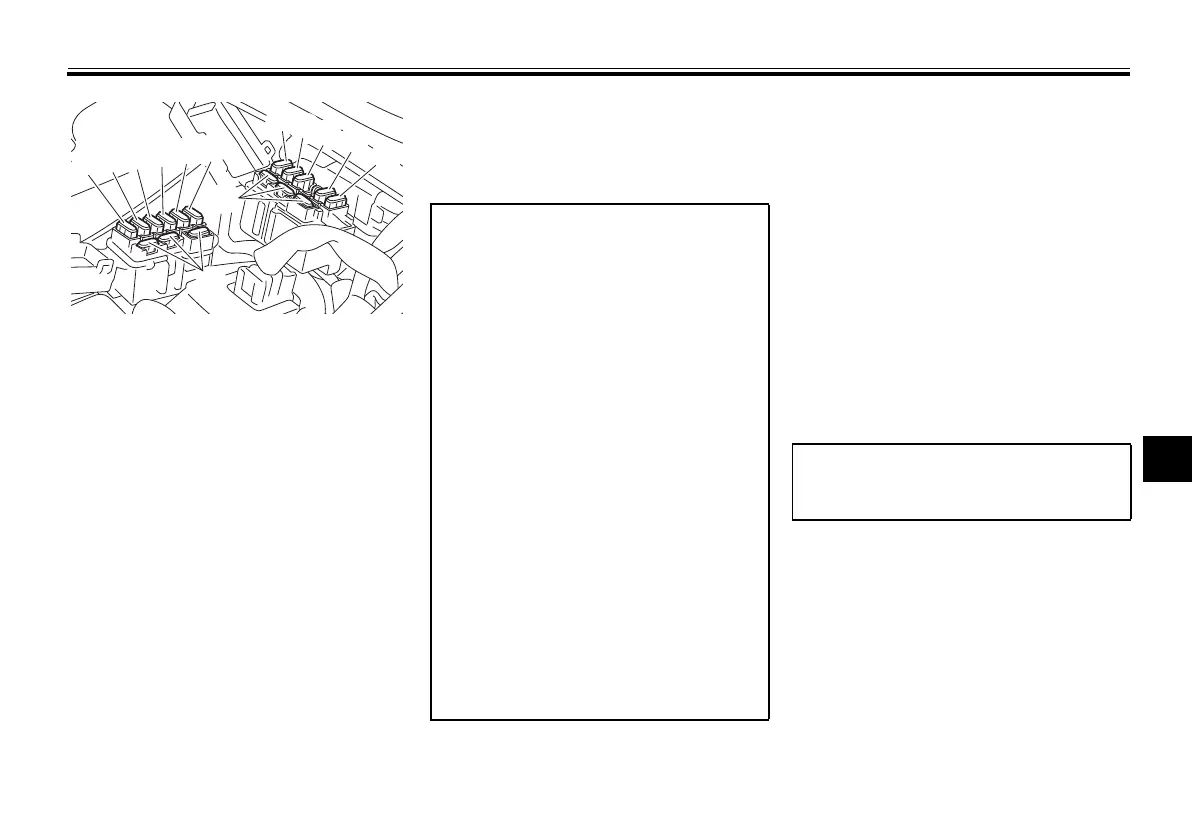
1. Ignition fuse
2. Signaling system fuse
3. Headlight fuse
4. Backup fuse 2 (for ECU)
5. Backup fuse (for clock)
6. Radiator fan motor fuse
7. ABS solenoid fuse
8. ABS motor fuse
9. Parking lighting fuse
10.Auxiliary fuse
11.ABS control unit fuse
12.Spare fuse