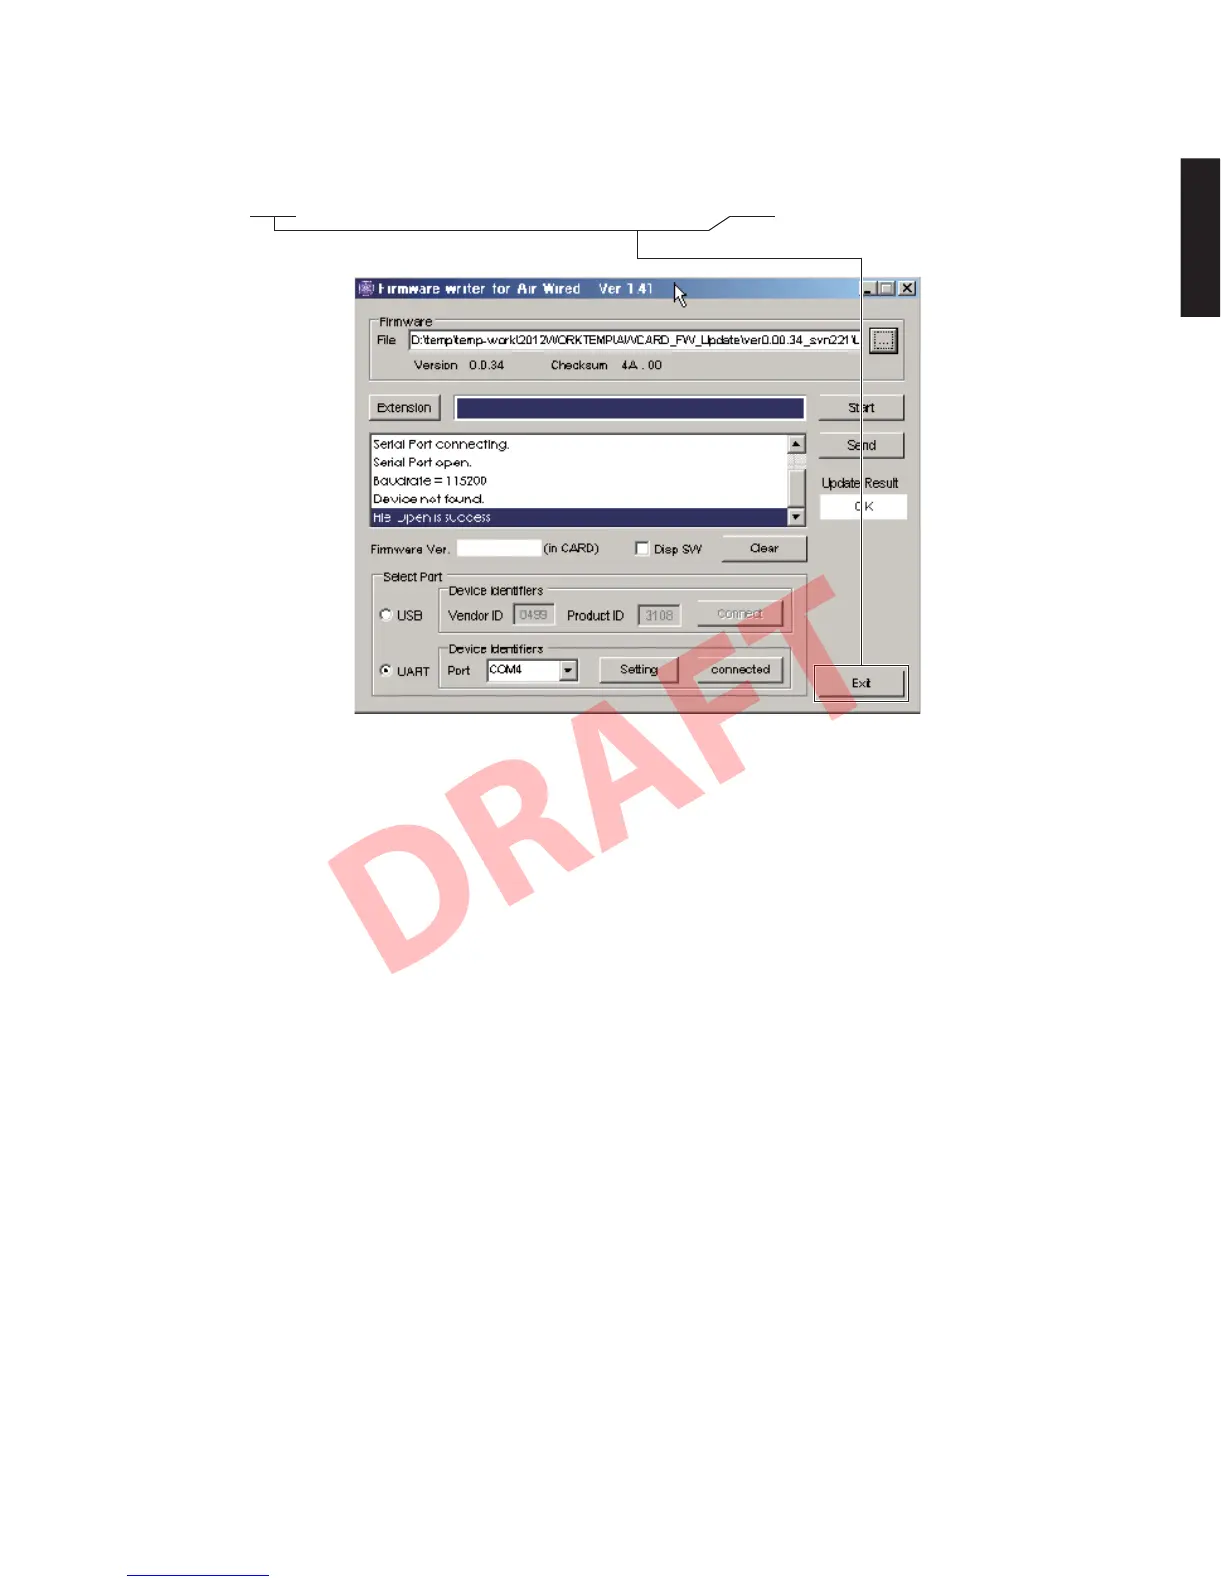
8. ファームウェアの書き込みが完了すると、Update
Result へ “OK” が表示されます。(Fig.8)
9.[Exit]をクリックして AWCARDFWUpdate
xxx.exe を終了します。(Fig.8)
8. When writing of the firmware is completed, “OK” is
displayed to Update Result. (Fig. 8)
9. Click [Exit] to end AWCARD_FW_Update_xxx.exe.
(Fig. 8)
Fig. 8
10.本機の電源コードを AC コンセントから抜きます。
11.本機の書き込み用ポート(MAIN(3)P.C.B. の
CB205)から RS-232C 変換アダプターとカード電
線を取り外します。
12.本機の電源コードを AC コンセントに接続してダ
イアグを起動し、ファームウェアバージョンと
チェックサムが書き込まれたものと同じであるこ
とをチェックします。(詳細は “ファームウェアの
バージョンとチェックサムの確認” を参照してく
ださい。)
10. Disconnect the power cable of this unit from the
AC outlet.
11. Remove the RS-232C conversion adaptor and
flexible flat cable from the writing port (CB205 on
MAIN (3) P.C.B.) of this unit.
12. Connect the power cable of this unit to the AC
outlet, start up the self-diagnostic function and
check that the firmware version and checksum
are the same as written ones. (For details, refer to
“Confirmation of firmware version and checksum”)
53
YSP-CU4300/YSP-CU3300/NS-WSW160
YSP-CU4300/YSP-CU3300/
NS-WSW160